Beginner Friendly Projects, DIY + Projects, Home, Kitchen, Projects on A Budget, View All, Weekend Projects


This bathroom project challenged me in SO many ways but I’m so proud of myself for pushing through. From the vanity not fitting and to having to redo the drywall repair 2x… it’s so much better than I could have ever dreamed!! I absolutely love how much warmth the wood ceiling and beams added to the room! Read the full project breakdown blog here.


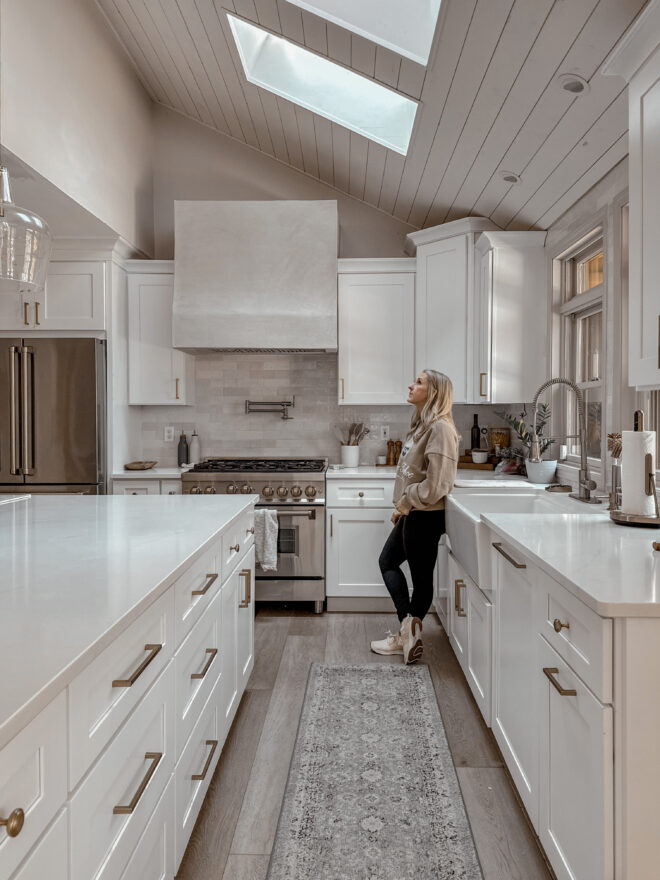
When I renovated the kitchen, I knew there was going to be a phase two eventually. I wanted to live in the house for a while and figure out my style, then when I saw this inspiration picture from @making_highview_home I knew what I was going to do first! I started by adding shiplap to the vaulted ceiling and it made such a huge impact!


I wanted to add beams to the vaulted ceiling in the kitchen, but knew that I wouldn’t be able to lift them by myself, so I started searching for lightweight options. When I found these foam beams from @architecturaldepot I knew they were perfect! I added one to the highest point of the vaulted ceiling and to the case opening between the living room and kitchen. The beams added so much warmth and character to the space, I’m obsessed! Read more about the faux beams project here.


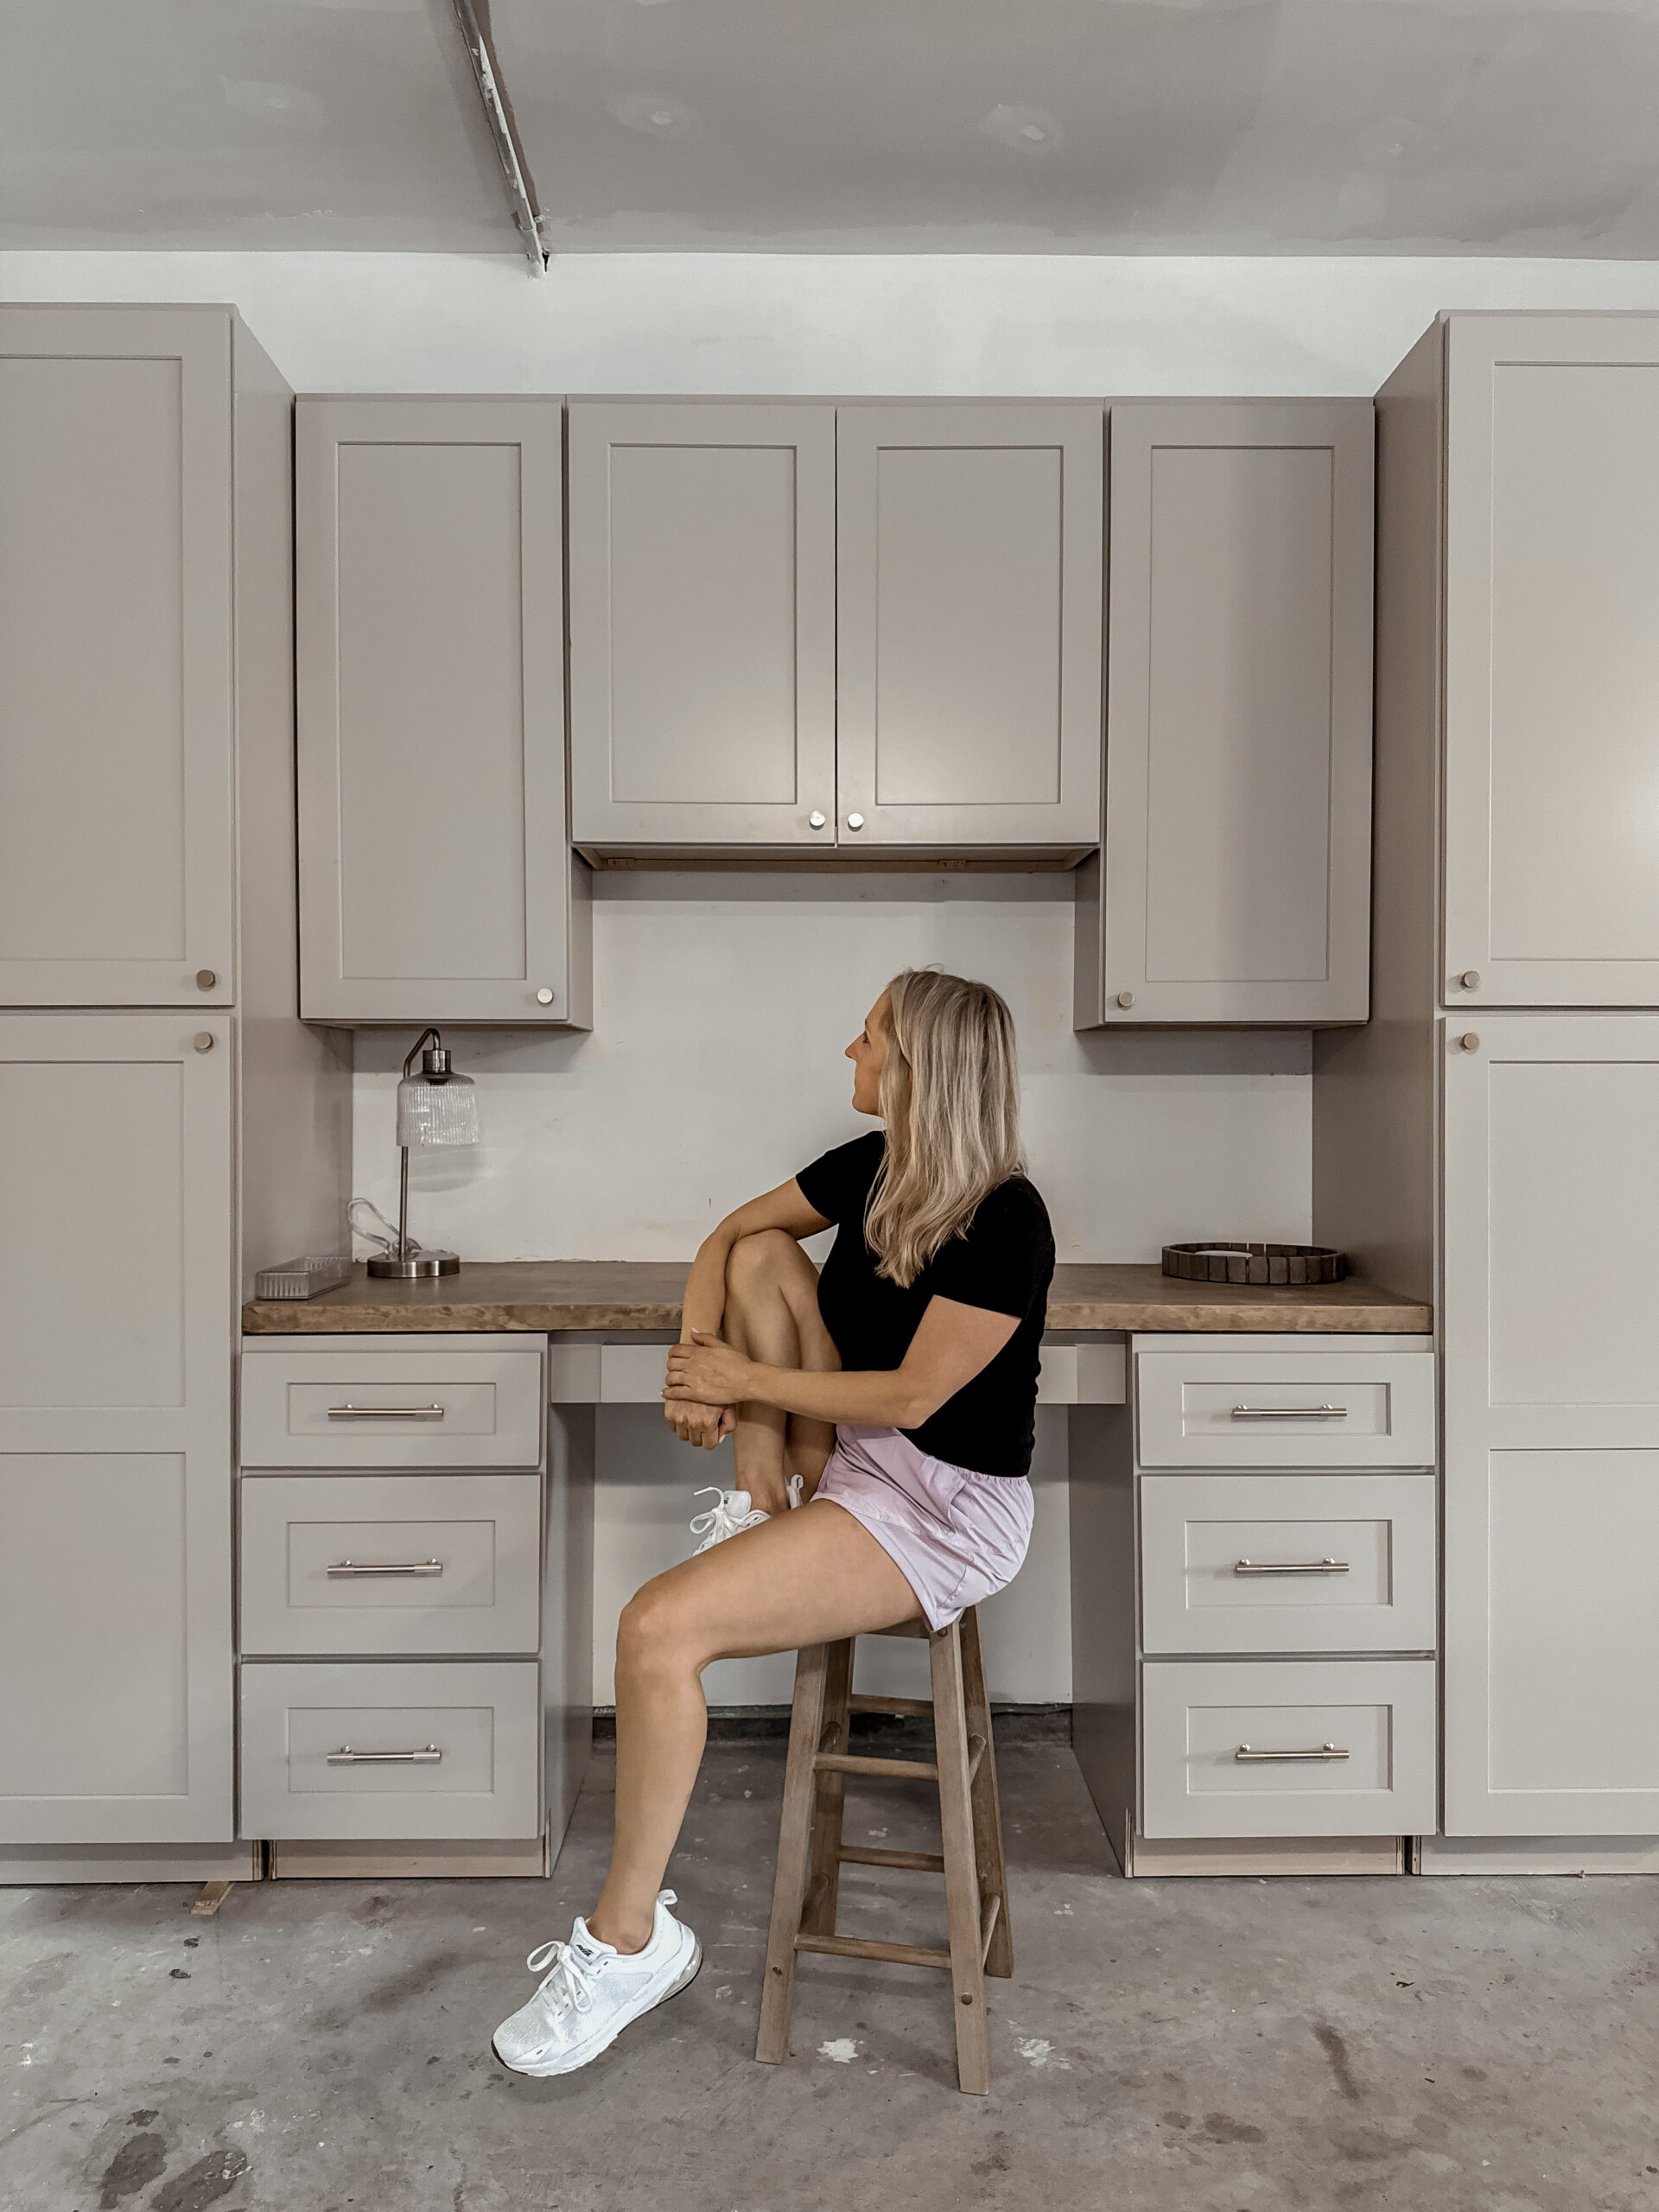
The garage workshop makeover started off with a bang… no literally 😂 I put a hole right into my new drywall. I started by installing my desk area cabinets and quickly (not quick enough) realized that I was supposed to cut down the floating desk to 30in so all of my uppers would be the right size 🫠 so I could either take everything down and move them over OR just buy a new 36” cabinet. I’ll let you guess which one I chose 😂 in my defense tho… now I’ll have more storage! WIN WIN WIN. Read my blog on how to install cabinets by yourself here.


Instead of building the mobile work benches from scratch this time, I decided to make modifications to the cabinets that I got for the garage so that everything matched and looked like one built-in space… I had to cut down some of the cabinets to account for the height of my table saw and miter saw and a few times I wasn’t sure I would be able to pull it off… but I’m so glad that I kept going because it is so good! I built custom countertops that I stained, and now I have a new set of modular workbenches that look built in with the rest of the cabinetry. Tap here to read more about how I built the mobile workbenches and read more about the countertops here.


I wanted my tools to be super organized in the new cabinets in the garage, so I built this practical (and cute!) hanging tool storage rack. It’s super easy! You can read the full tutorial and get the cut list here.


I ordered this gorgeous gold hardware, sliding drawers, and baskets from Amazon. Tap here to learn how to install cabinet hardware. To shop for my garage organization must haves + cabinet hardware, tap here.


I can’t believe that I actually was able to pull this DIY hand painted wall mural off. It definitely tested my patience, but I’m so glad that I persevered! I wanted to give up so many times… But I knew that it wasn’t going to paint itself and I had already come too far. The colors, the design, everything… IT’S PERFECT. I’m so proud to have this reminder of perseverance over my work bench! Read the project breakdown and tips & tricks here.


I was quoted almost $6000 to have these floors epoxied and I thought… hell no 😆 I can do that myself for way cheaper! My cost ended up being $1,048! Saving everything to a highlight for you so you can refer back to it later! Trust me… if you have a little patience, ready to sweat a little and know how to use a paint brush, you can totally tackle this project in your home too at a FRACTION of the price. Read the step by step tutorial here.


I poured my heart into the garage for SIX MONTHS!! I wanted to give up so many times but I’m so glad I kept pushing because this is NEXT LEVEL. I know what you’re thinking… Amanda this is a bit extra for a garage but this is Come Stay Awhile headquarters, baby!! We’ve got stuff to build!


After I finished my garage workshop makeover, I could not stop dreaming about beige cabinets in my kitchen. When I first did the kitchen renovation, I knew that I would eventually want to change the cabinet color, but I wanted to figure out my style first. I fell in love with the color of the garage cabinets, so I decided to have the kitchen cabinets painted to match! It’s crazy how much paint can update a space, it feels so much cozier now! I’m obsessed!


I’m seriously so excited about this project and how amazing it looks. I went back back-and-forth on the colors for so long and I feel like this is the first time in my life that I’ve picked a paint color and loved it the first time! There was lots of water damage and rot on the old siding, so we knew that it was going to have to be a complete overhaul, and now it looks like a completely new house! I couldn’t be more obsessed with how it turned out!


I wanted to update this room before the holidays so we could have a beautiful place to host this year! This room was a challenge and I was thrown a couple curve balls with the whole original wallpaper removal saga but I’m so glad I persevered. It’s so dang pretty!! Read the tutorials & shop the links here!


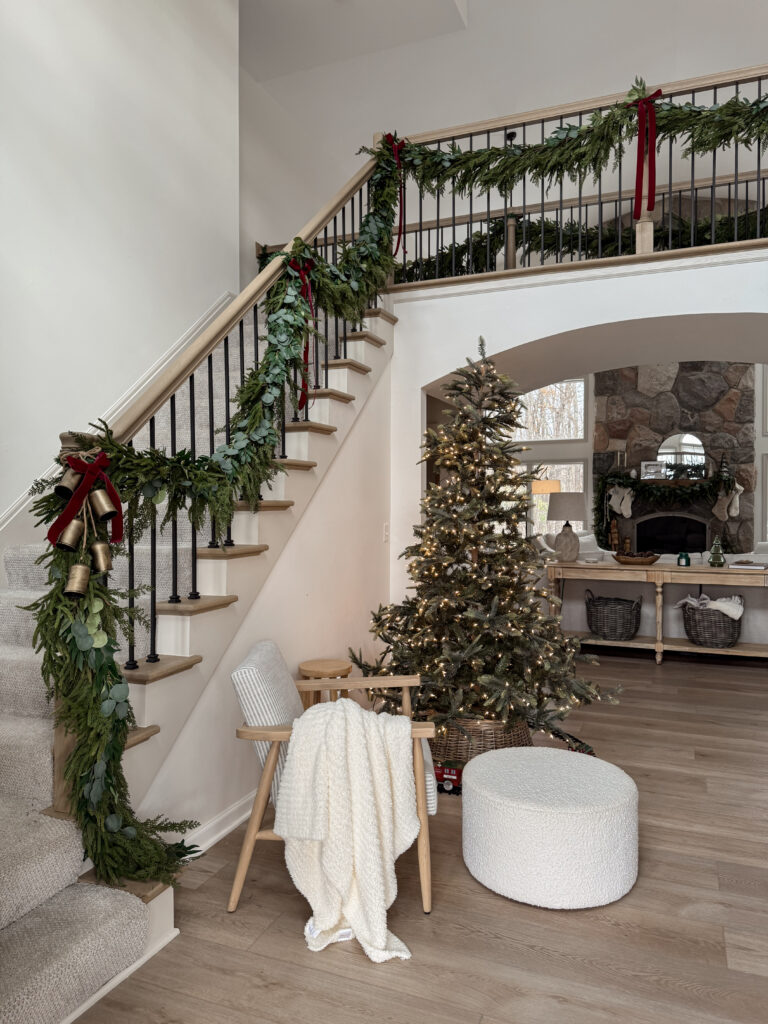
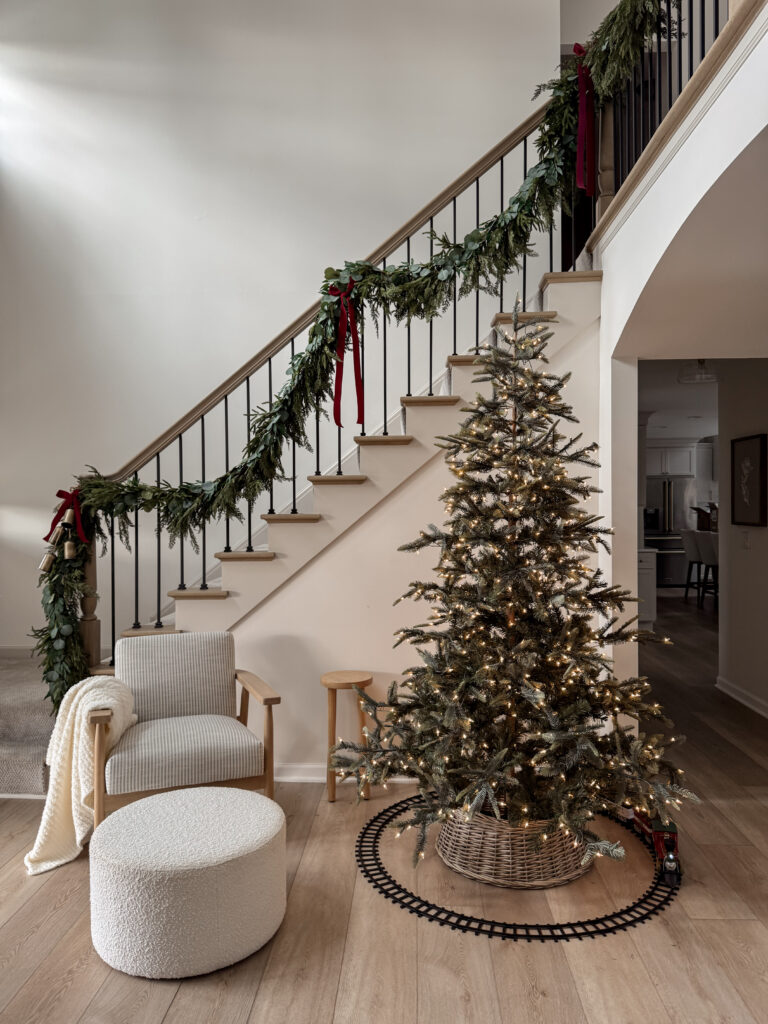
When we first walked into this house, I had so many plans for the entryway and we finally were able to have the stairs replaced and it feels like a brand new house! Could I have DIY’d this project? Absolutely, but I will warn you that I’ve heard from people who have done it that stairs are one of the most frustrating and difficult projects so I definitely wouldn’t say that it’s beginner friendly. If you have a straight railing, it can be a little bit more straightforward, but I’ve heard that the angles can be quite a challenge. I’ve been dreaming about updating this since we moved into this house and so it was worth saving for and having it done professionally. They were able to get it done in about five days total where if I tried to do it myself it probably would’ve taken me three weeks and cost me all my sanity. It was worth every penny to have the staircase of my dreams, just in time to decorate for the holidays!