Bedroom, Beginner Friendly Projects, DIY + Projects, Entryway, Home, Kitchen, Living Room, Office, View All, Weekend Projects


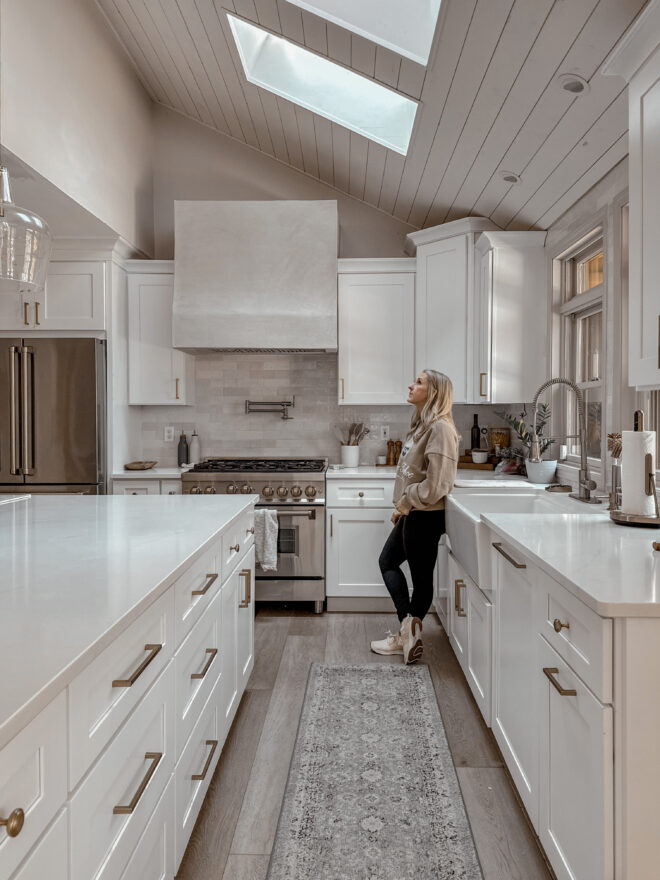
Let’s catch up, in case you missed it, a couple of months ago I had recessed lights installed to replace the ugly track lights and added gorgeous pendant lights above the island in the kitchen. As a result, there were quite a few holes left in the ceiling, so I started thinking about how I was going to fix that when I saw a picture on Pinterest that inspired me to make my vaulted ceiling the feature it deserves to be. First, I added shiplap, read this blog to get the full details on how I did that. Now, I’m adding faux beams to really pull the space together and make it the kitchen ceiling of my dreams.
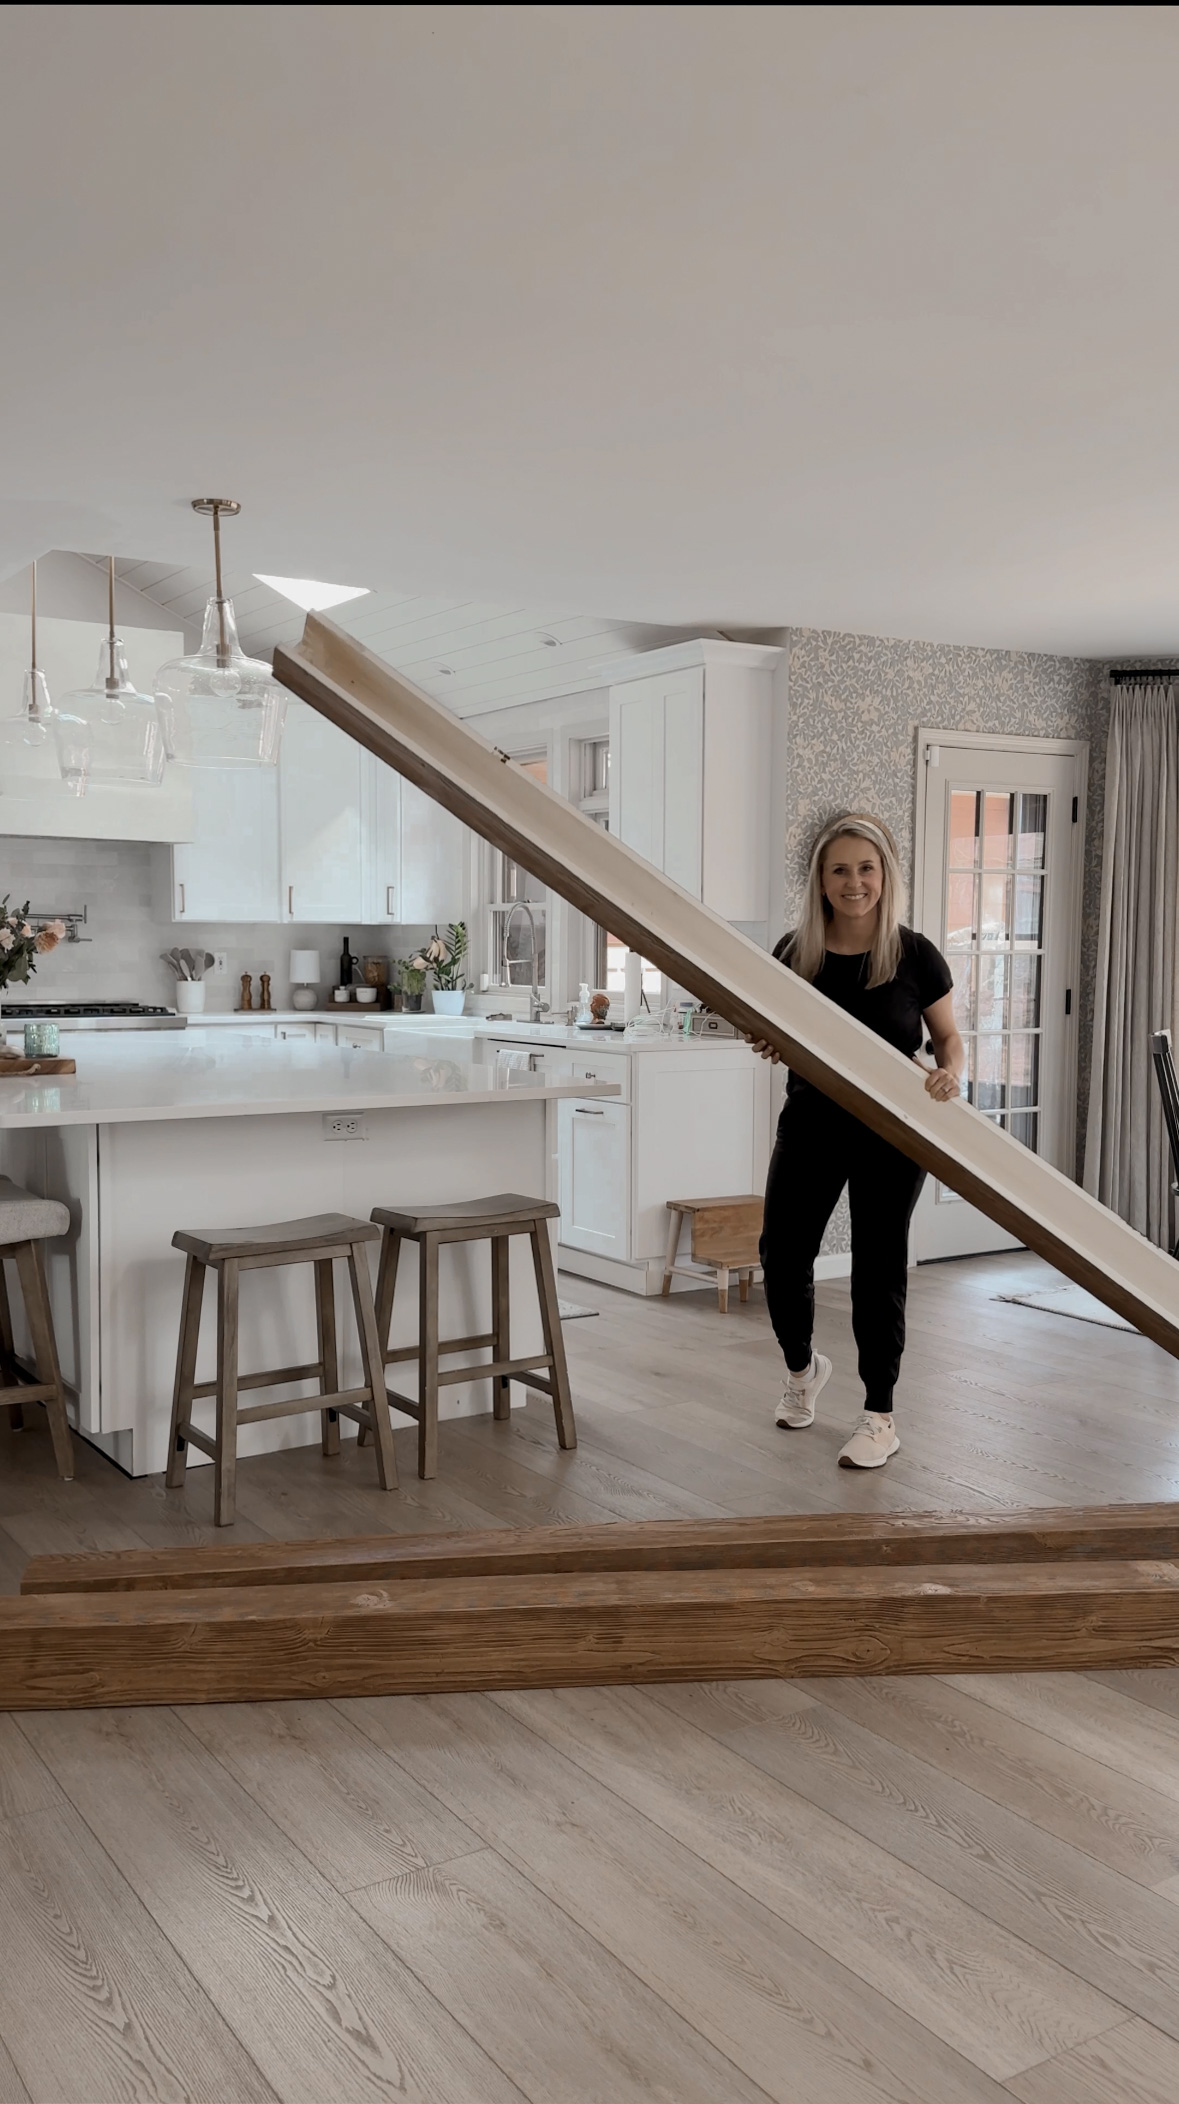
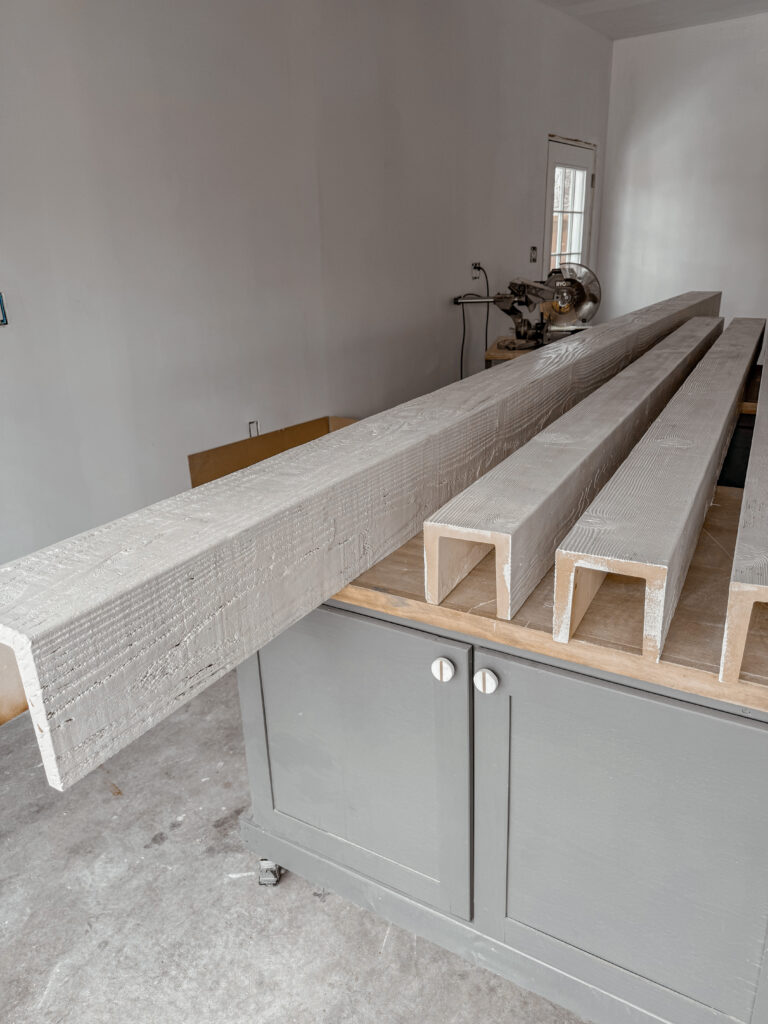
First, you’ll need to figure out how long your beams need to be to fit your space. I like to use my laser measuring tools for long measurements like this– my beams need to be 16 feet long!! With the beams being that long, I knew I needed to find a lightweight solution so I could hang them by myself. While I was researching ideas for lightweight beams, I found Architectural Depot– they make FOAM beams that literally weigh next to nothing and look SO realistic!! They’re seriously the coolest thing I’ve ever seen in my life. Architectural Depot has a ton of sizes, styles, and colors to choose from, I chose the style Mena in the color Warm Caramel for mine. I love that I was able to order the exact size I needed so there was no need to cut them! These foam beams are such a beginner friendly way to add beams to your home!


I wasn’t able to order a color sample for the beams, so when they arrived, they were slightly warmer toned than I was hoping for. To make them the exact tone I was dreaming of, I used my tried and true gel stain method! I used Sherwin William’s Accessible Beige paint as my base and Rust-oleum Decorative Glaze in the color Java Brown for the gel stain. You can use any tan/ beige/ brown paint and gel stain combo you like to create a custom color! After the paint was completely dried, I applied an even coat of the stain with a large stain brush using sweeping motions to keep the textured woodgrain look. If you’re using this method on a smooth surface, use a straw broom to gently brush the gel before it dries to replicate a wood texture. If you’ve never used gel stain before, put the rag away! It’s not like regular wood stain, you do not need to wipe it, it will dry to the touch in 6-8 hours. Once it’s dry, you may need to use mineral spirits to lightly rub some areas where you see splotchiness. Repeat these steps as needed to achieve the look you’re going for, making sure to wait until everything is dry before applying the next coat.

Next, you will need to use a stud finder to locate the studs in your ceiling and mark them. Then, use an impact driver and wood screws to attach your cleats to the studs. I used two 2 X 4 X 8 boards for my cleats, but you can use whatever size fits the width and length of your beams. If you cannot find the studs in your ceiling or they don’t align with where you want to hang your beam, don’t sweat it! You can use drywall anchors to hang the cleats instead, and since these faux styrofoam beams are so lightweight, you’ll never have to worry about them being too heavy for the anchors to hold up!

I cannot overstate how easy these faux beams are to hang up! It literally took me 5 minutes to hang the one in the case opening between my living room and kitchen since I didn’t need a cleat to hang that one! I was working alone, so to hang the beams, I started in the middle (I may have to used my head to help hold it up LOL), secured it with a few brad nails on either side, then worked my way to the ends. Easy peasy! Who would’ve guessed that I would be able to hang 16 FOOT BEAMS in my kitchen, all by myself?! Literally the epitome of DIY! I definitely could not have done it with real wood beams, and you seriously would never be able to tell that these beams are foam– they look SO realistic! It’s a win, win!


My kitchen ceiling was literally BEGGING to make a statement in my kitchen. I started by adding shiplap and trimming out the skylight. After I painted the shiplap, I fell in love with it. Originally I dreamed of adding three vertical beams to the ceiling, but ultimately decided that just doing one horizontal beam would be the perfect compliment to the shiplap without overpowering it. Then I decided to add a beam to the casing between the living room and kitchen to tie it all together and it seriously looks SO GOOD. The beams added so much warmth and texture to the space and I absolutely love how they make the rooms flow together.
Follow along @comestayawhile for more DIY and home renovation projects! Next, I’m showing you how to update your kitchen cabinets by replacing the doors and drawer fronts! You don’t want to miss the full reveal of my kitchen renovation 2.0!