


Bathroom, Beginner Friendly Projects, DIY + Projects, Home, Projects on A Budget, View All, Weekend Projects


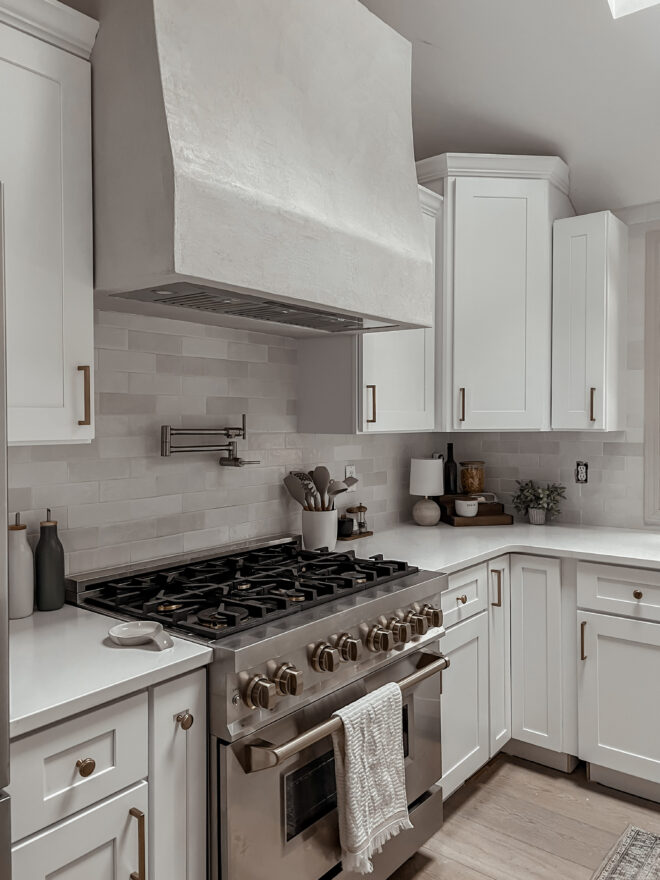
You guys! I’m super excited to share with you a project that totally transformed my kitchen! And the best part? It’s not super complicated to add to your space and adds so much character! 🎉
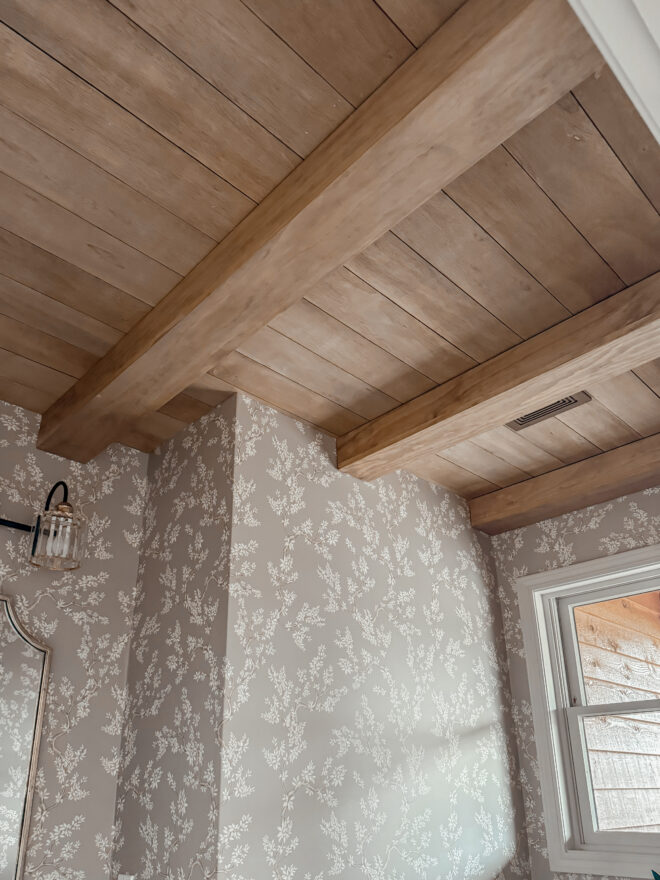
You’ve probably seen those dreamy ceilings on Pinterest (yep, that’s where my obsession started), and guess what? It’s totally achievable, and I’m here to walk you through it, step by step. So, grab your coffee (or wine, I’m not judging😜), and let’s dive into this DIY adventure together.


Picture this: A cozy, inviting kitchen with a stunning vaulted ceiling, all accented by beautiful faux beams. Sounds like a page out of a home decor magazine, right? Well, that’s the vision that kickstarted this whole project. Inspired by a Pinterest photo by @making_highview_home haunted me (in the best way possible🤩), I decided it was time to bring that vision to life in my own kitchen. I absolutely love the way the faux beams look with the crisp white shiplap!
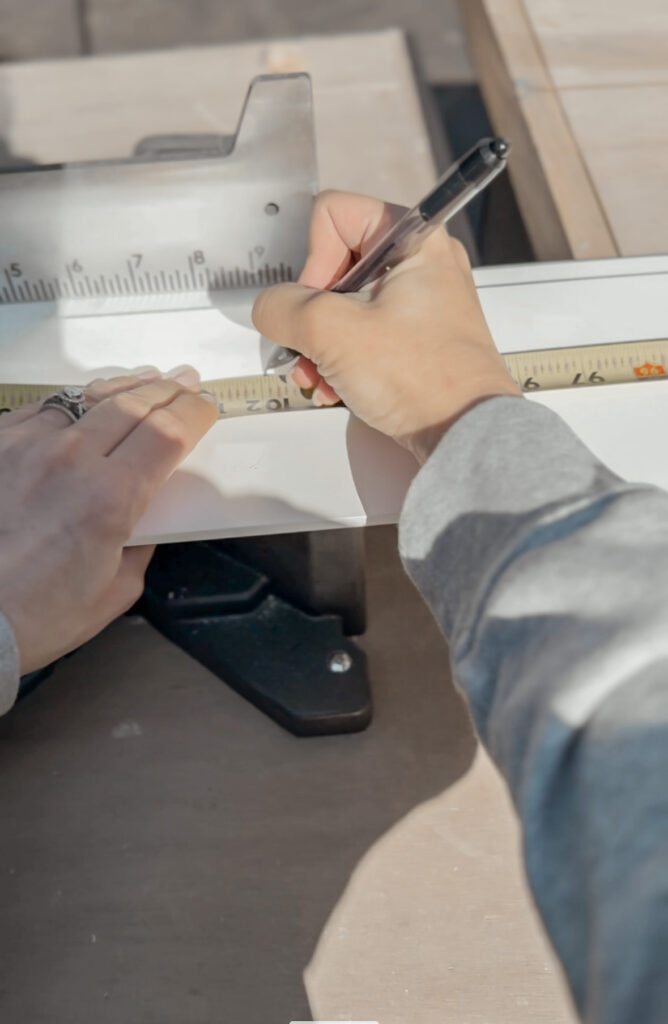
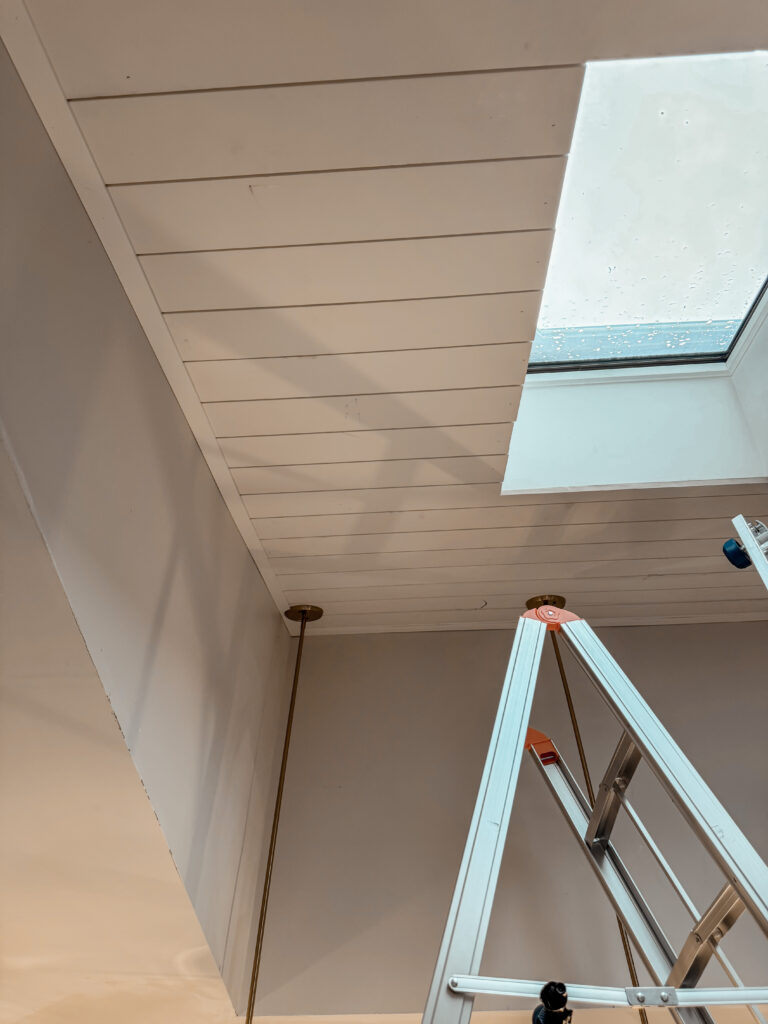
The first step in all projects is to prep. Measure everything and get your plan of attack together. I started by drawing out the ceiling on a piece of paper and writing down some rough measurements. I measured the ceiling length and width using a laser measuring tape and also the spacing/size of each skylight. Once you’ve gathered your materials, I recommend starting by cutting all of your shiplap to length. It’s important to remember that you don’t need to get this exact because you will cover the edges with lattice trim. Chances are your wall aren’t level/plumb so there is going to be some variation in your measurements as you work across the ceiling. I used my miter saw to make all of the cuts and cut all 21 boards that I needed at one time instead of going back and forth.
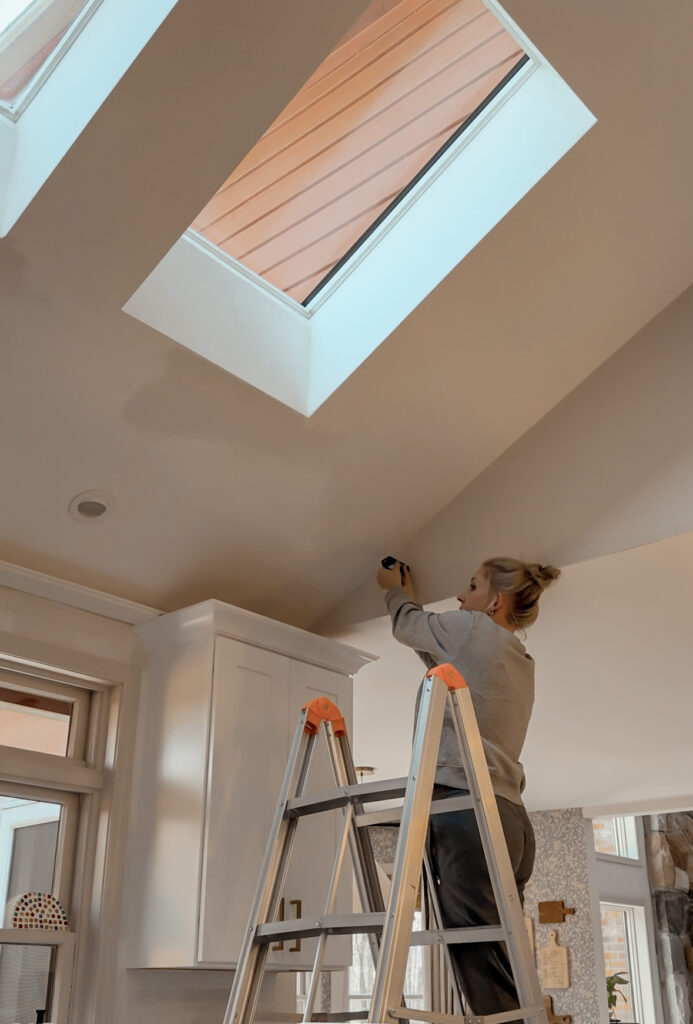

Have you ever wondered how shiplap boards are spaced so perfectly? Well… it’s because they are tongue and groove style. They fit together kind of like a puzzle giving you equal gaps between each board. To make cuts around outlets or skylights, simply measure or trace the shape onto the board and cut the hole using your jigsaw. As long as you get the rough size correct the edge of your light fixture will cover the edges of the hole. For the edges on the skylights, you will use corner molding… but we will talk about that in another step.
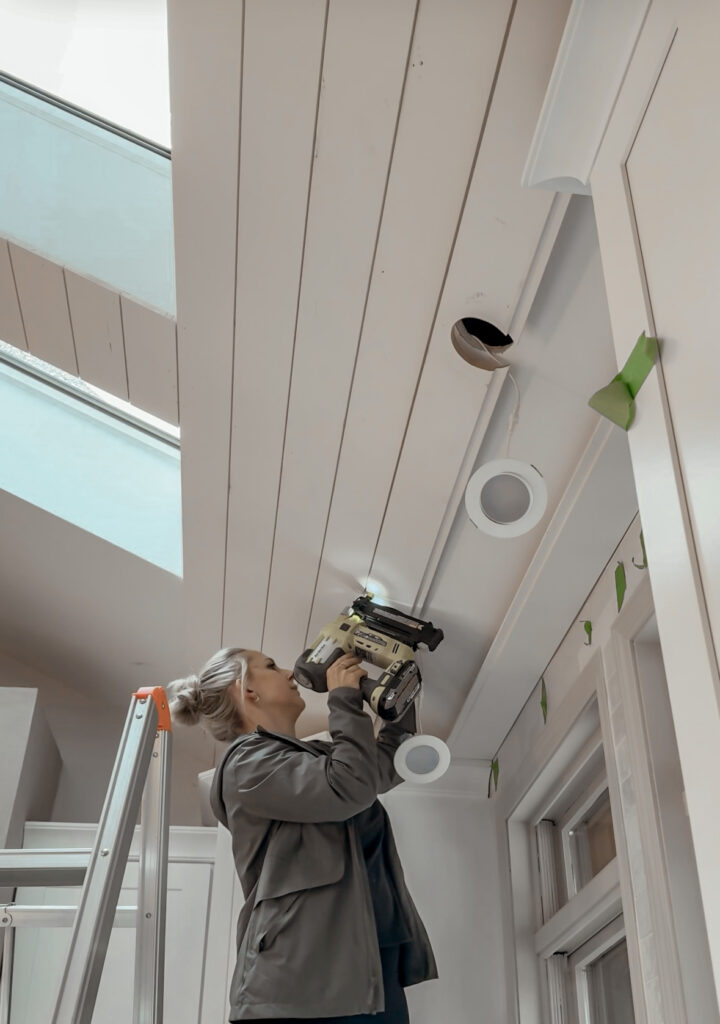
I’m using my 18g Brad nailer to attach the shiplap boards to the ceiling. Ideally we would be shooting the nails into the studs so it’s important to mark them on the wall before you start to reference back to. If you can’t shoot the nails into a stud, shoot them in at alternating angles to help them grip the drywall above. Remember they every hole you make, you’ll have to fill later… so be mindful of that. We obviously want the boards to be secure but don’t wanna go crazy and regret it later when we fill all the holes.


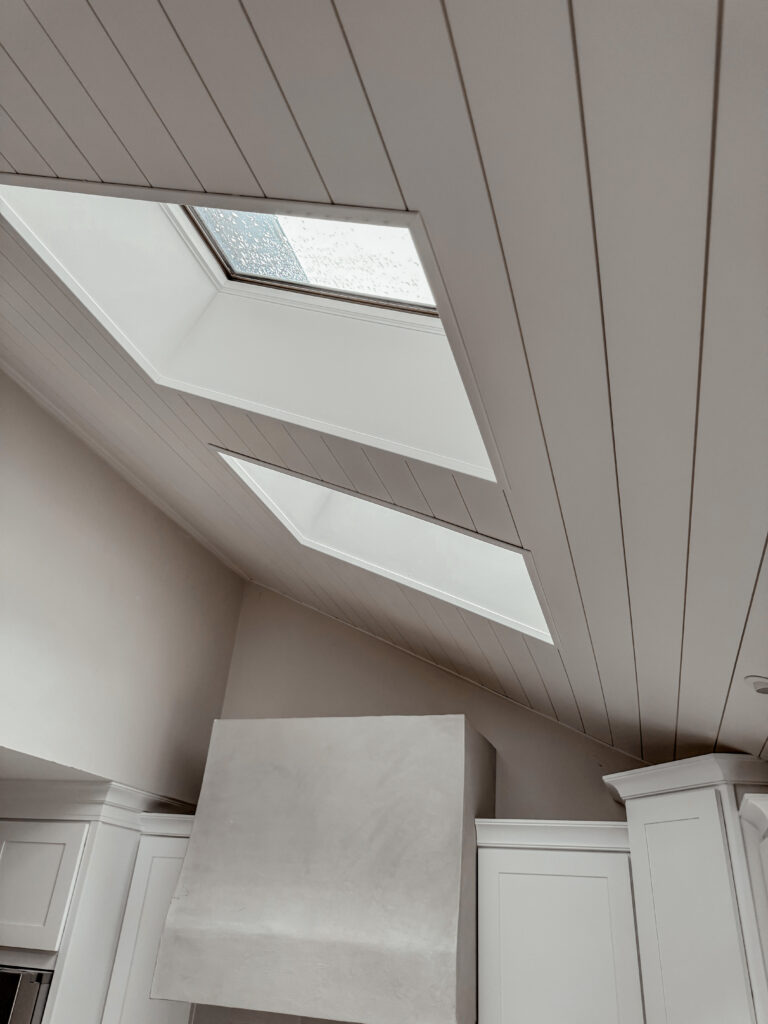
In order to give the ceiling treatment a polished and finished look, you will want to add a border trim around the perimeter. I used lattice trim. It’s the perfect size and lightweight for easy installation. I cut them to size and installed with Brad nails on top of the shiplap. This gives a polished and completed look but also covers where the boards meet the wall, remember how I said earlier it was ok if it wasn’t perfect? That’s because we cover it up here!
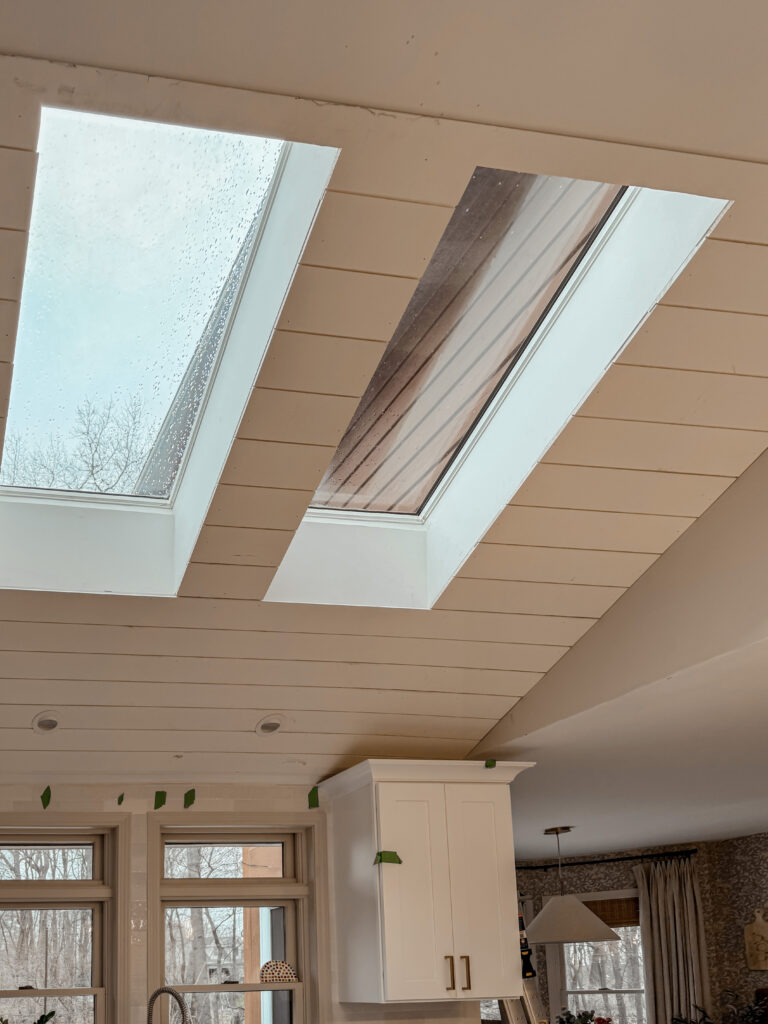
I originally was thinking I would carry the shiplap into the skylights but let me tell you there are WAY too many angles involved. When I started really thinking through it, the angle of the wall with the angle of the ceiling AND the angle of the shiplap… the math just wasn’t matching LOL. To cover the edge I used corner molding. I had to do a compound cut due to the angle of the ceiling (which definitely took years off my life) but I ended up figuring it out and it looks amazing. Despite the trim being time-consuming and requiring a lot of patience, the result was so worth it. I’m so obsessed with how it turned out! See how now the raw edges of the shiplap are covered?

By this point, you’ll start to see the ceiling take shape but I’m sure you’re noticing all those tiny nail holes staring back at you. I’ve got a little trick up my sleeve for this — wood filler! This plastic wood is my favorite to use; it goes on pink and dries to a tan, letting you know when it’s ready for sanding. Now, I could have gone the traditional route, waiting for it to dry and then sanding it down. But, who has time for that? Not me! 😂 Here’s a little secret, if you wipe it with a wet cloth before it’s completely dry, you can skip the sanding part. It dries flush with the surface; boom, no extra sanding is needed. It’s magic… saving you time and the mess!

With the nail holes filled and everything looking smooth, it was time to caulk the seams. This step makes everything look seamless and covers any gaps that there might be between the wall and the boards. It really takes the project to that next level.
We’re finally in the home stretch —painting! I used pre-primed shiplap boards so that I could skip priming. I highly recommend this. It skips an extra step and isn’t that much more expensive. If you don’t get pre-primed boards, you’ll want to prime them before you install on your ceiling. I chose a color from Sherwin Williams, called Alabaster with a satin sheen. It’s a creamy neutral white that has just enough warmth to keep the space feeling cozy and inviting. You can get this color in any paint line but I always get the Emerald Urethane paint. It’s more expensive but it is self-leveling, meaning it dries with a very even finish and doesn’t leave any brush strokes. This paint is my go-to for projects but any mid to high tier interior wall paint is fine to use! I know a lot of you were leaning towards a moody vibe, but I decided on white. I know I know… but here’s the thing: I’m planning to paint the cabinets beige and do a wood accent on island, so once that is all done, I know I’ll wish it was white. Just trust me! You’ll see!

Now that we’ve got our gorgeous shiplap ceiling, next I’m planning to add some show-stopping faux beams. Stay tuned for Part 2, I’ve got a trick up my sleeve that I don’t think you’ve ever seen before! OMG, are you as excited as I am?!
Feeling inspired? I promise you can do this. Whether you’re a seasoned DIYer or a newbie looking for a fun project, adding shiplap to your ceiling is a game-changer. And remember, it’s not just about the end result; it’s about having fun and making your space truly your own.😍
So, what do you think? Ready to tackle your own ceiling transformation? I’d love to hear your thoughts, see your progress shots, and celebrate your successes. Drop a comment, share your story, and let’s keep making our homes beautiful, one project at a time!