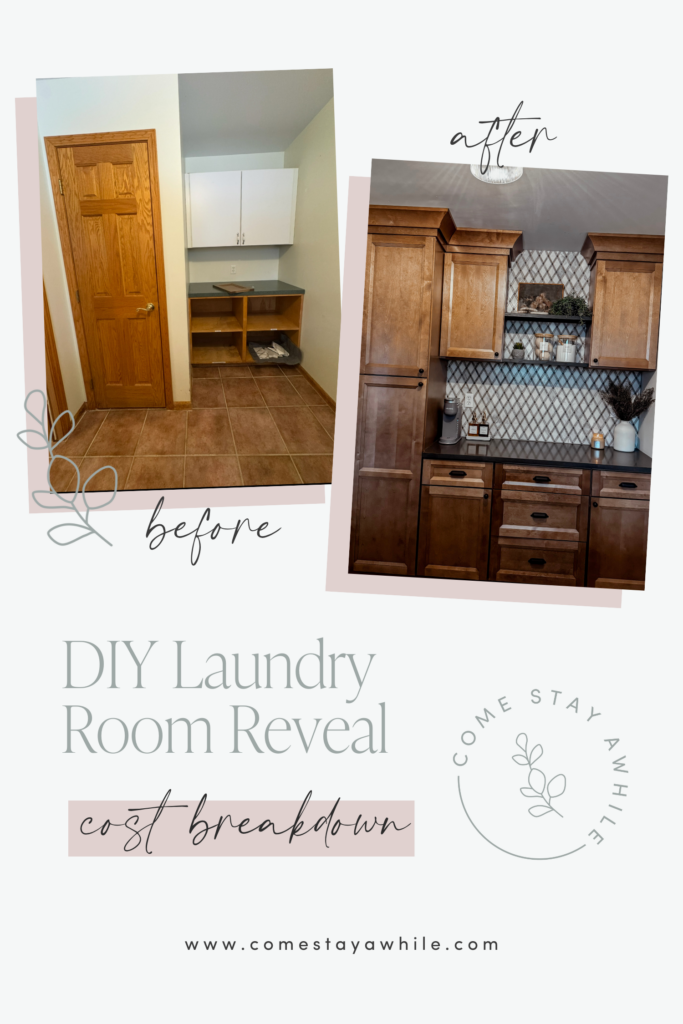


I am obsessed with how this turned out and I cannot even believe it’s the same room!! I’m soo glad I decided to take out the closet. We gained square footage and the room feels so much bigger now without sacrificing any storage.

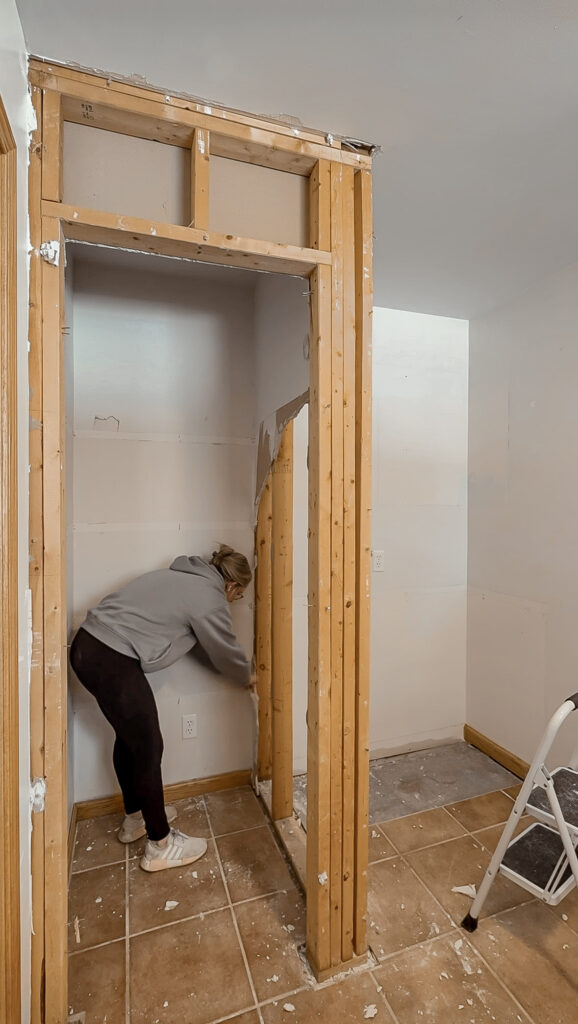
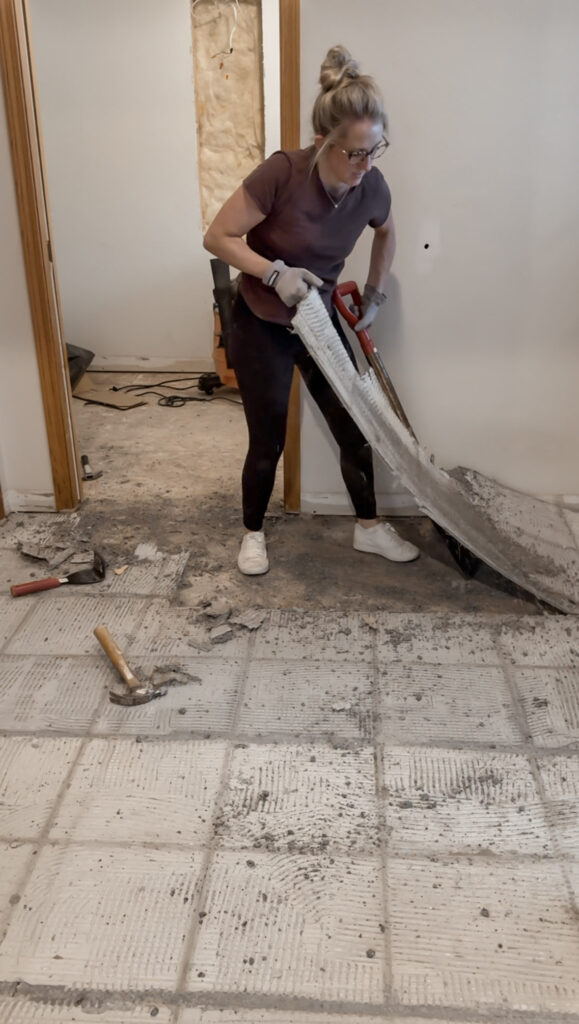
I wanted to start with a completely blank slate so I ripped out EVERYTHING!! The tile flooring, outdated cabinets, green countertops, and bulky closet had to GO! When I was demo-ing the closet, I found a pipe that made me stop in my tracks and panic, but thankfully it was just a vent for our central vacuum system that we no longer use so I was able to just remove it. I removed the closet to replace it with more cabinets and counter space! It was definitely a trust the process moment, but you know your girl always has a plan!
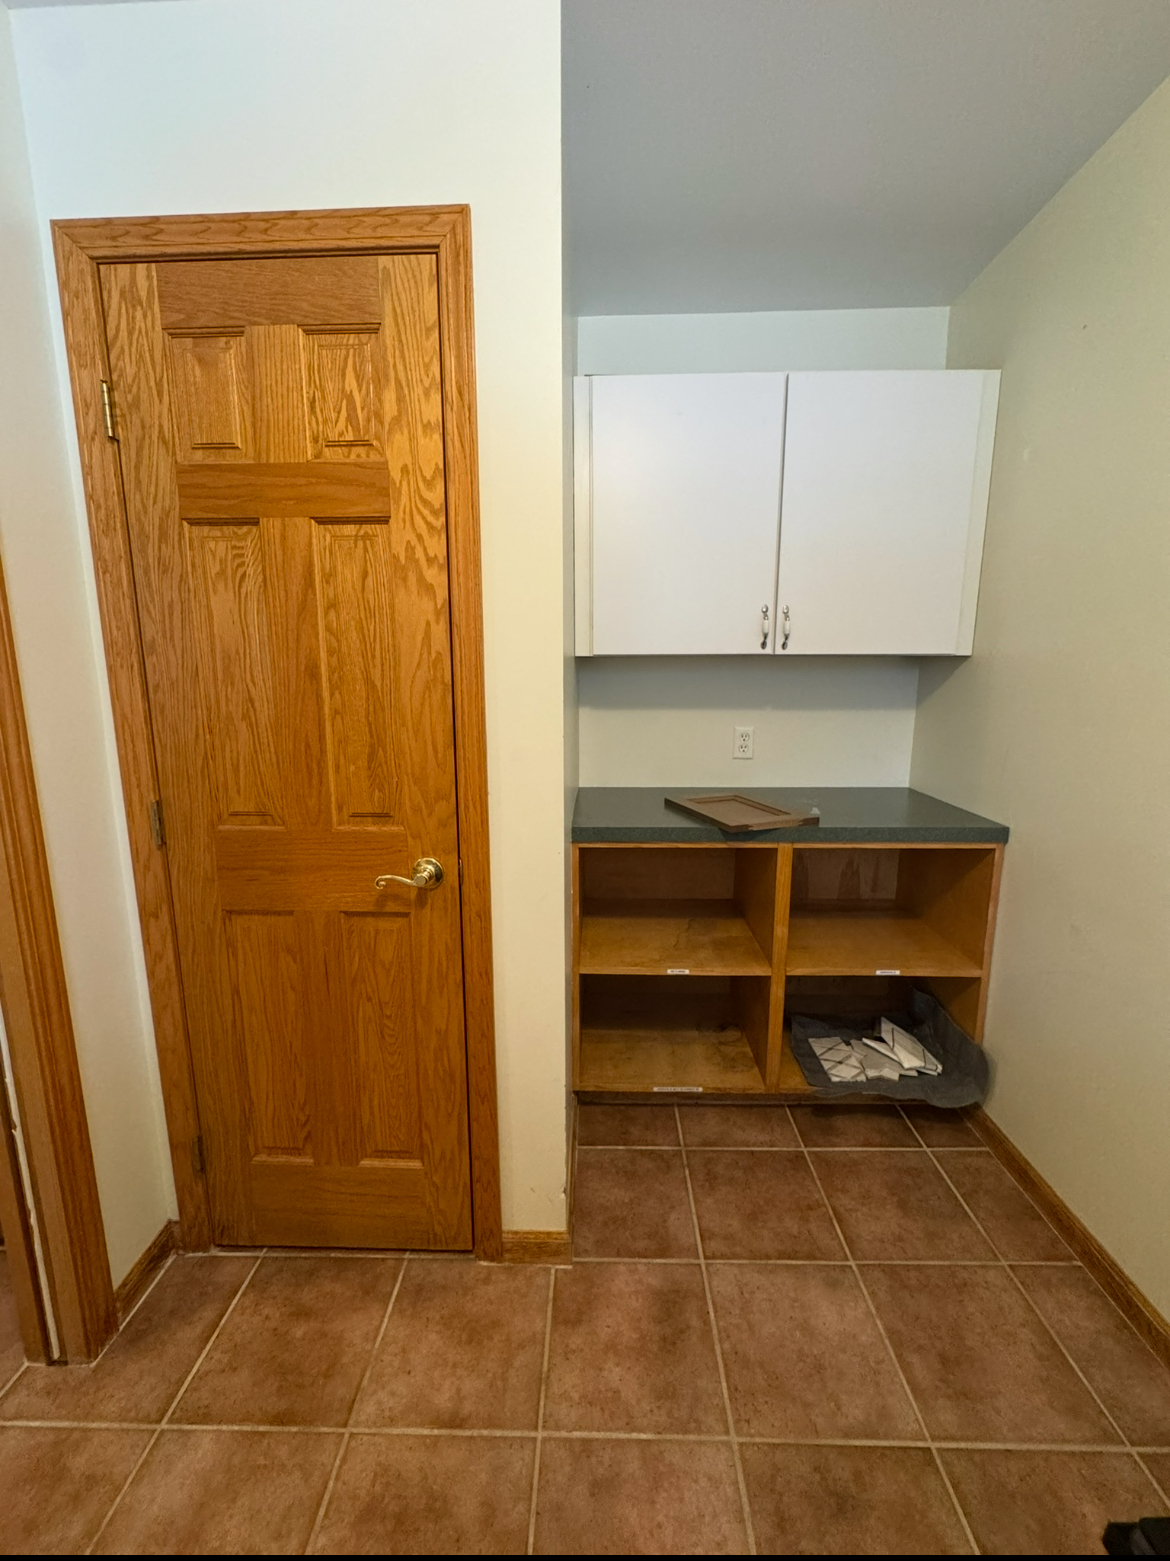
There was really ugly tile in the laundry room and mudroom that I knew I needed to remove, but I went back and forth on whether I wanted to replace it with tile or just continue the same LVP flooring that I have in the rest of the house. I ultimately decided that I liked the look of continuous flooring better, so I ripped out the cement board and added another layer of subfloor to make it flush with the flooring in the kitchen, then I laid the flooring! I used Hewn Floor in the color Weathered from the Becki Owens collection. It’s super easy to DIY, tap here for my step by step tutorial.

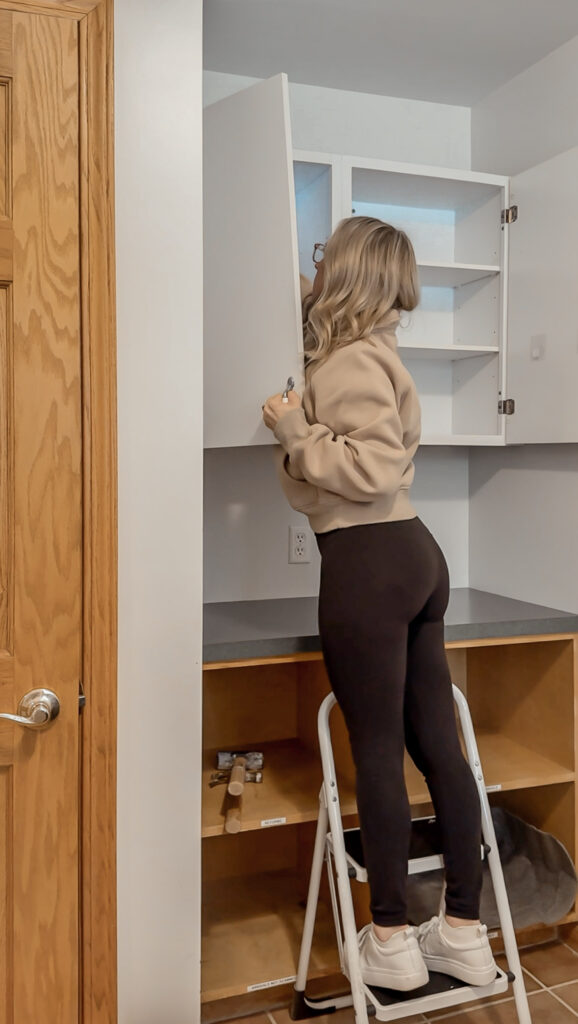
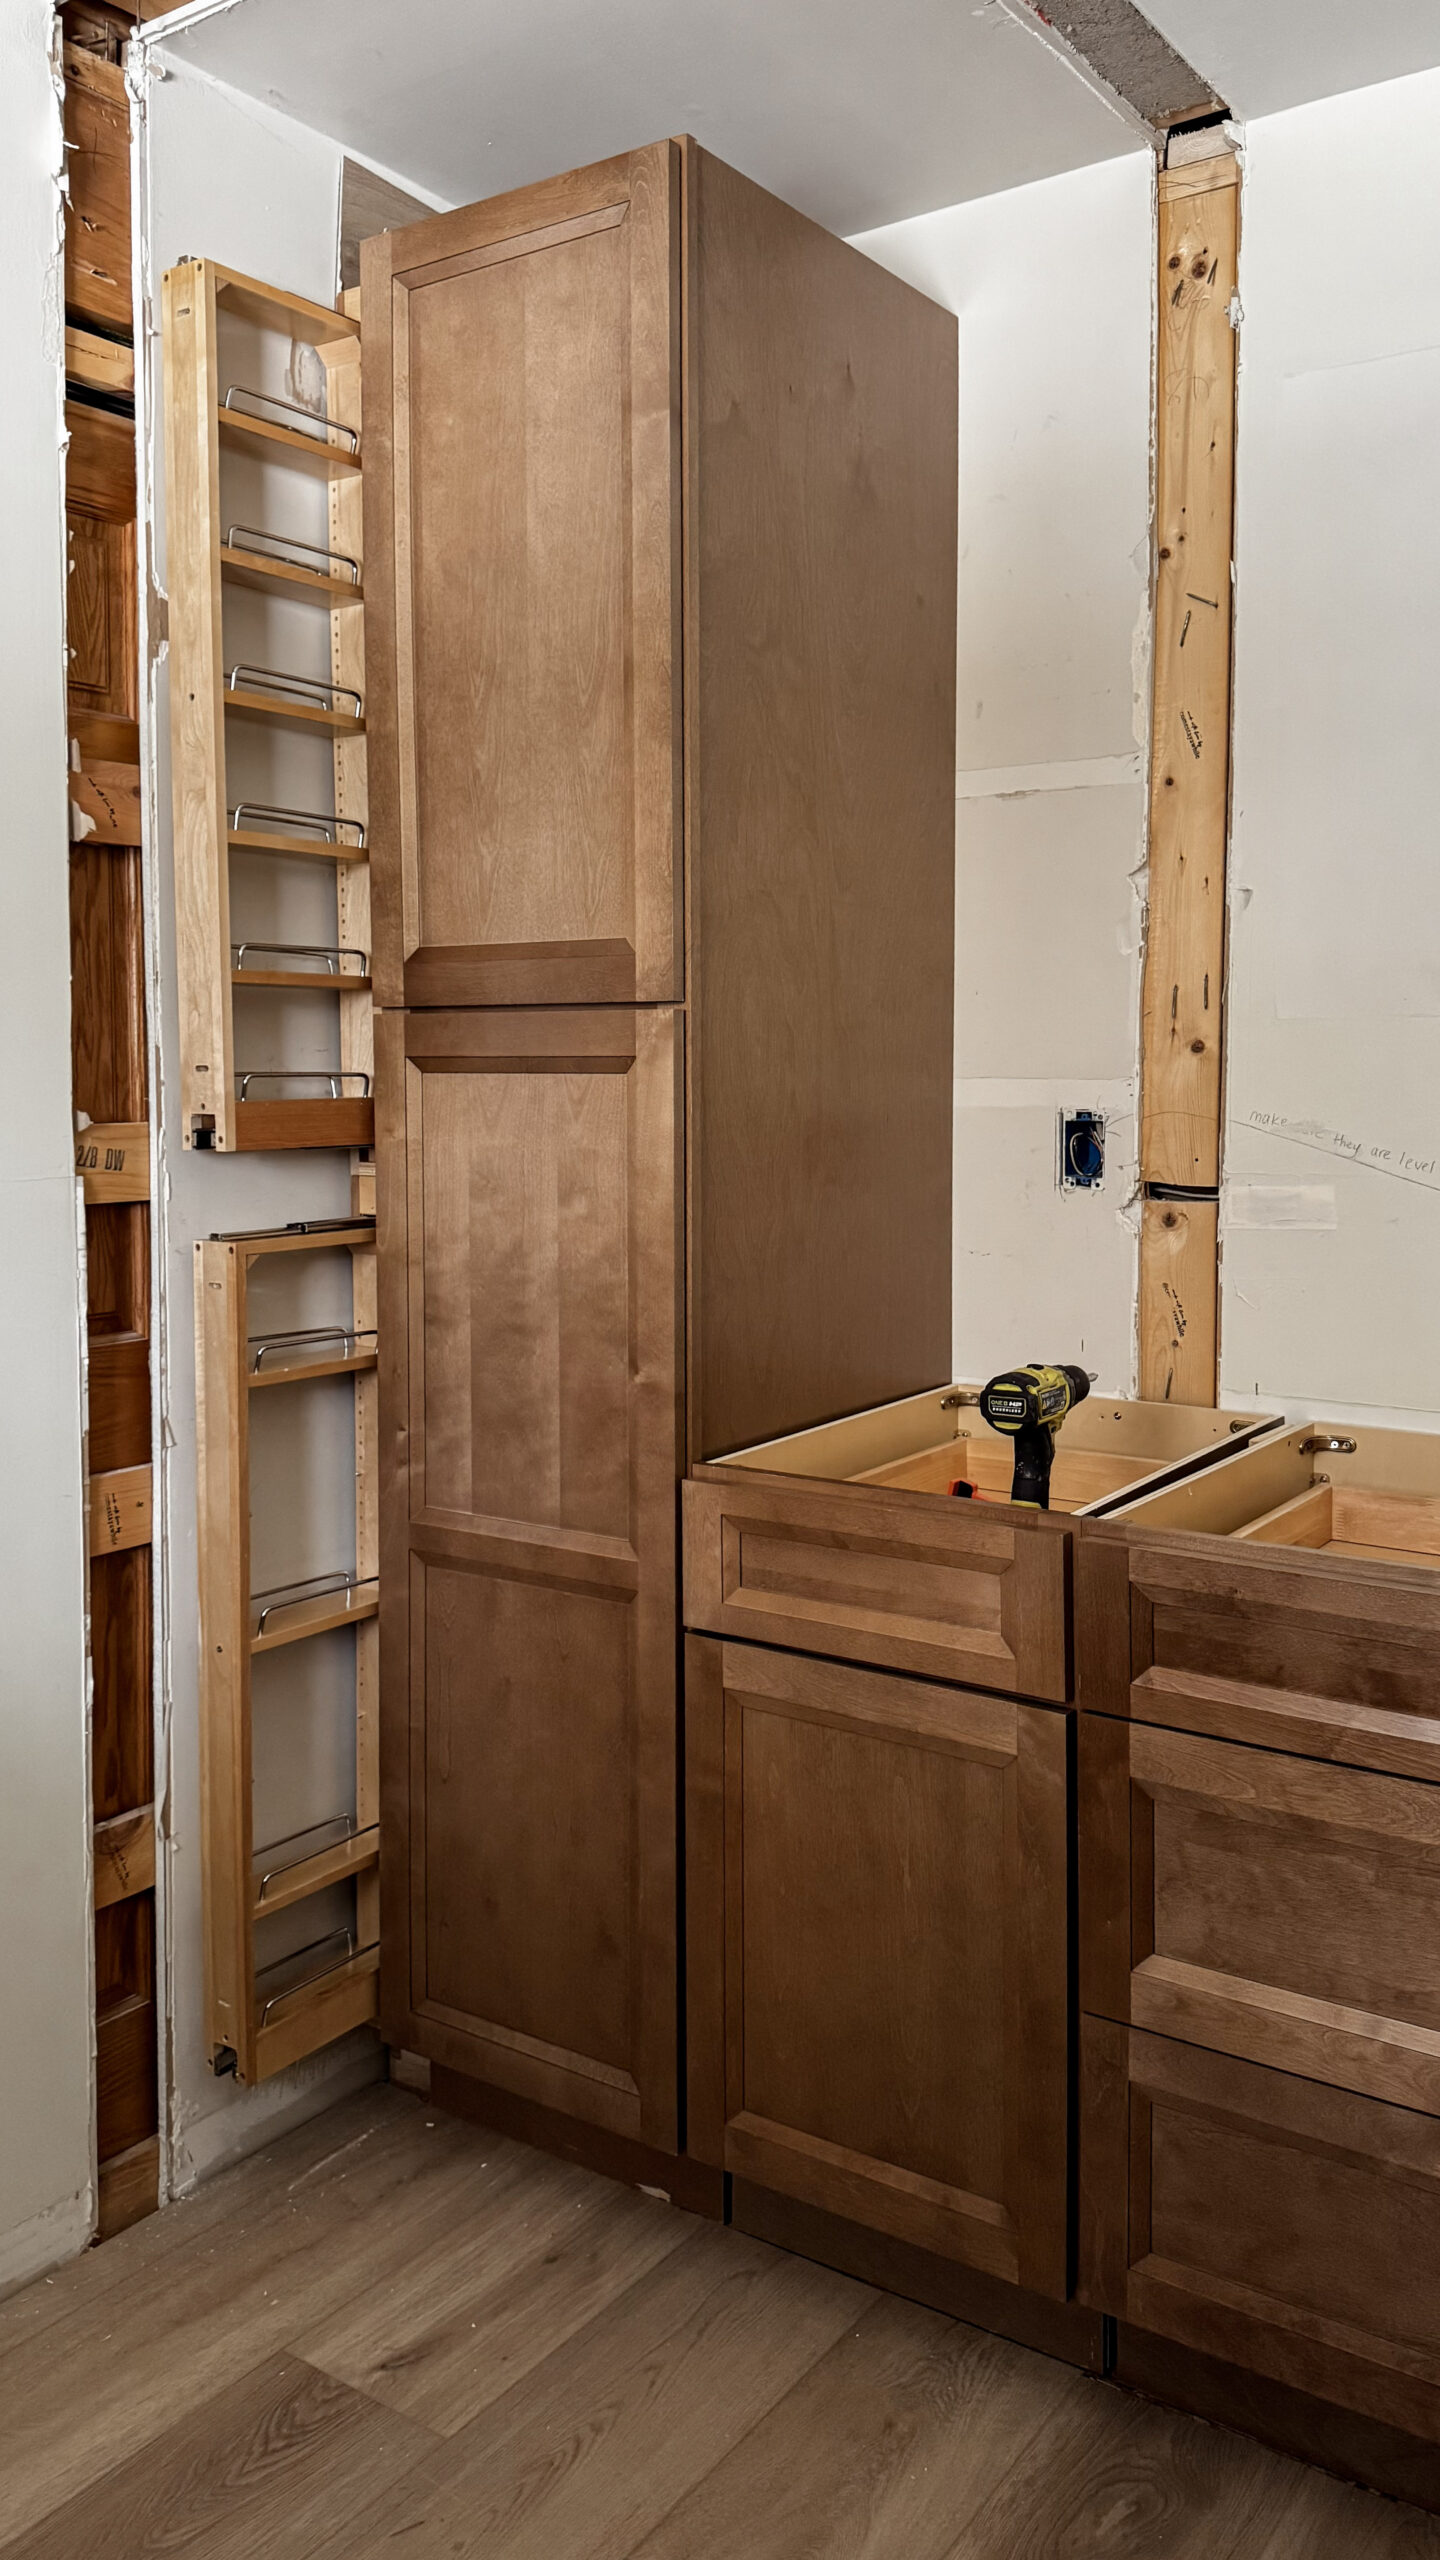
I ordered the new cabinets from @rtacabinetstore in the color Timber Toffee Shaker 😍 Aren’t they STUNNING?! I stepped outside my design comfort zone with this room and I LOVE it! I usually would pick bright and airy everything but I felt like the laundry room was a great place to take a risk! If you’ve never heard of RTA cabinets, it stands for “ready to assemble” and it’s a great way to save some money on new cabinets! They come with everything you need and then you assemble and install them yourself. I’ve used them on almost all of my projects! If you want to read more on how to install cabinets by yourself, tap here!
Once the cabinets were installed I had a crazy idea to stack two spice cabinets on top of each other to fill the gap between the tall cabinet and the wall. Even tho the shelves are small, extra storage is extra storage… right?!
There was a lot of drywall damage from tearing out the closet, but it’s important to repair it before tiling so that you have a smooth, even surface to do your tile and obviously you’re not going to paint over busted up drywall LOL! Tap here for my tutorial on how to easily repair your drywall.
Once the drywall was repaired, I sanded everything smooth and placed my Musselbound adhesive mat where the tile was going, and then it was time to paint! I thought about doing a moody sage green color, but ultimately decided I had to go with white because everything else in the room is going to be so rich. It needed something to pop off of instead of competing with… ya feel me? I used Behr’s Blank Canvas, I’ve used this color on all the walls in my house and it’s my absolute fav, the perfect warm, creamy white!


I found the most gorgeous diamond pattern tile at Home Depot! It’s the perfect statement piece for a moody laundry room and I couldn’t love it more. Before I could start installing the tile I had to pick the countertops, I went with Caesarstone raven quartz countertops and they are GORGEOUS!! A lot of you voted for white countertops, but now that you see the dark ones, did I change your mind?
Once the countertops were in, it was time for tile baby! I broke down the whole tiling process and linked all the tools you’ll need here. I promise installing backsplash is so much easier than you think, don’t be intimidated! I used pre-mixed grout in the color silver and I think it pulled everything together perfectly, I’m so glad I changed my mind last minute on the grout color!


I swear it takes years off of my life every time I do crown moulding, IYKYK. If you’ve never done it before but you want to learn, read my step by step tutorial here. Be prepared to make a bunch of wrong cuts at first– Take your time, give yourself grace, and don’t be afraid to make mistakes!
I was going to build floating shelves, but then I had a genius idea to use stair treads instead!! I found these stair treads at Home Depot that have a lip on them so they look like regular floating shelves, all I had to do was cut them down to size and paint them! At first I used a gel stain in the color black, but felt like it was a little too dark so then I painted with Sherwin Williams Iron Ore and now they’re perfect! To secure them, I screwed them in from the sides of the cabinets. Such an easy and budget friendly way to do floating shelves!


This is my favorite part of every project! I get to reflect on all of my hard work as I add the finishing touches like cabinet hardware and decor. I accidentally mis-marked one of my holes for the drawer hardware and really didn’t want to have to buy a whole new drawer front to fix it, so I found these stickers that worked perfectly! Nobody will ever know.. except all of you I guess. To avoid making the same mistake, follow this tutorial on how to install cabinet hardware! Since the cabinets, counters, and tile make a bold statement, I wanted to add really soft floral decor throughout the room. To keep things really budget friendly, I ordered most of my decor from Amazon! For my wall art, I found stock photos and had them printed at CVS and put them in frames that I already had. I’ll link all of my decor, tools, and anything else I used in this room below for you to shop!


I was quoted $21,000 to hire contractors for this renovation, and I thought, “mmm no I could probably do it myself for half the cost”….
What do you think?! Was this more or less expensive than you were thinking?