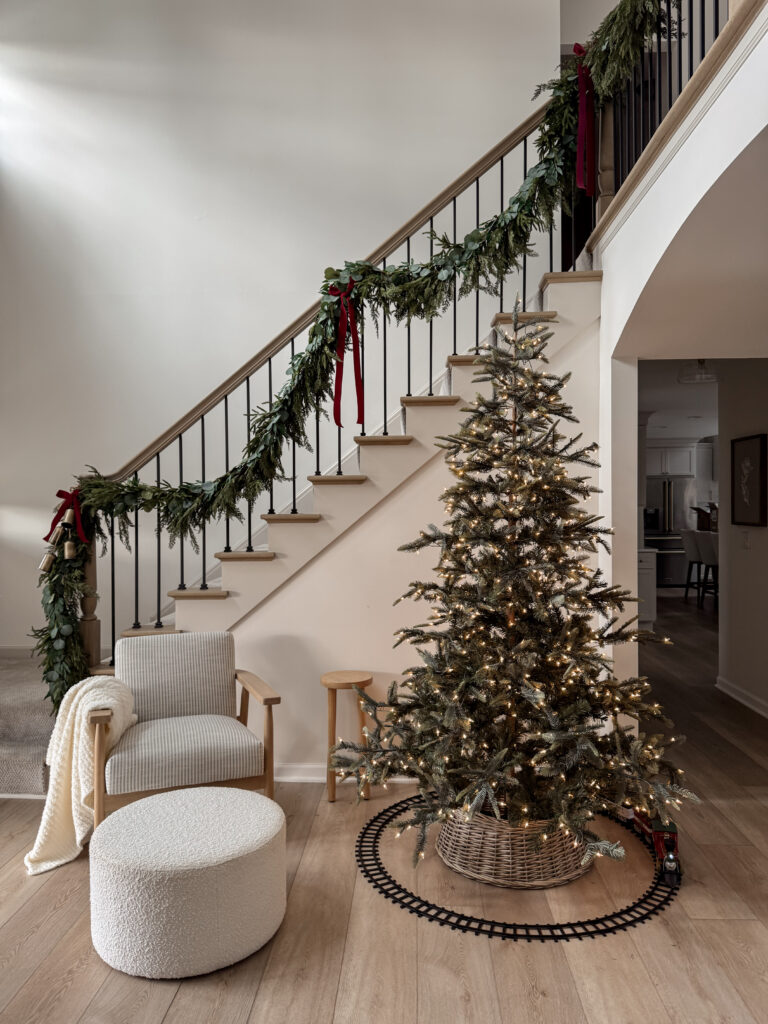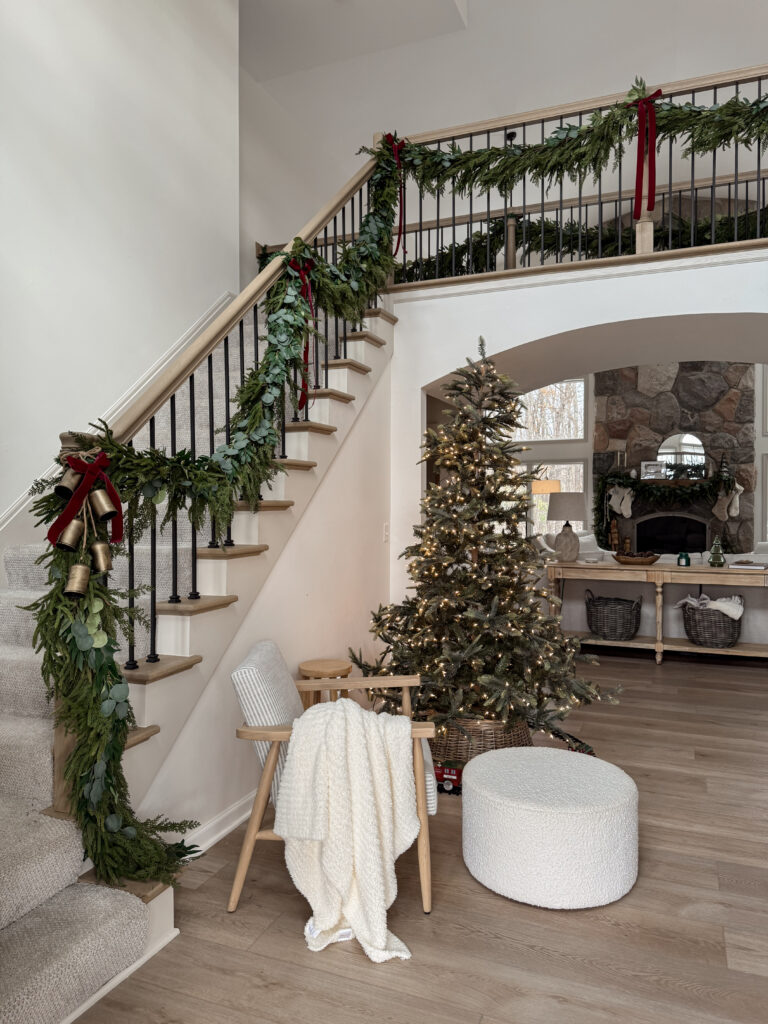


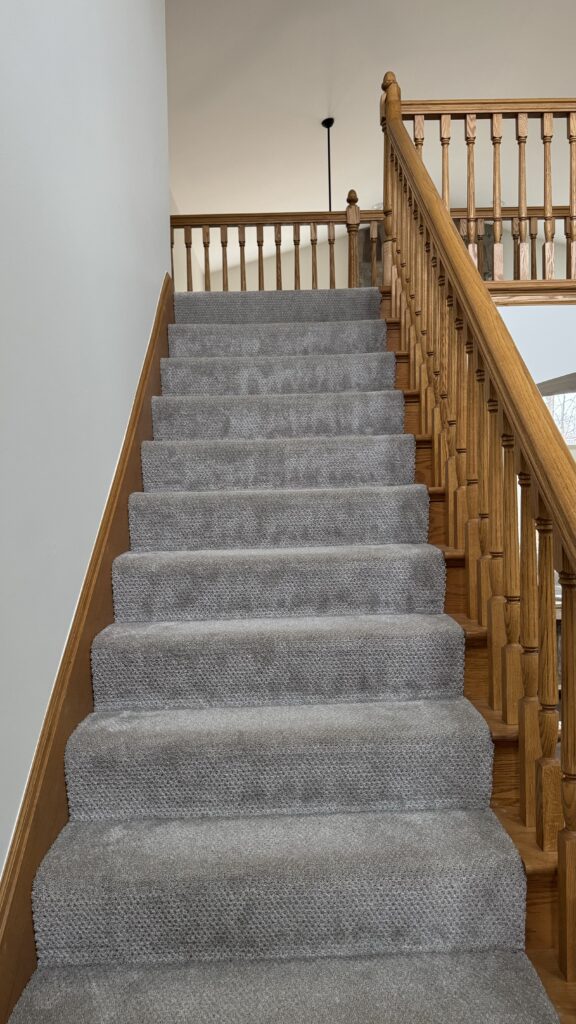
The new staircase is so beautiful I could cry!!! When we first walked into this house, I had so many plans for this entryway and now that it’s finally done, it feels like a brand new house! I’m so in love!
Tearing down the ugly orange oak banister was the highlight of my month! I’ve envisioned what the staircase would look like since we bought this house, and it felt so good to finally see that vision come to life! We hired SCT Carpentry to do the demolition and install and they were absolutely amazing!! 10/10 recommend hiring them if you’re in the Clarkston, MI area.

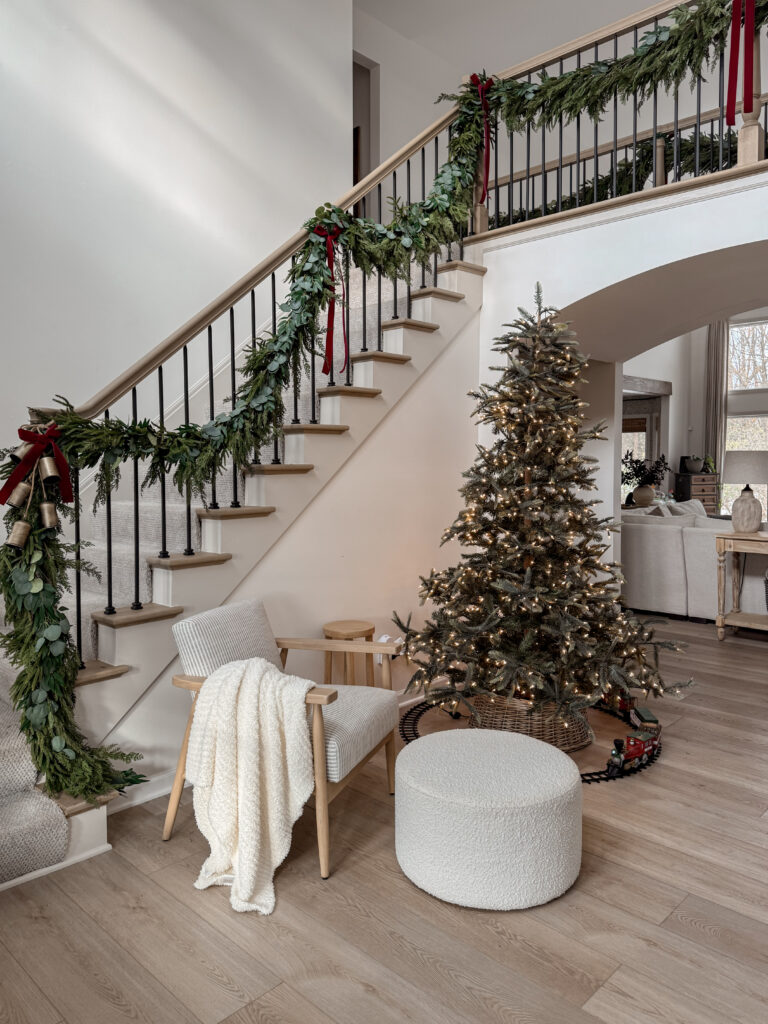
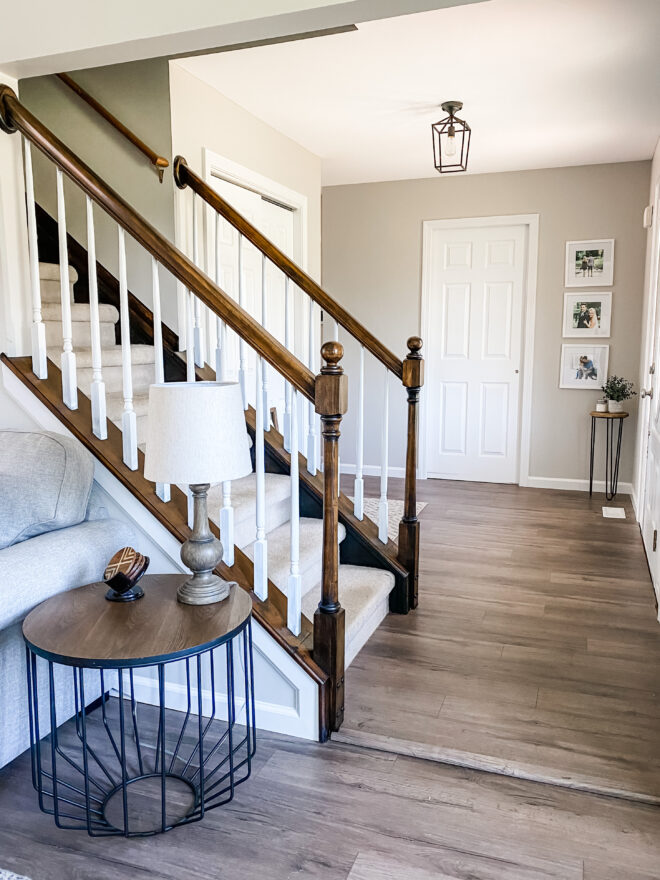
We decided to leave the carpet for now, since the boys are still young and the carpet is only a couple years old. Because we kept the carpet, I opted to just replace the end caps of the stairs with white oak and have them stained to match the floor. I decided to splurge on white oak since we weren’t doing the whole stair, but had I chosen a different material it would’ve saved about $3,000. I went back and forth for a long time deciding whether to do a modern style hand rail or not, and ultimately decided to do a curvy, classic style one to compliment the existing trim throughout the rest of the house. I think the combination of the traditional style handrail with the modern black railing is perfect to match my style while still feeling true to the home.
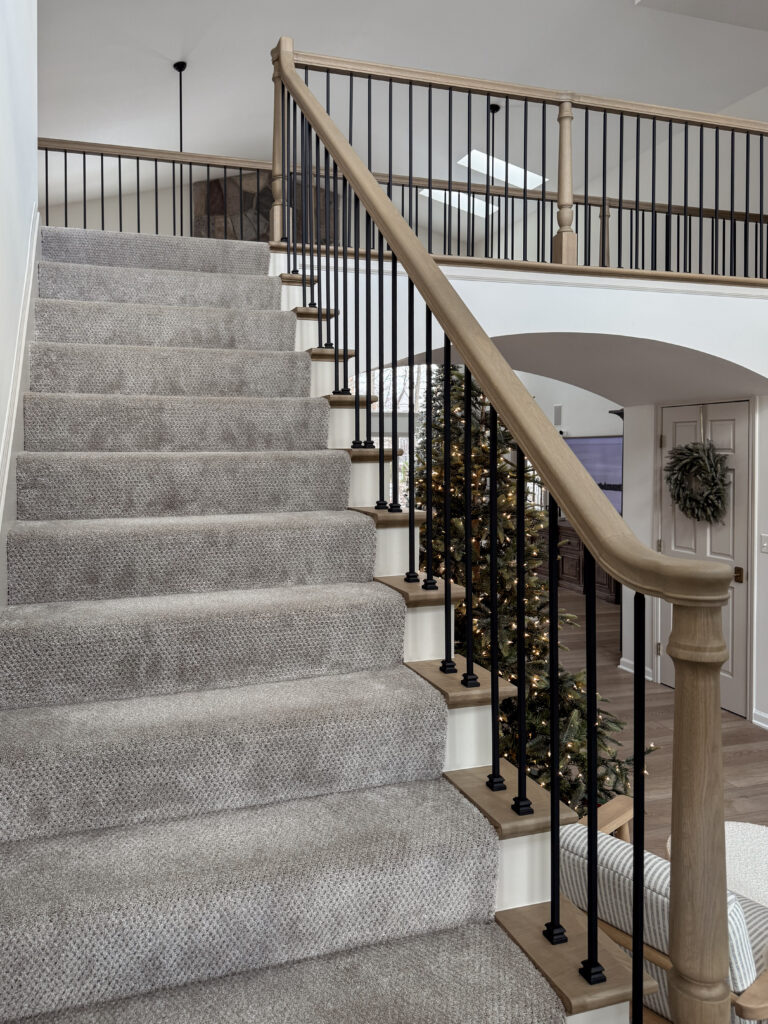
We hired @paintingkpro to paint the kitchen cabinets a couple months ago, and they did such a great job, I knew exactly who to call to paint the staircase! All of the remaining orange oak was painted with Behr’s Even Better Beige to match the rest of the trim and doors throughout the house. Then, the pros @paintingkpro created a custom stain for the handrail and end caps to match the flooring and it’s SO good! I couldn’t decide whether to match the stain to the floor or the beams, so I had them match the floor but just a shade or two darker– I think it was the perfect compromise!
I chose to do black railing to modernize the feel of the staircase, but chose a style that had curved end-caps that matched the details on the handrail. I feel like the railing really brought the whole thing together! I am SO excited to have the staircase done just in time for Christmas. I’ve been DYING to hang my garland up, but wanted to wait for this project to be finished first. I think it was worth the wait, don’t you?!
Could I have tried to DIY this? Yes… but it probably would’ve taken me 3 weeks and cost me all of my sanity so with some projects it’s just better to call in the pros.