Beginner Friendly Projects, DIY + Projects, Home, Home Decor, Living Room, Organization, Projects on A Budget, View All


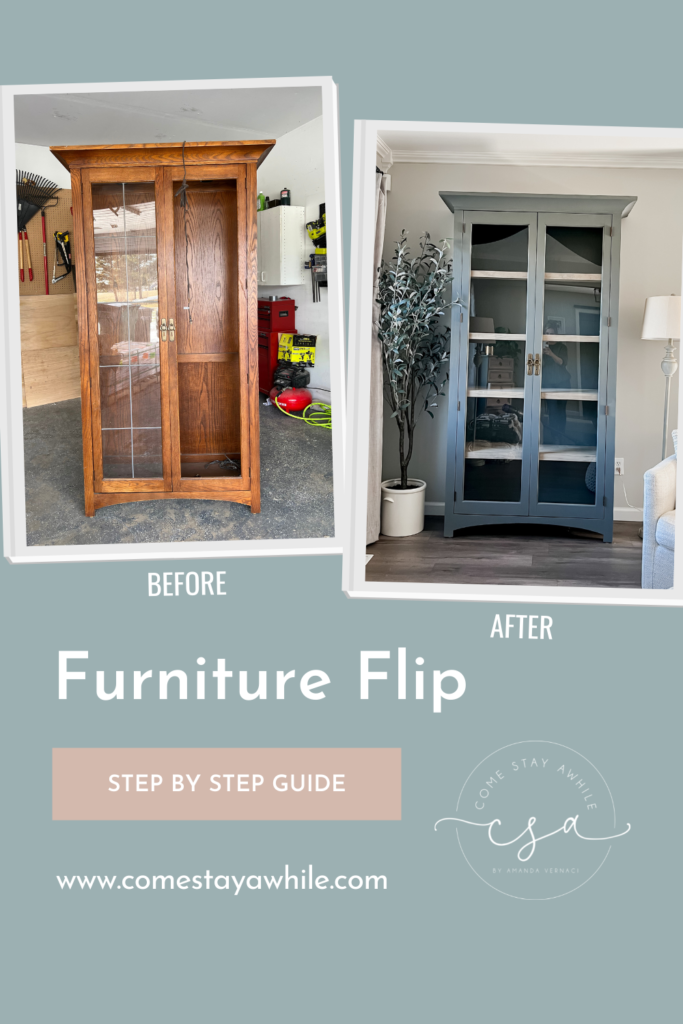
Total Cost: $218 ($15 cabinet, $110 glass, $93 wood + materials)
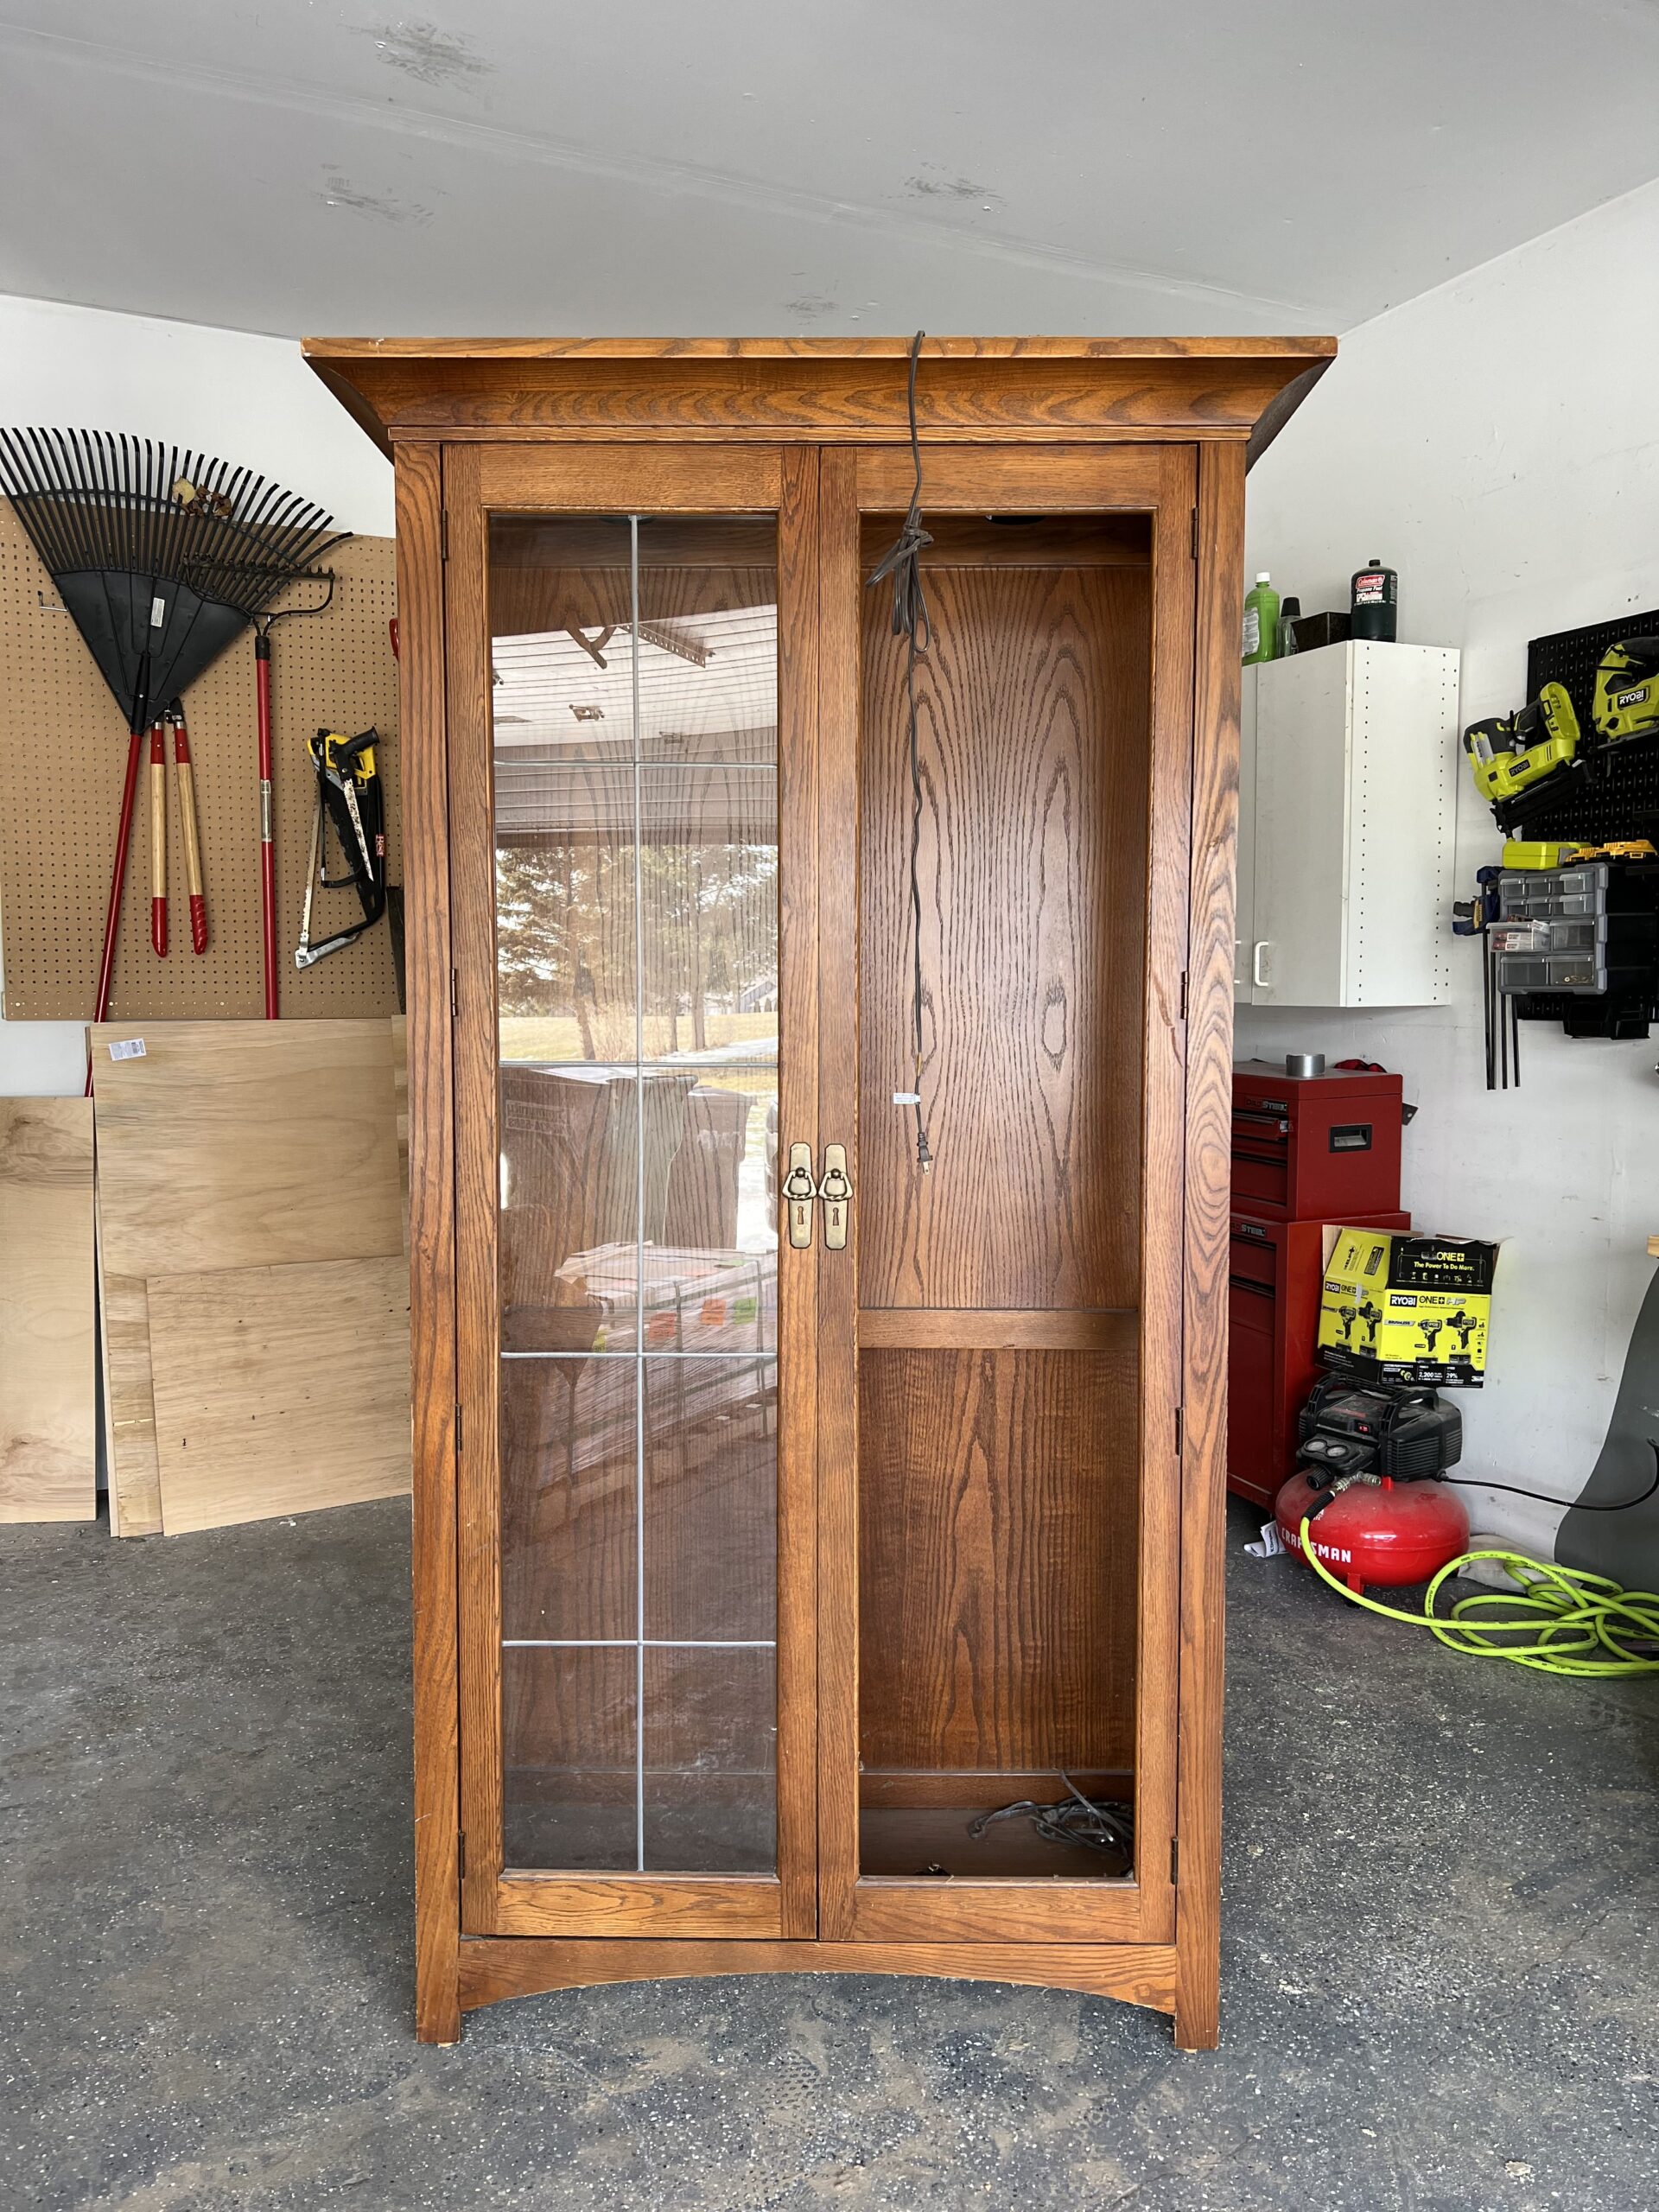
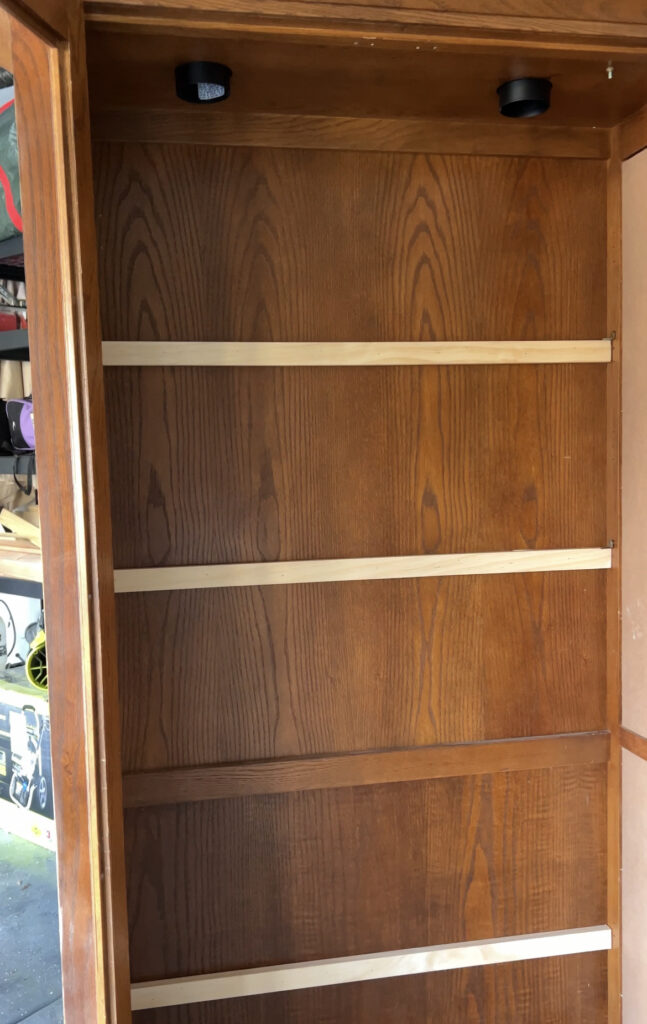
I found this cabinet on Facebook Marketplace for $15. I had a space in my living room that was in need of a cabinet & when I found this piece, I knew I could turn it into something beautiful! When looking for furniture, don’t let the first impression scare you away. Look at the bones of the piece and if you can see potential, know you can turn it into something that fits your style!

To make something new, first you have to take it apart! For this piece, I took off all the hardware, nails, screws, & removed all the glass. Next I cleaned the whole piece from top to bottom.
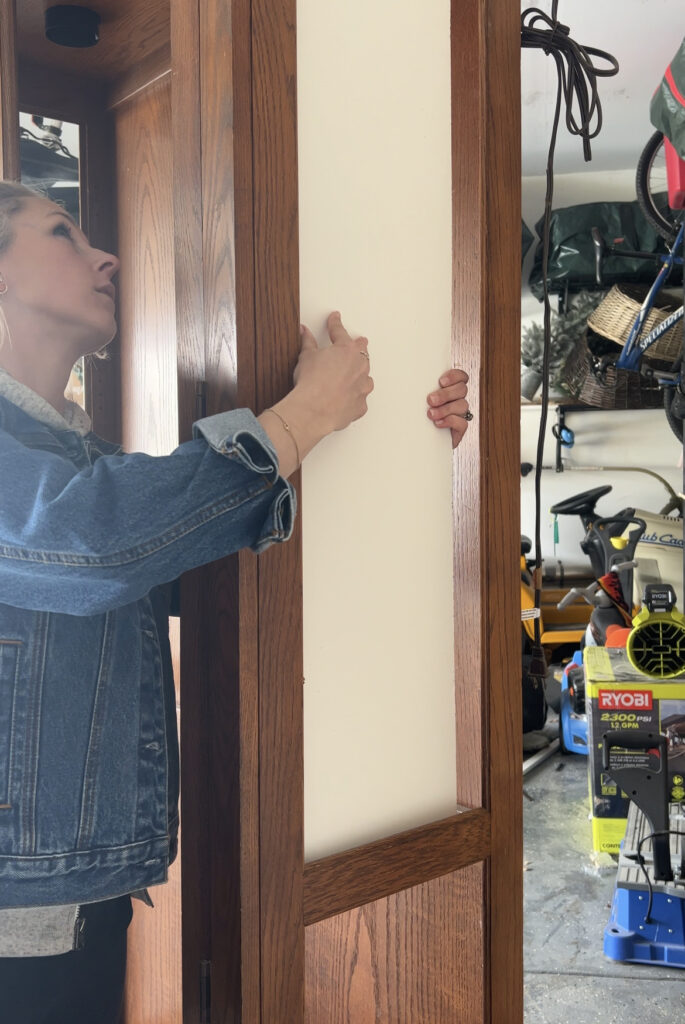
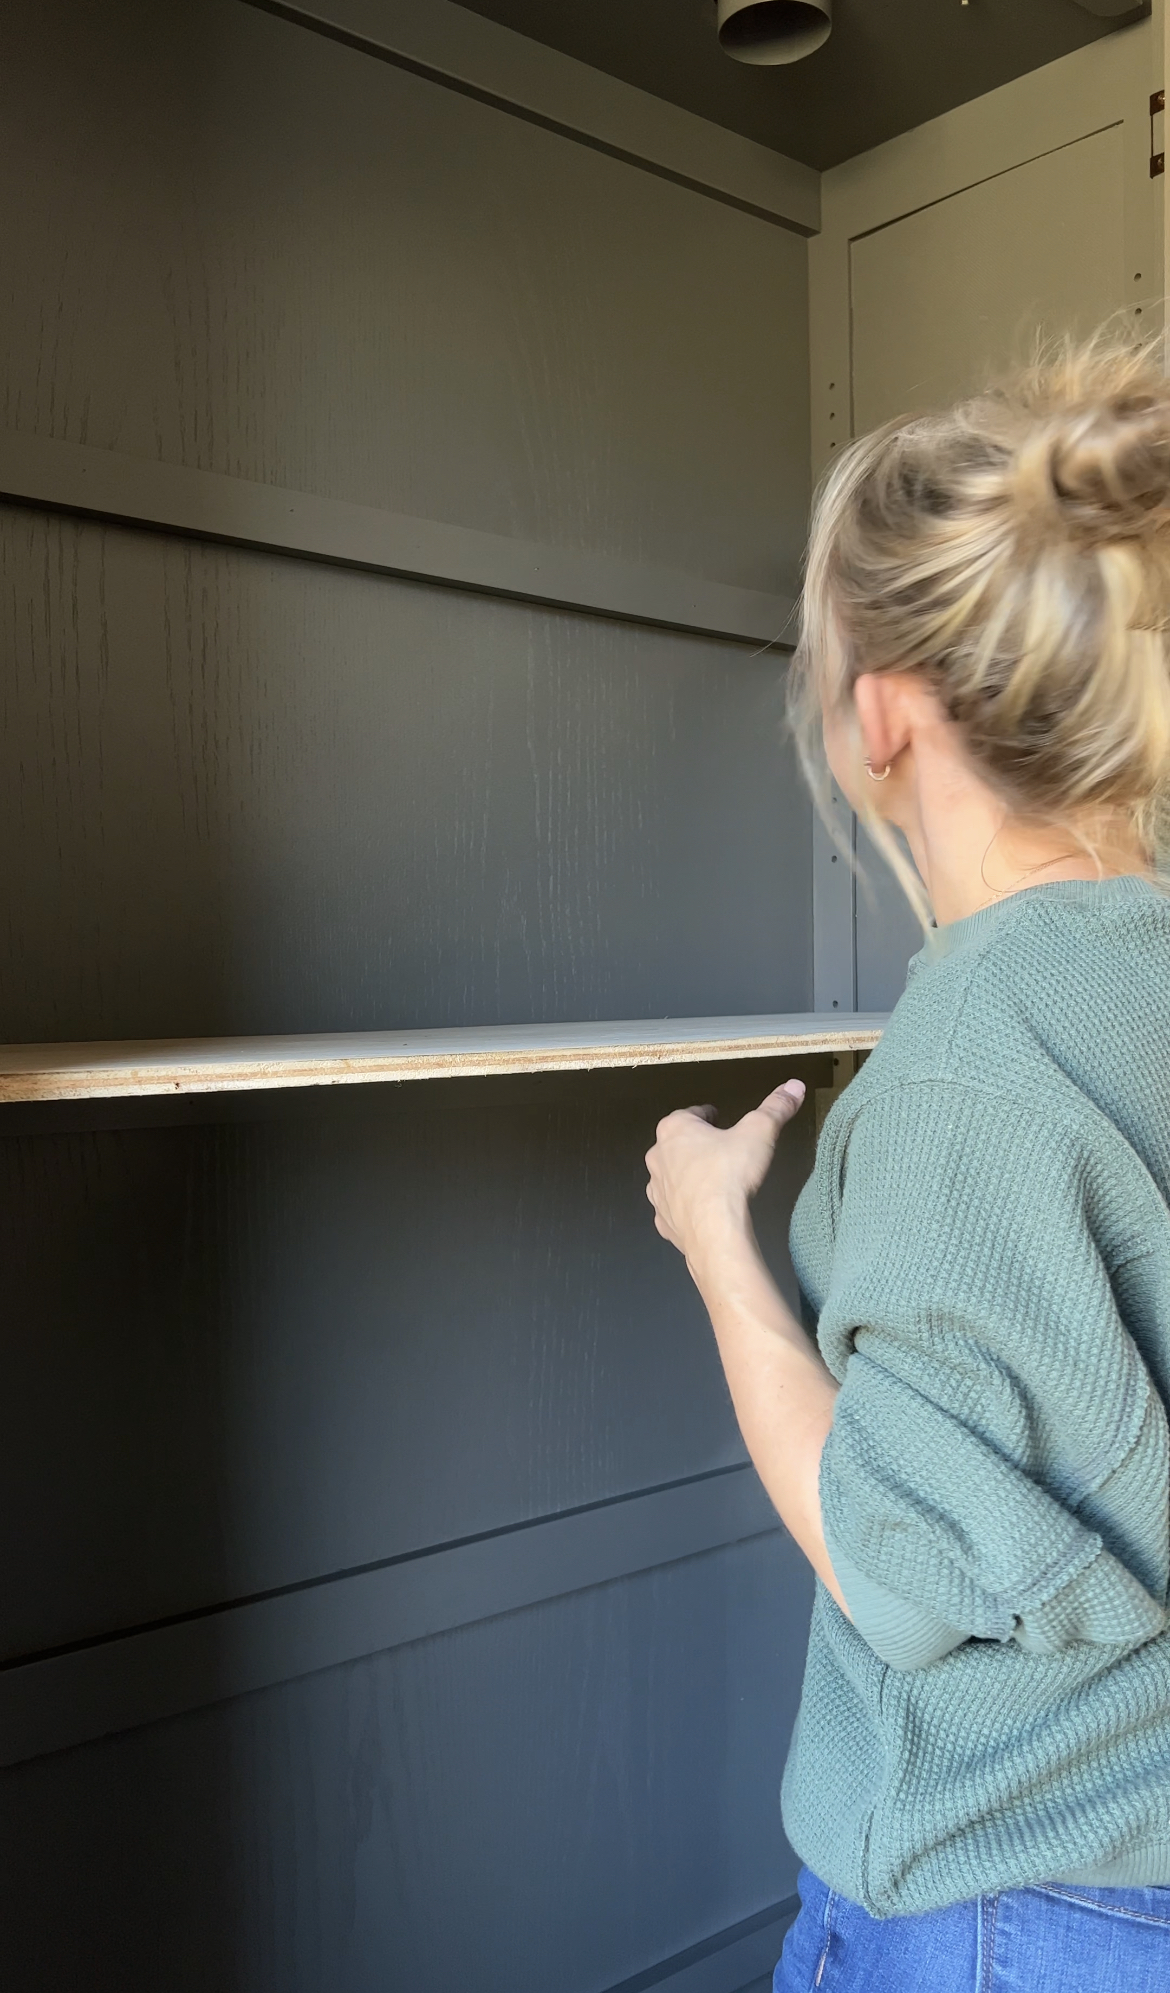
I decided to close in the sides of the cabinet and just keep glass on the doors. I used a thin backer board to fill in the space left by the glass & enclose the cabinet sides. You could also use plywood! Next I filled in the holes and caulked all the seams. Be sure to use paintable caulk! If you need help with caulking, I have a beginner friendly tutorial here!
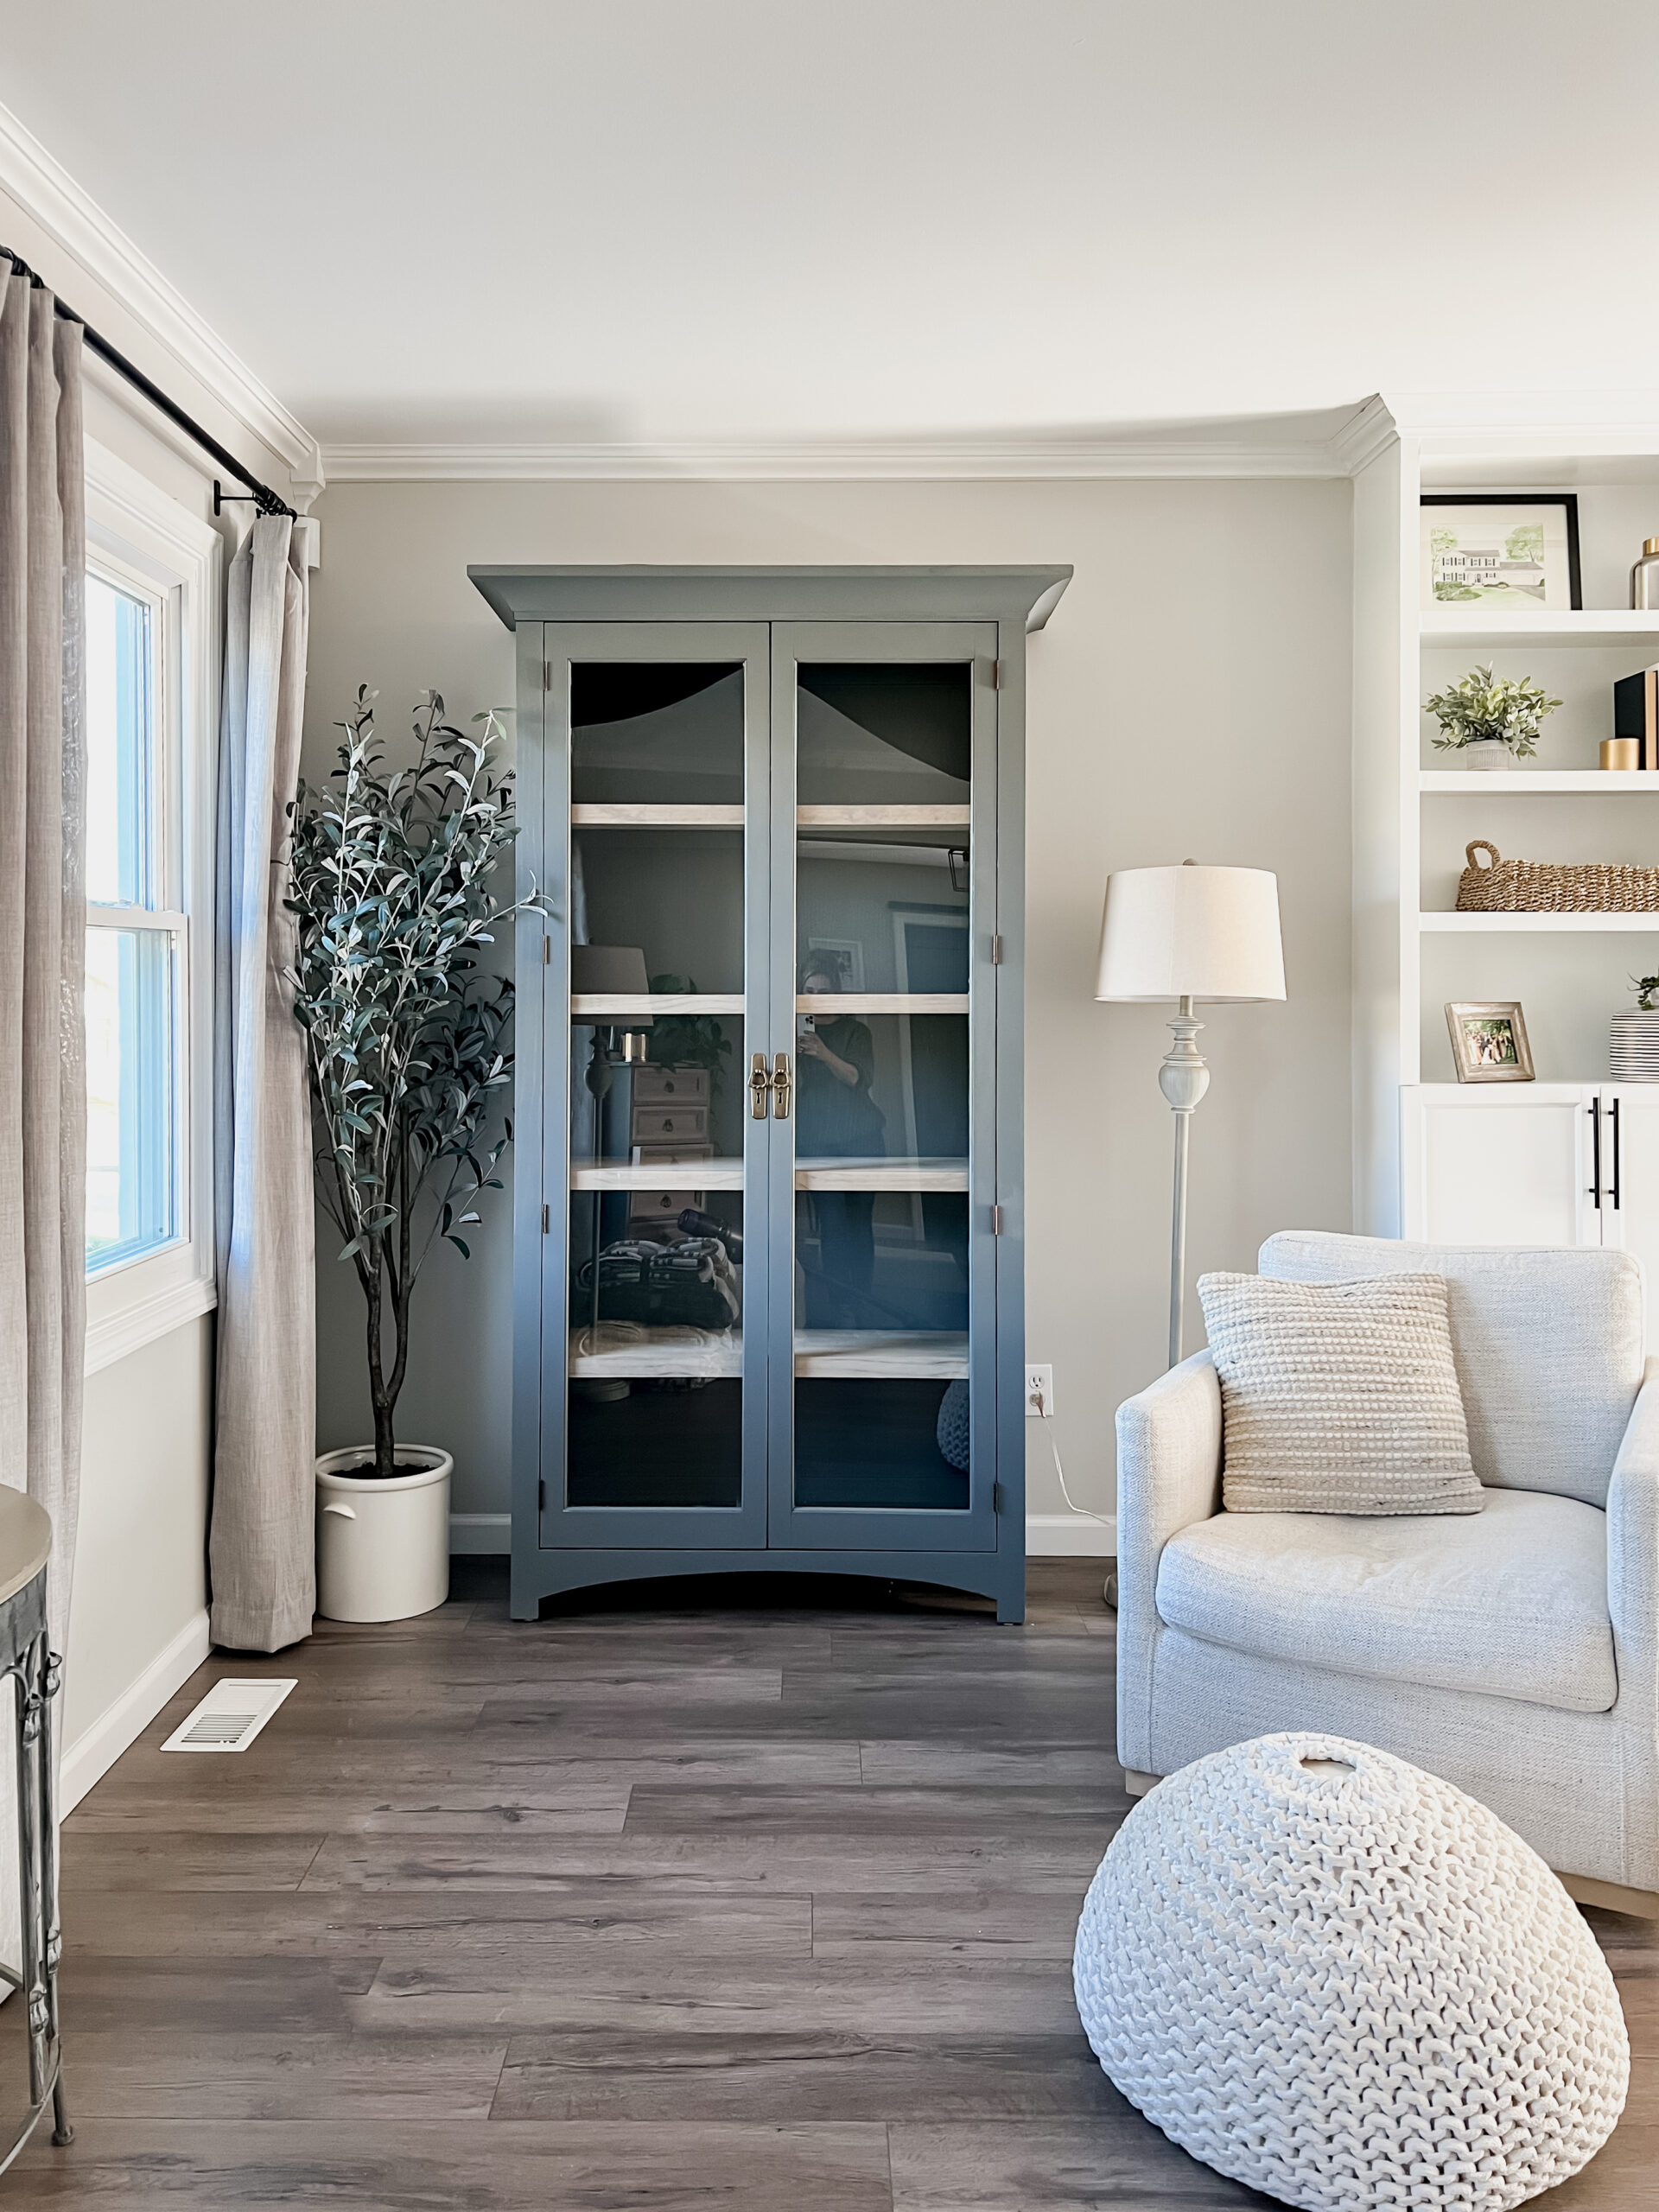
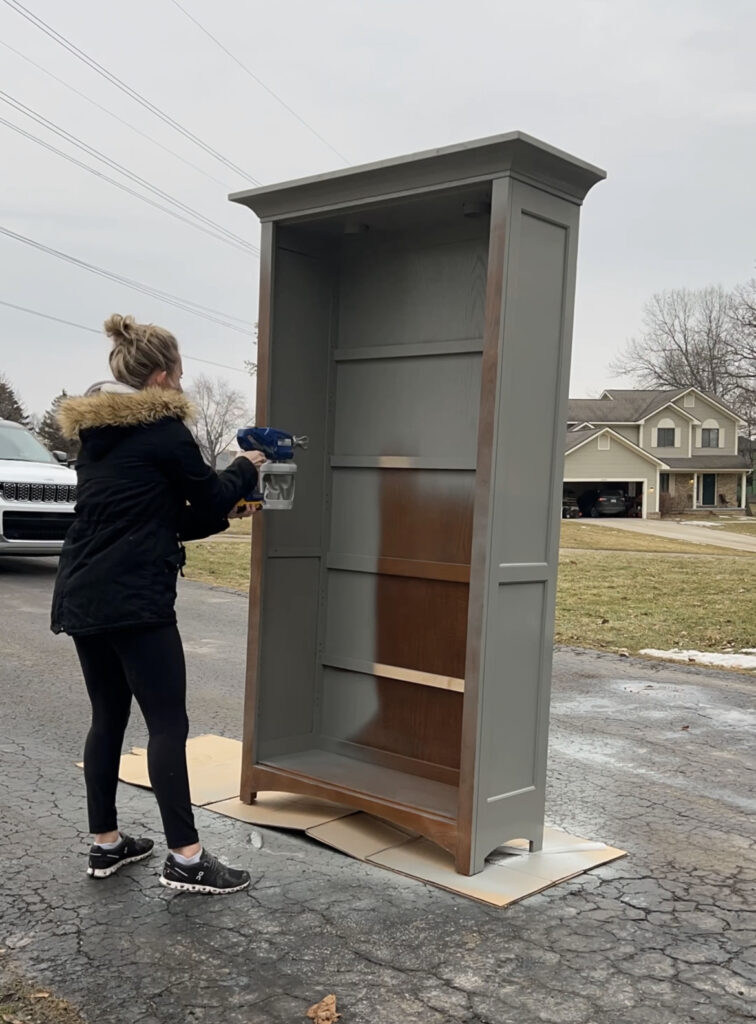
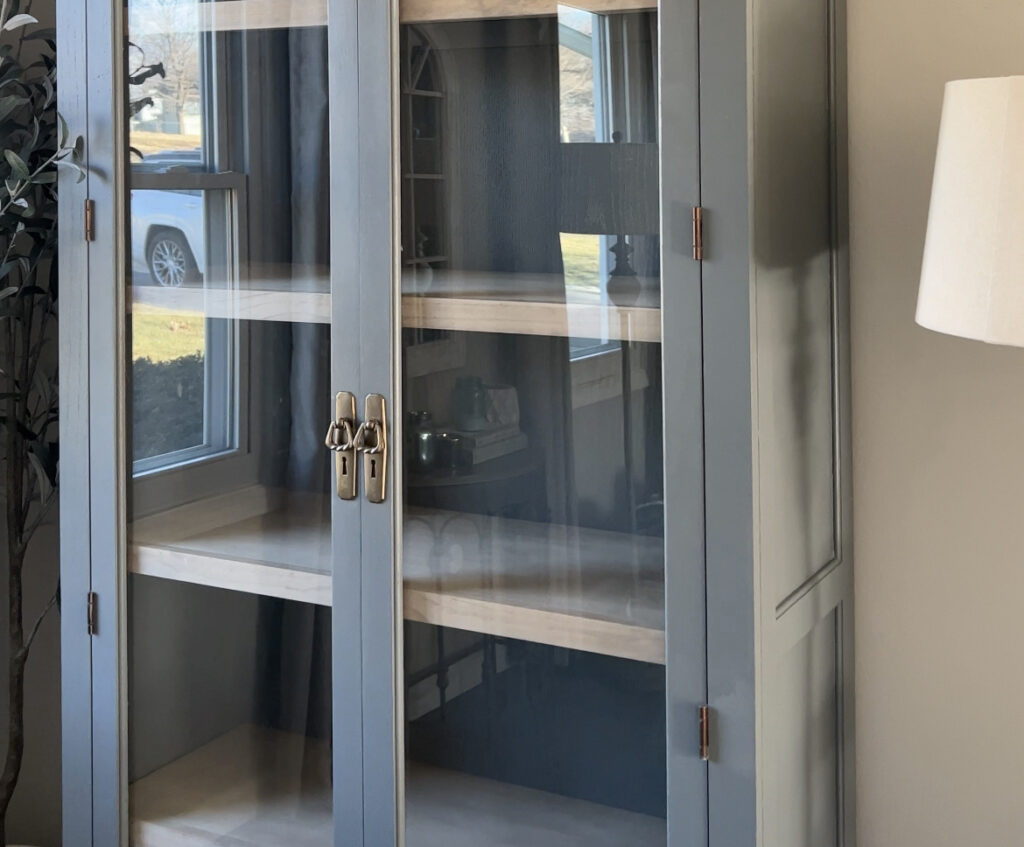
I then had to prep the cabinet for paint! I sanded the inside & the outside of the piece using 120 grit. Then I used Grizzle Gray by Sherwin Williams to paint the whole cabinet! I used a paint sprayer to get a clean even look. Once the paint was dry, I installed the original hardware for the doors – I loved the character they added to the cabinet. You could purchase different hardware if you don’t love the original!
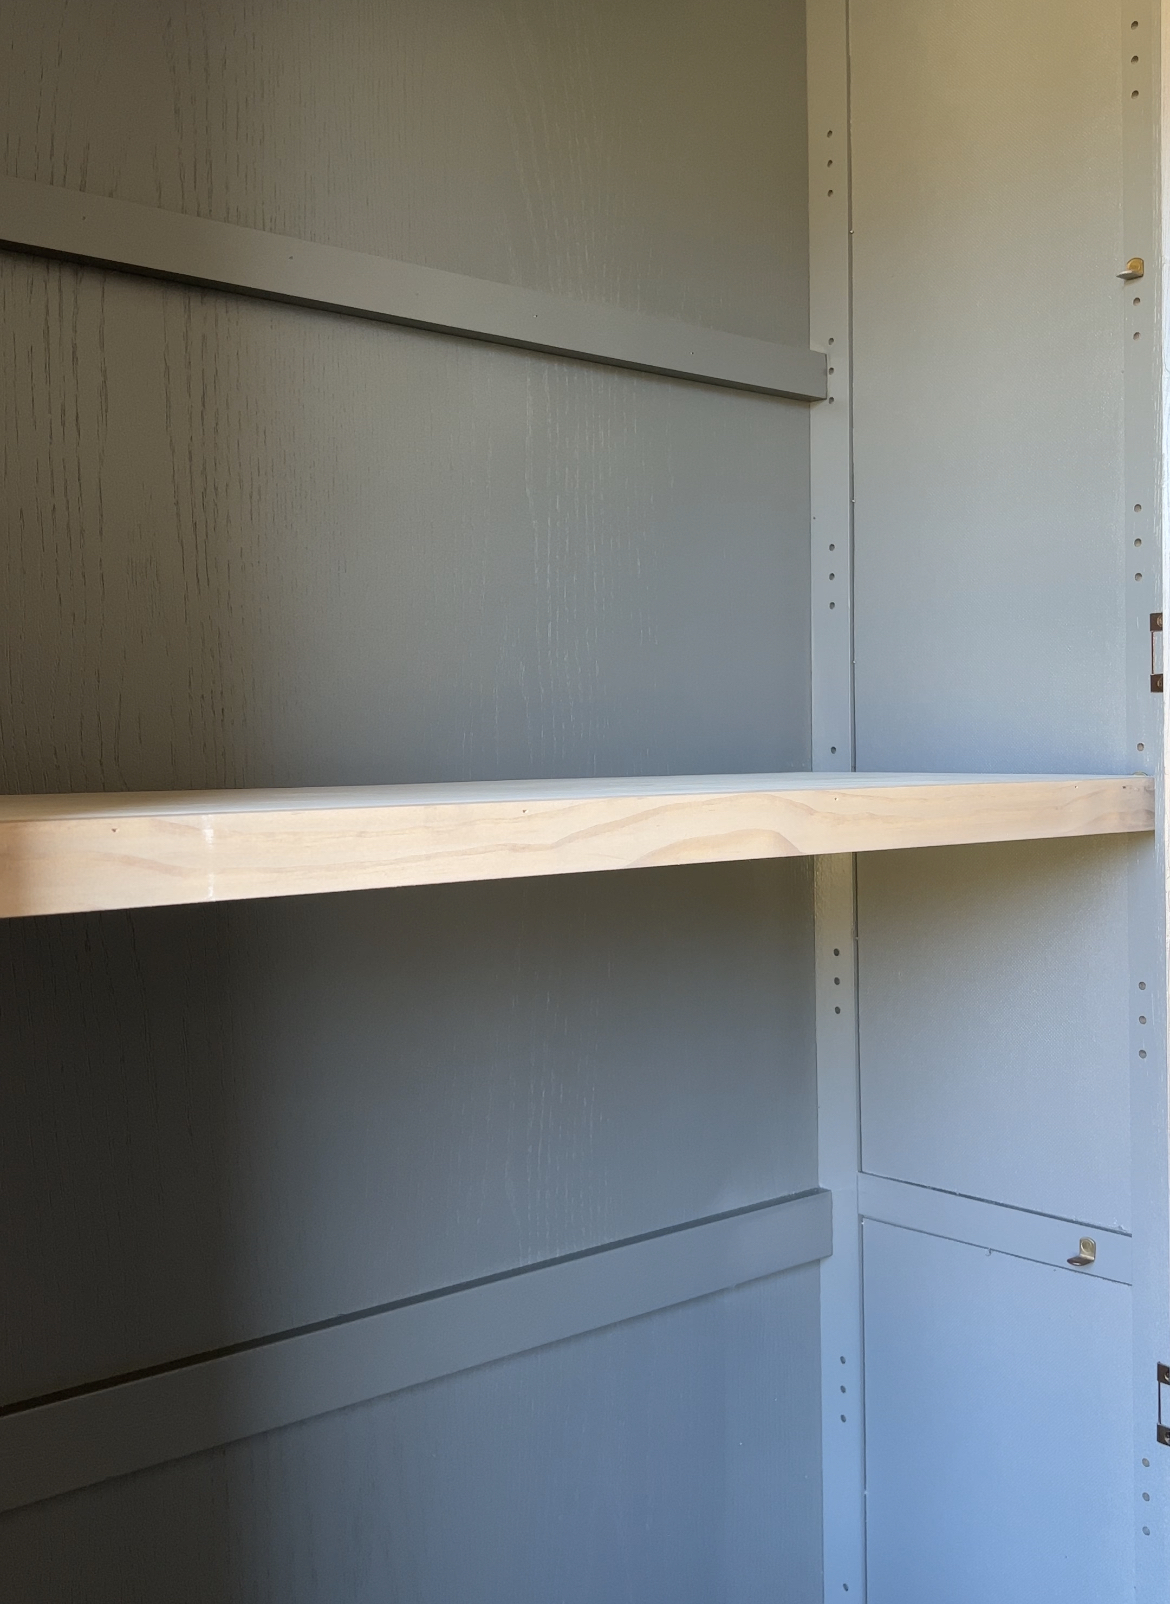
I used 1/2in plywood to build my shelves. You want something thick so that it doesn’t bow in the middle and can support the weight of whatever you are going to place on the shelving. If you are using something thinner, you will need to build extra supports underneath to support the middle. Measure and cut plywood for shelving (remember to account for the space needed for the doors of the cabinet to close). I then added a 1×2 pine board to the front of the shelves to give it a cleaner finish and to thicken up the face of the shelves. This makes it look more professional and custom as plywood has a very raw, unattractive edge. If you don’t want to use 1x2s you could always apply some edge banding (I used this one this project). Let the extra length hang over the bottom of the shelf so the top stays flush. Stain the shelves (one coat provincial one coat antique white) and front pieces before installation in the cabinet.
I used scrap 1×2 pine boards to create cleats along the back and sides to support the shelves and the shelf brackets for extra reinforcement that came with the piece to hold the shelves in place. Once the 1×2 pieces are added to the front of the shelves, I used wood putty to fill the holes. You can get the wood putty in the same color as the stain so it blends in with no extra work or sanding.
Measure your opening for the glass, and get glass custom cut. Did you know you can get custom glass cut at a local glass shop!? I got both of these pieces for $111!
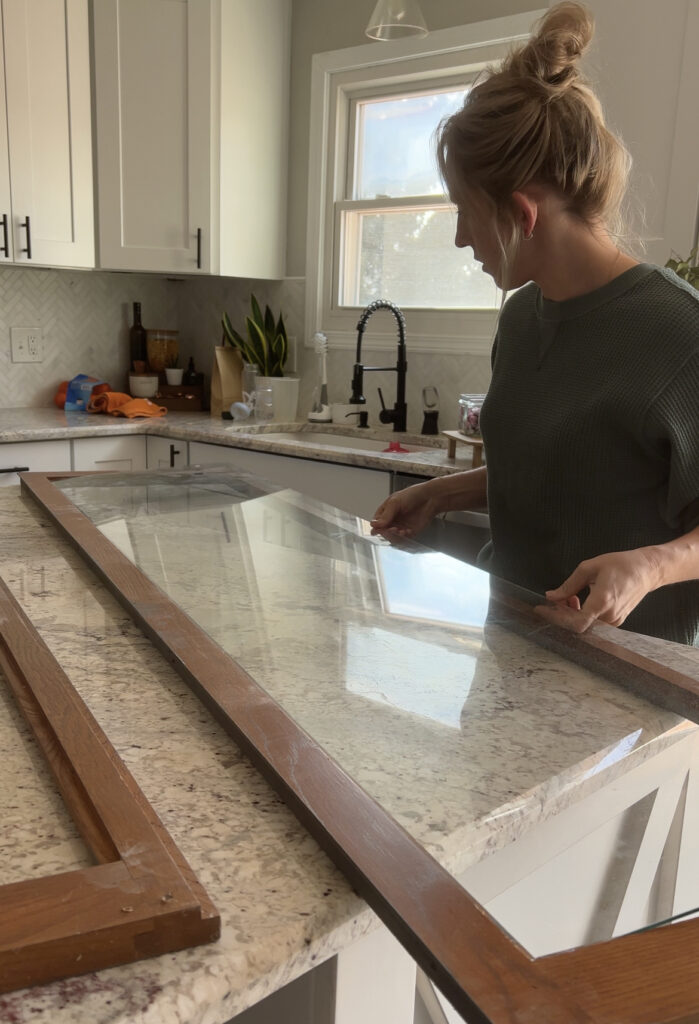
Take it from me, you want to test the fit before you start installing it to make sure it doesn’t break. Install the glass using silicone caulk, just like you are caulking around the edges, to hold the glass in place. Allow it to fully dry before installing!
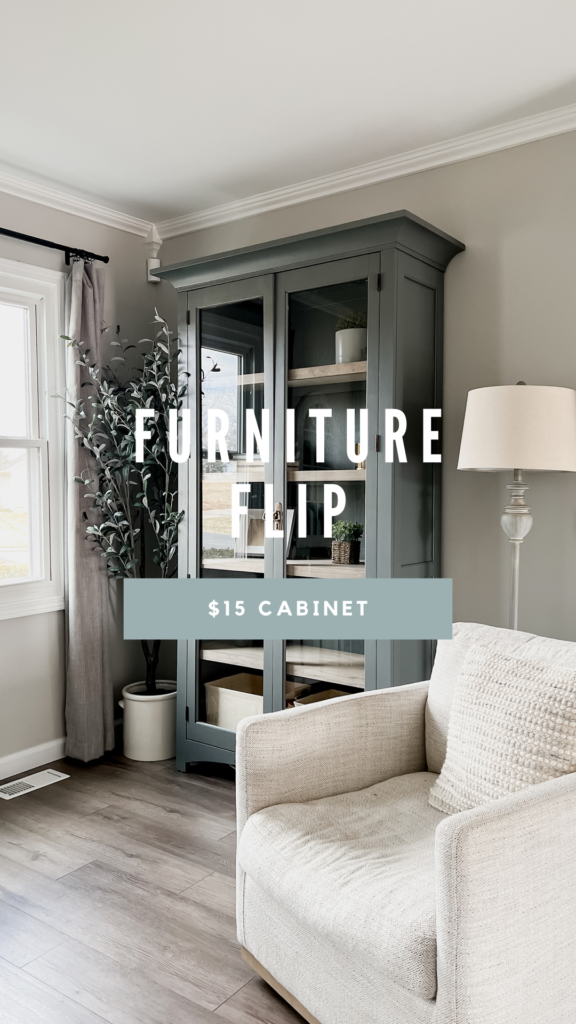
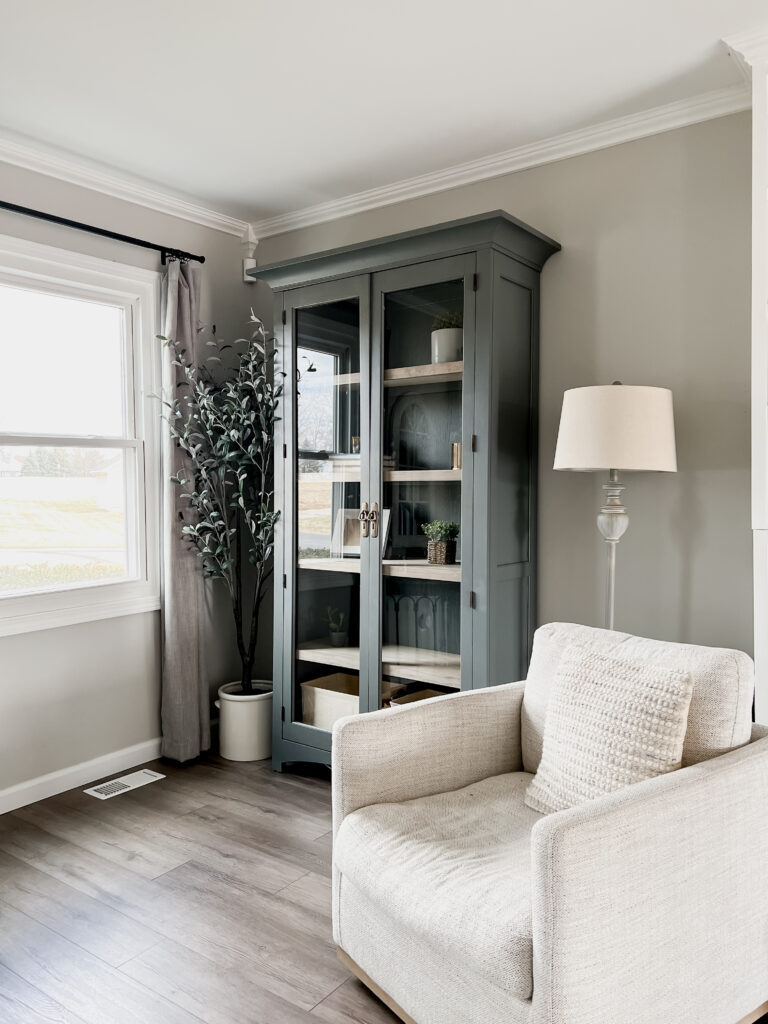
In a few quick steps, this old cabinet has a new, custom look!