Beginner Friendly Projects, DIY + Projects, Home, Home Decor, Living Room, Projects on A Budget, View All, Weekend Projects


This is a quick and easy one day project that will be functional and fun for the whole family!

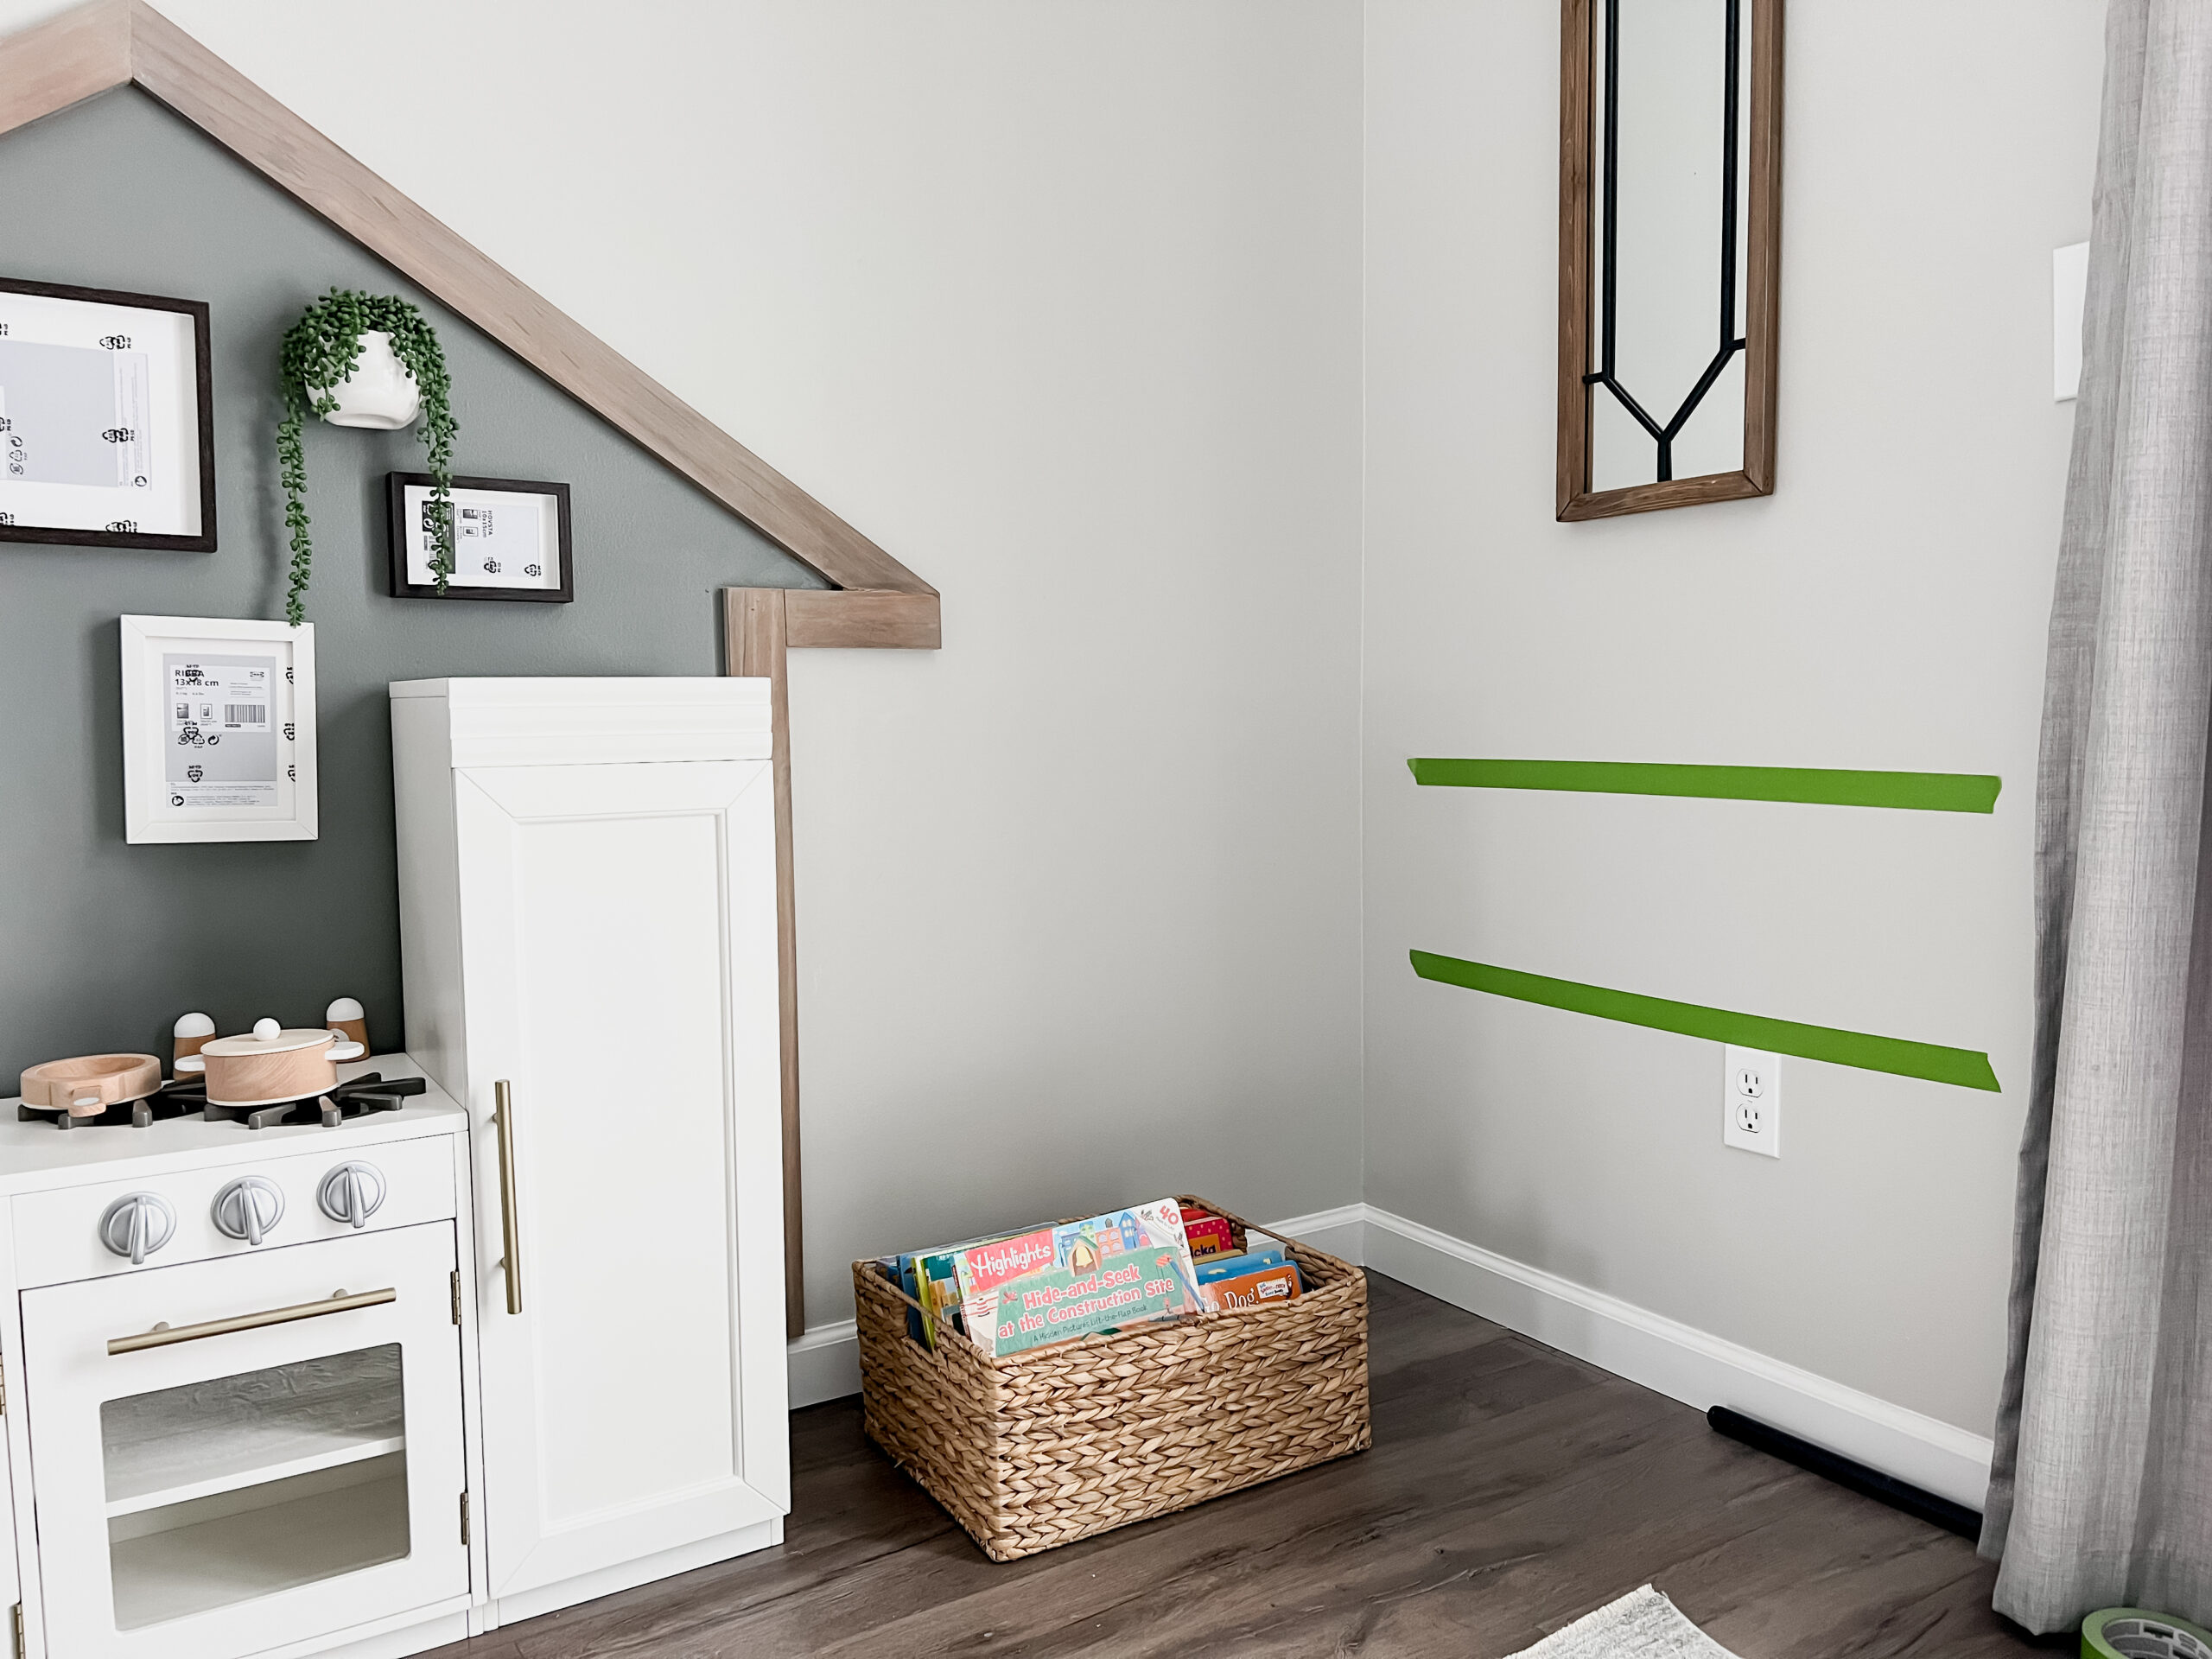
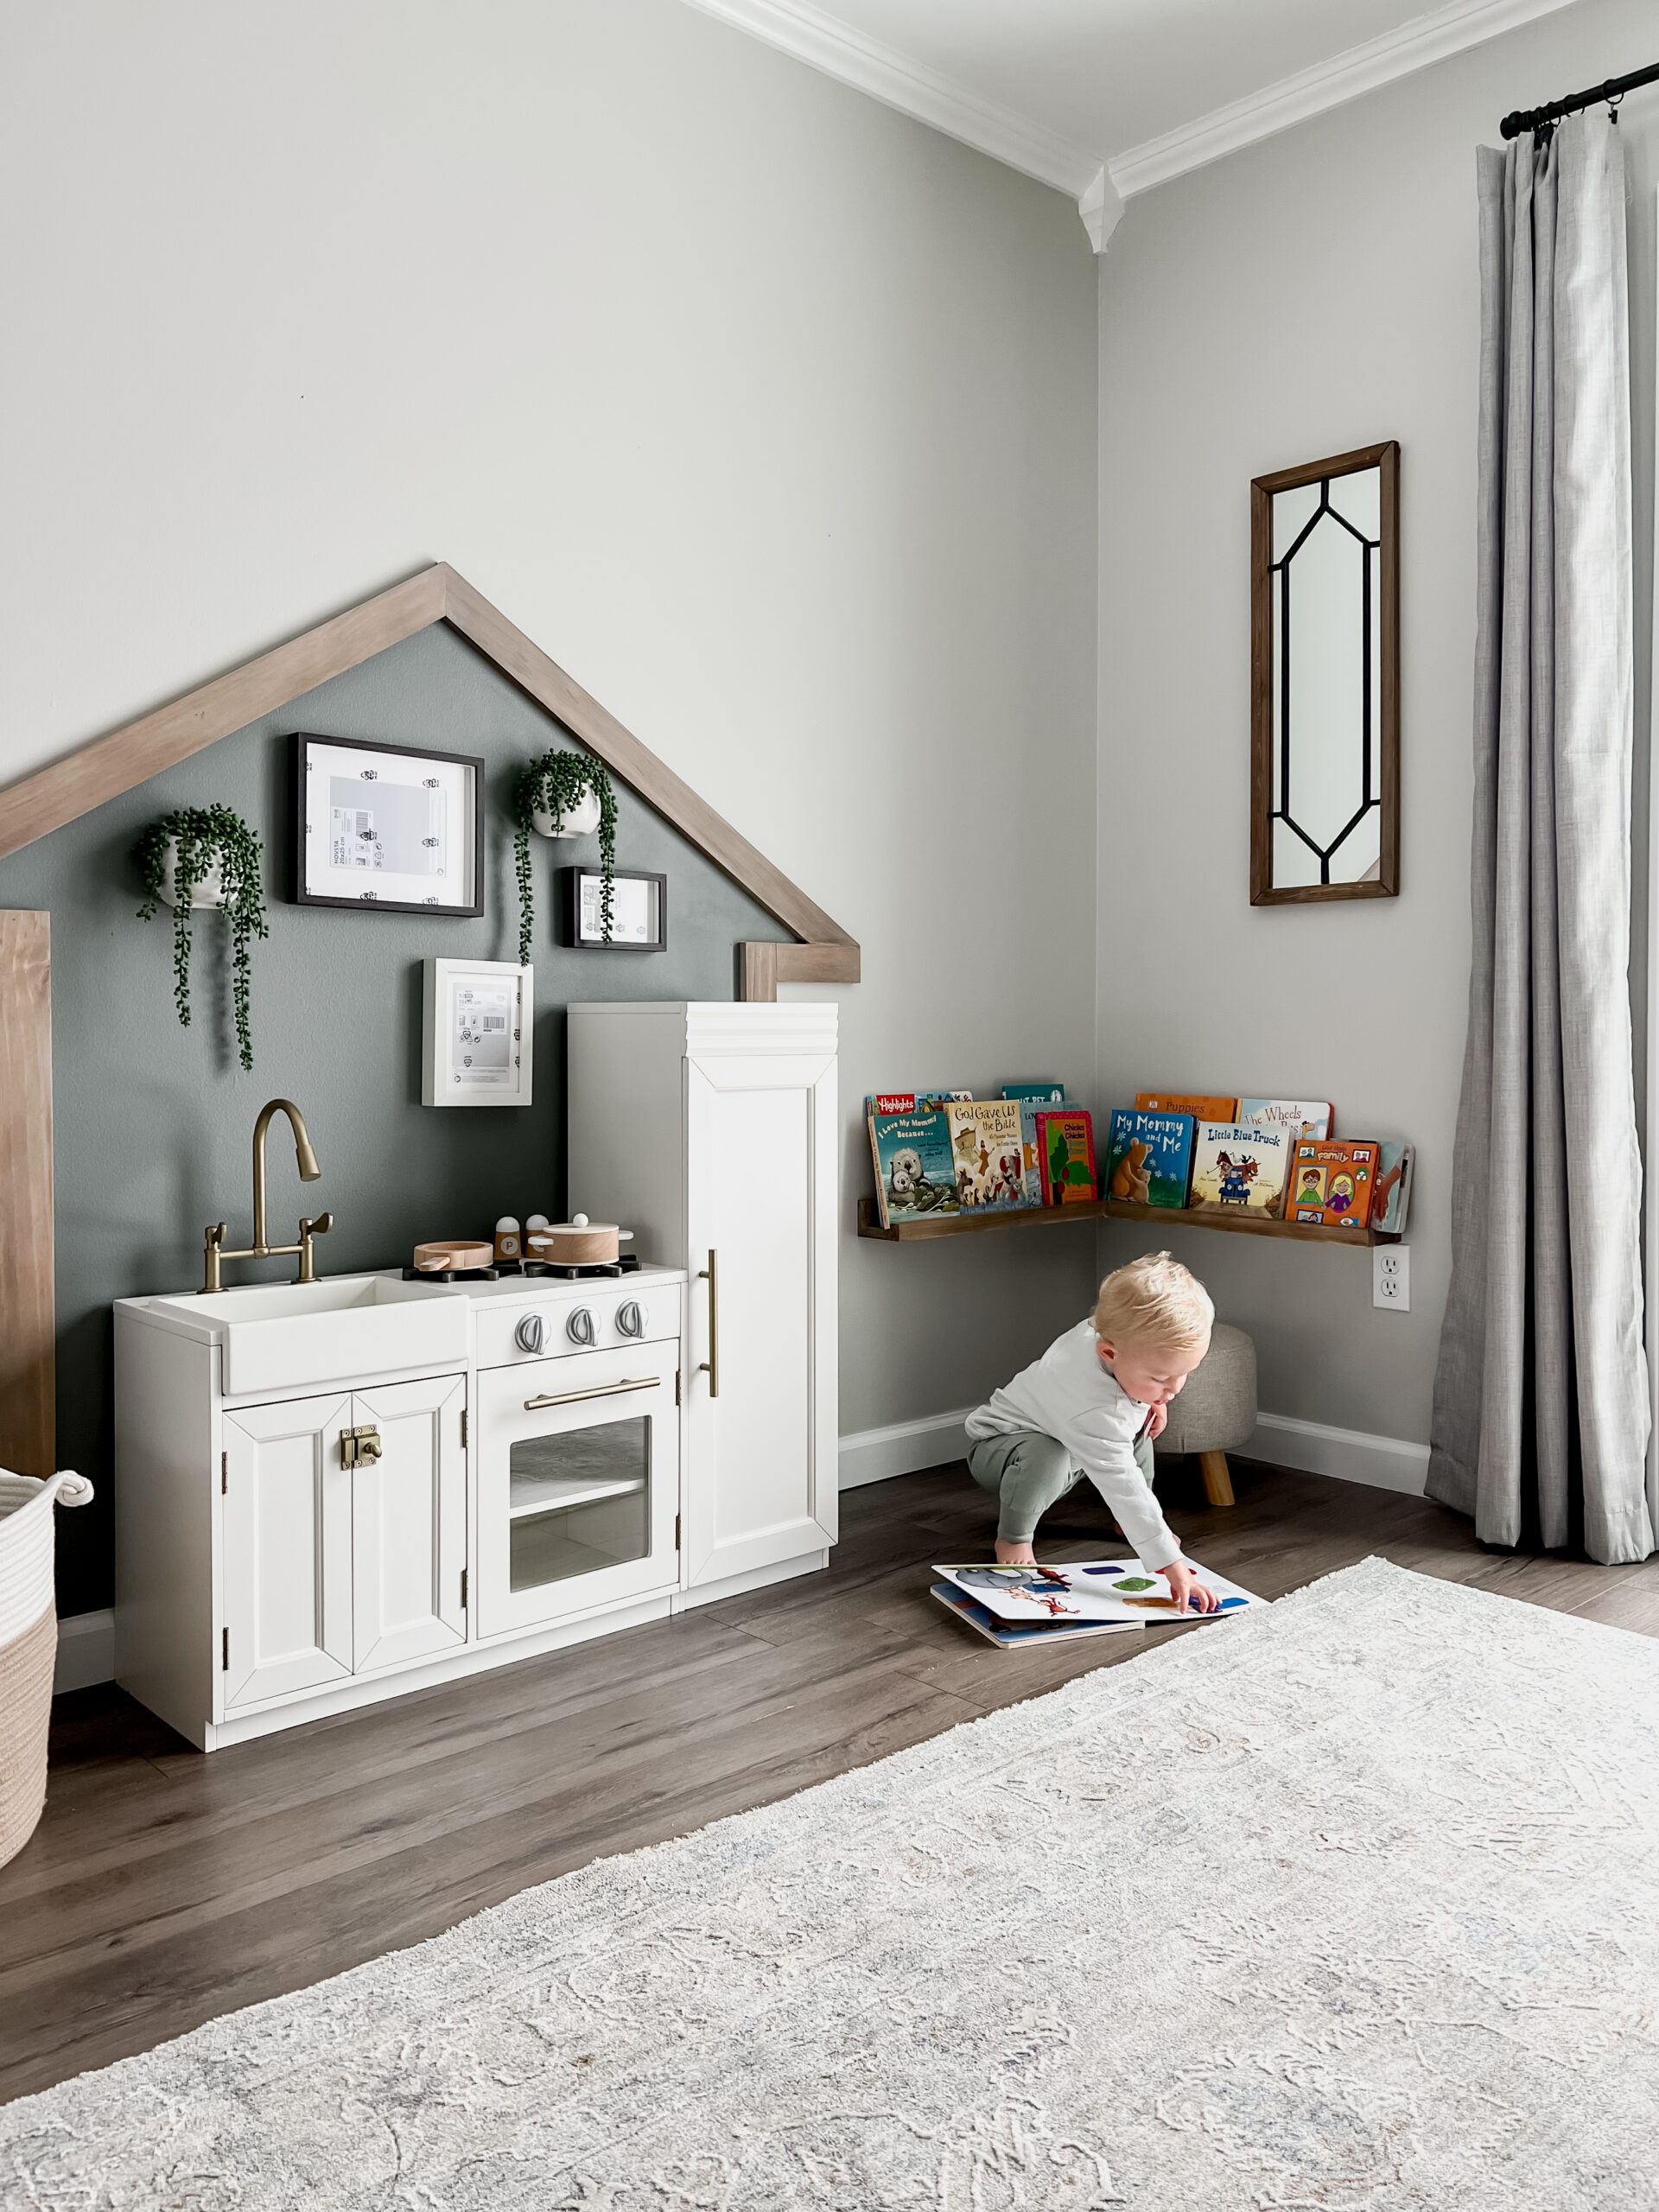
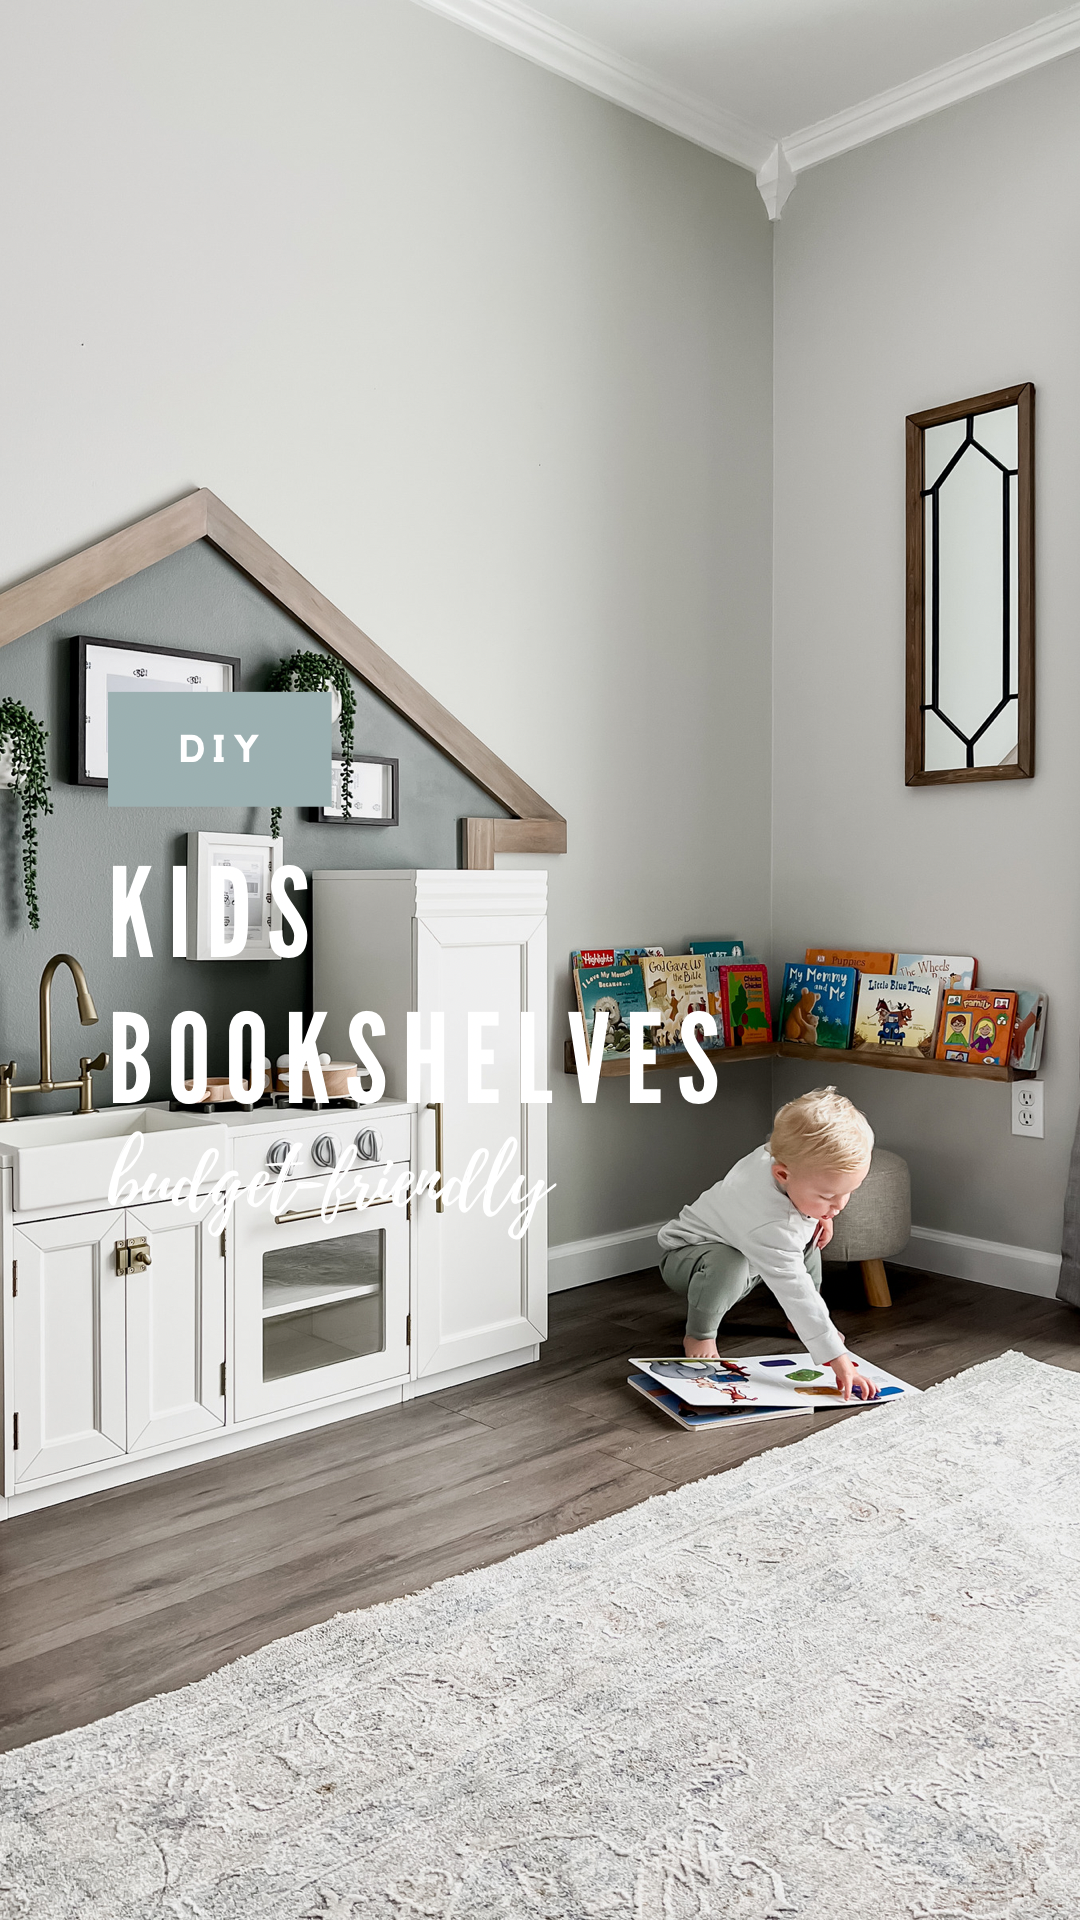
For this project, the measurements will be specific to the space that you have! I know on my poll, having two shelves won, but I just couldn’t get over how cute the corner shelf is! I also think it will be more functional in the long run. Painters tape is a great way to visualize where you want your shelves and what sizes you want them to be.
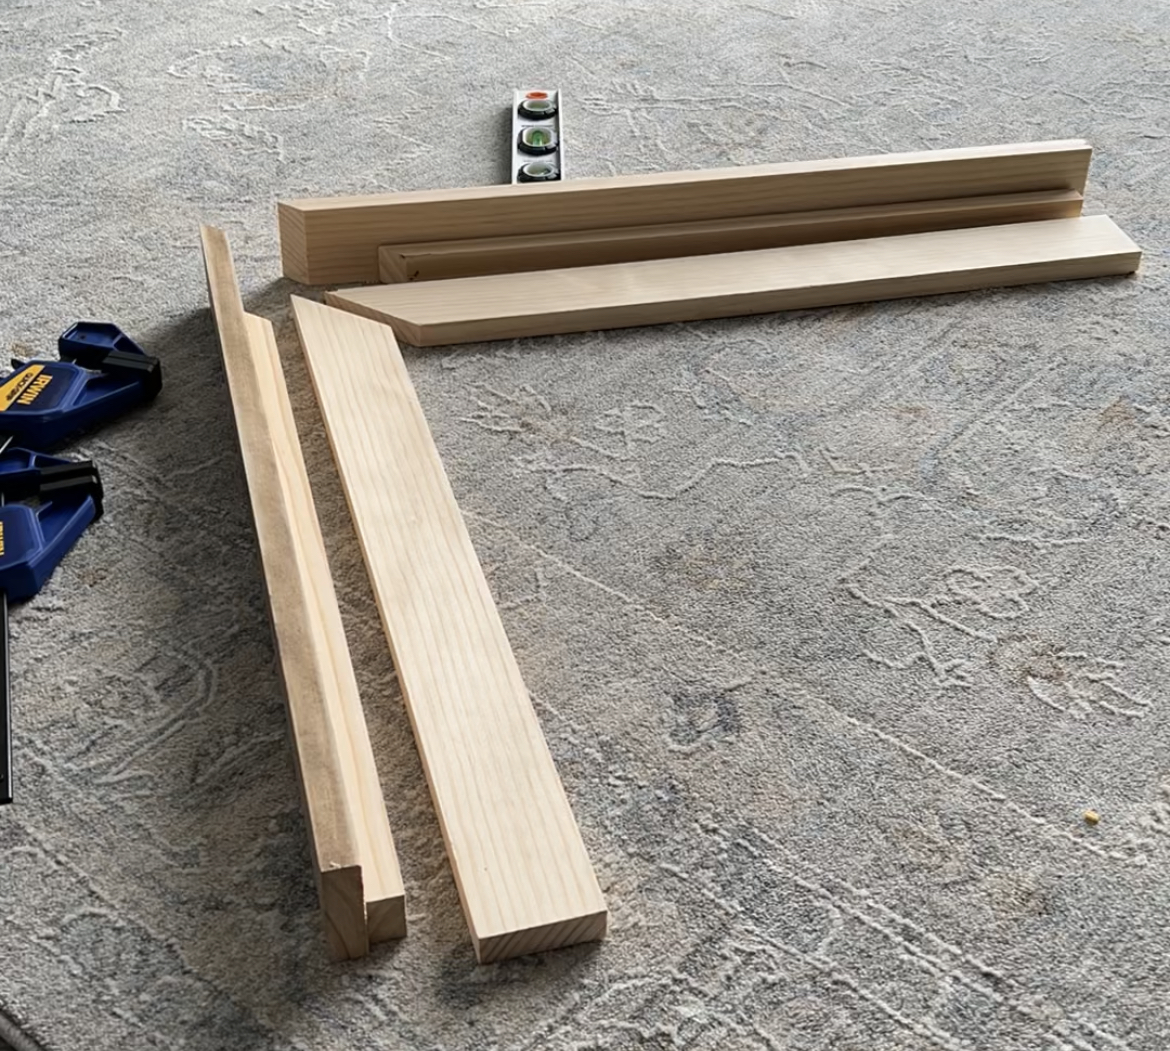
Once I knew my plan for the shelf, I was able to measure and cut all my boards to get them ready to assemble.
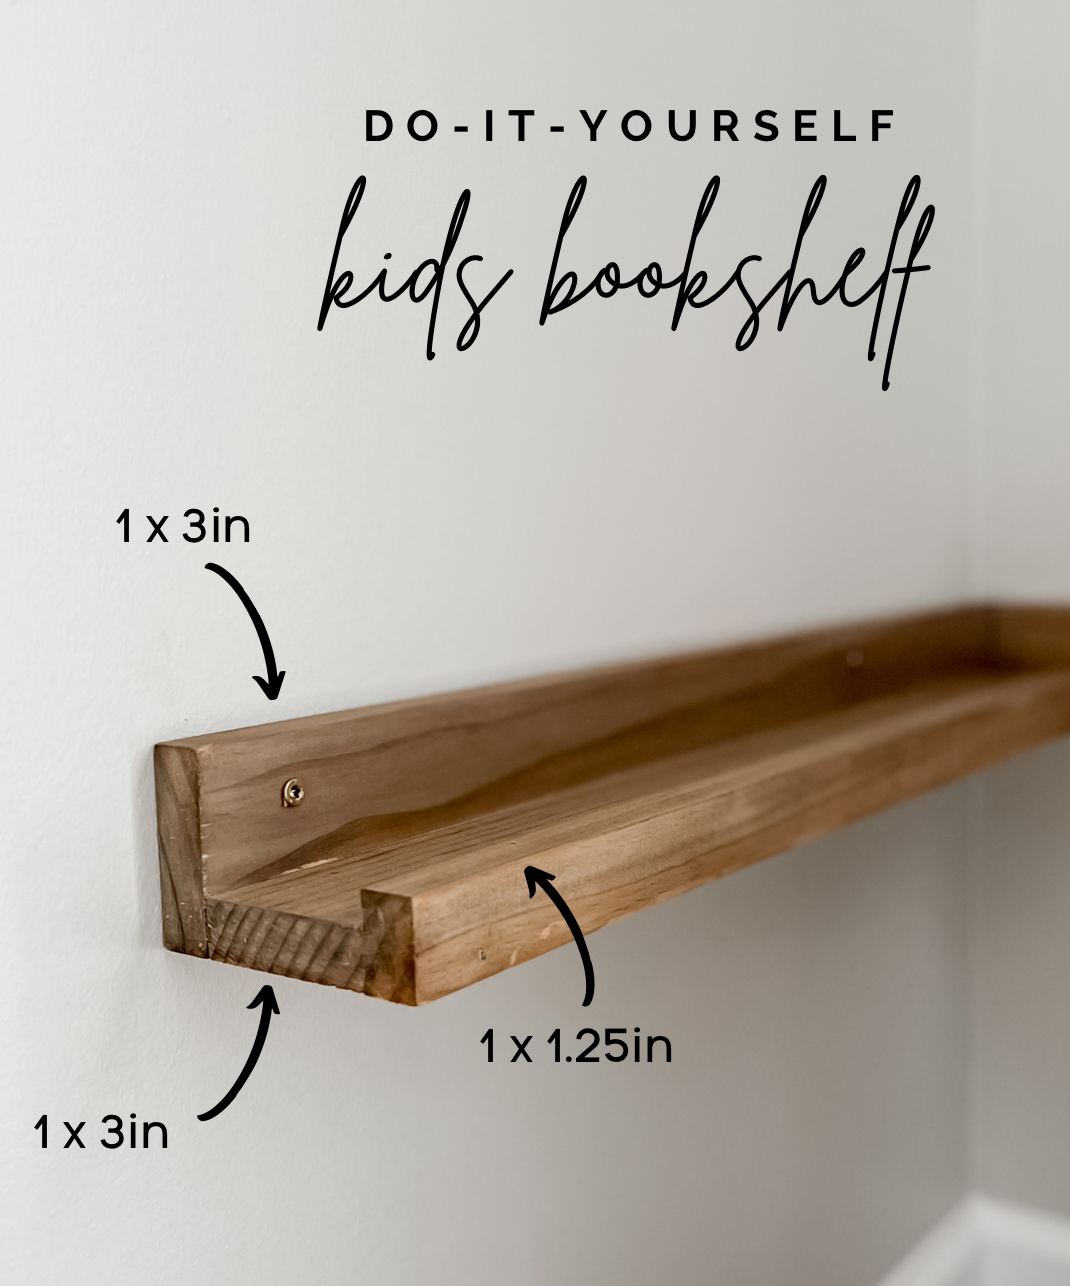
You will want to cut your boards to length, if you are also using the corner shelf method you will need to cut 45º angles on one end of the boards so they fit together. I used a 1″ x 3″ piece of wood for the bottom and back of the shelf, and I trimmed a 1″ x 1.25″ piece for the front of the shelf so it had a lip to hold the books on.
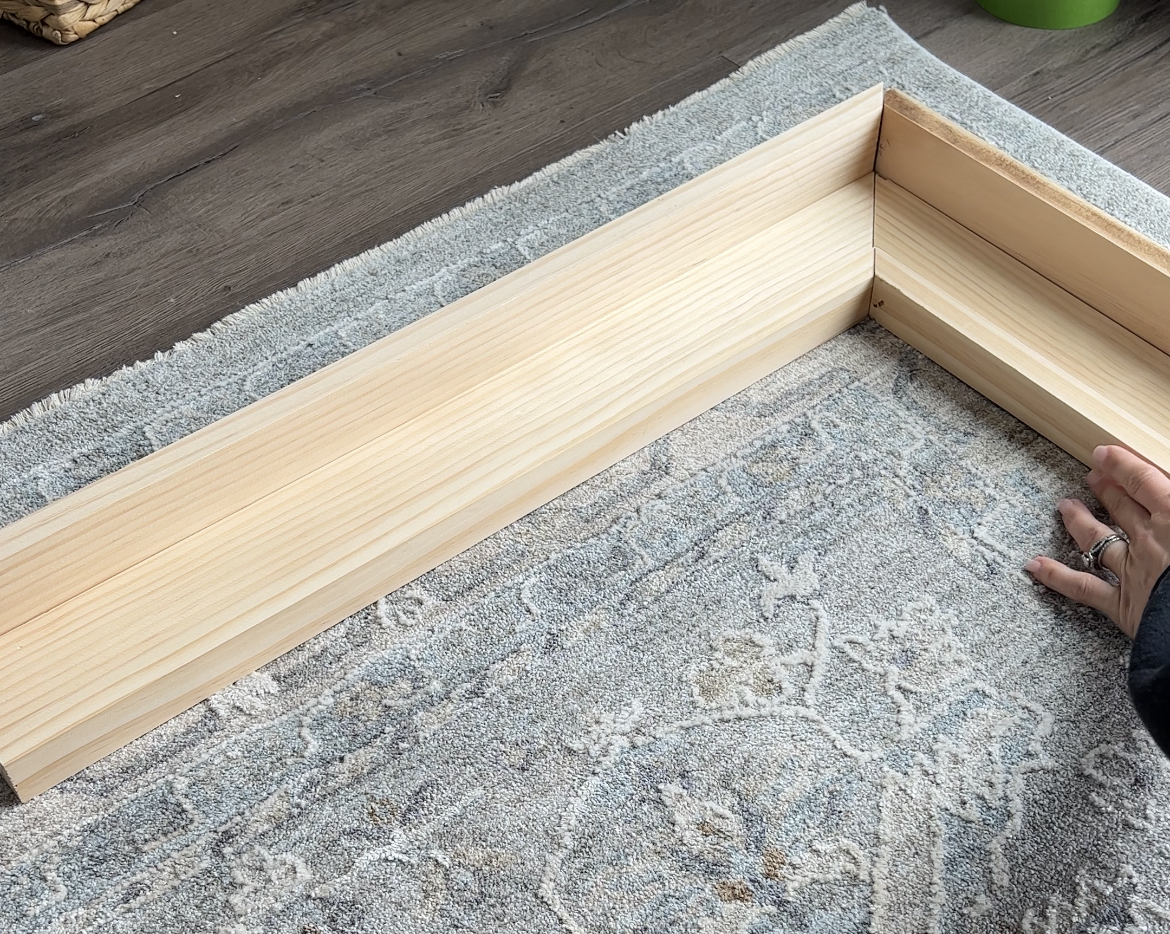
If you’ve followed me for very long, you know that wood glue is stronger than screws/nails! Mind still blown. I applied wood glue to assemble my shelves together and then used my nail gun to secure them in place. After they were assembled I stained them with my favorite stain combo one coat Provincial and one coat Antique White! Make sure you use a pre-stain wood conditioner beforehand so that your stain goes on evenly without any blotchy areas.
Once the shelves are assembled, all you have left to do is find your wall studs and screw them into the wall! I use a stud finder and level to make it quick and easy! This whole process is very similar to how you can build a photo ledge!