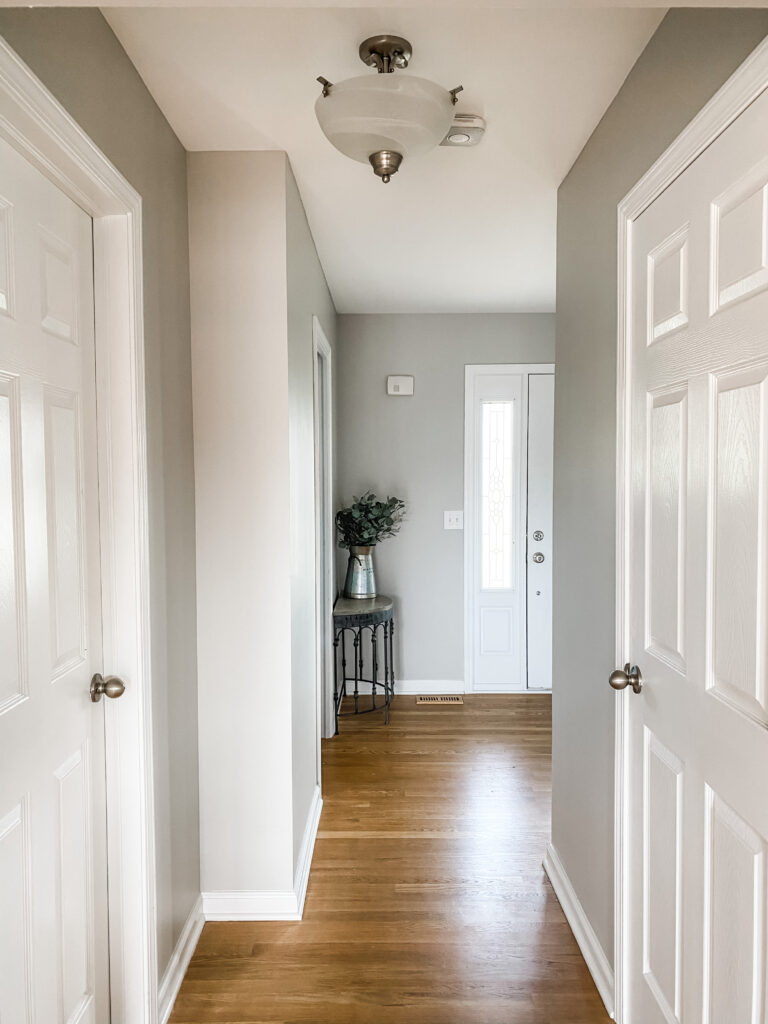


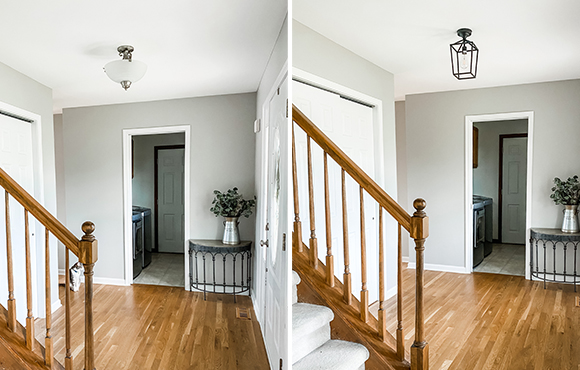
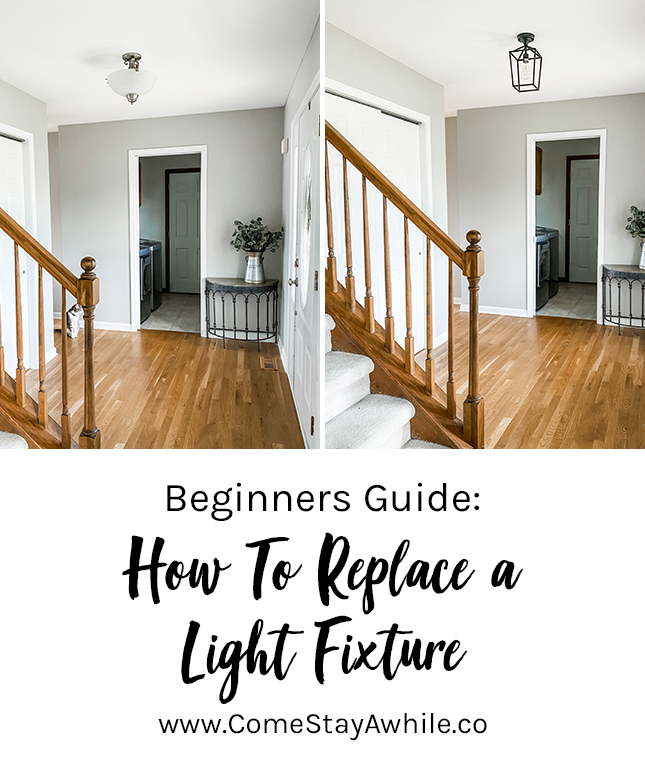
Let me start by saying replacing a light fixture is NEVER something I thought we were capable of. I thought it would be something we needed assistance with. During this quarantine, we are forced to learn some new tricks and it turns out replacing a light fixture is SO easy! If we can do it, YOU can do it sister!
Fixtures are a super inexpensive way to modernize a space!
Although all fixtures are different, they almost all are attached the same way electrically! You can use this tutorial for most light fixtures.
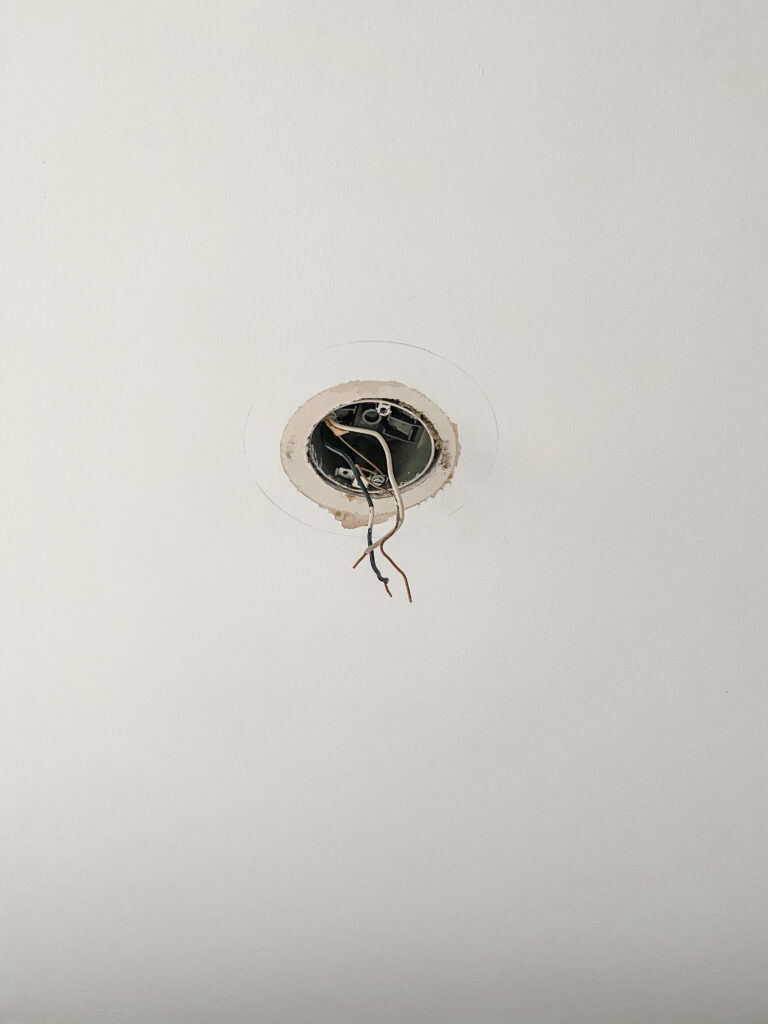
The worst thing ever would be getting a nasty shock while trying to install a light fixture. Make sure you turn off the switch or flip the breaker while you are working.
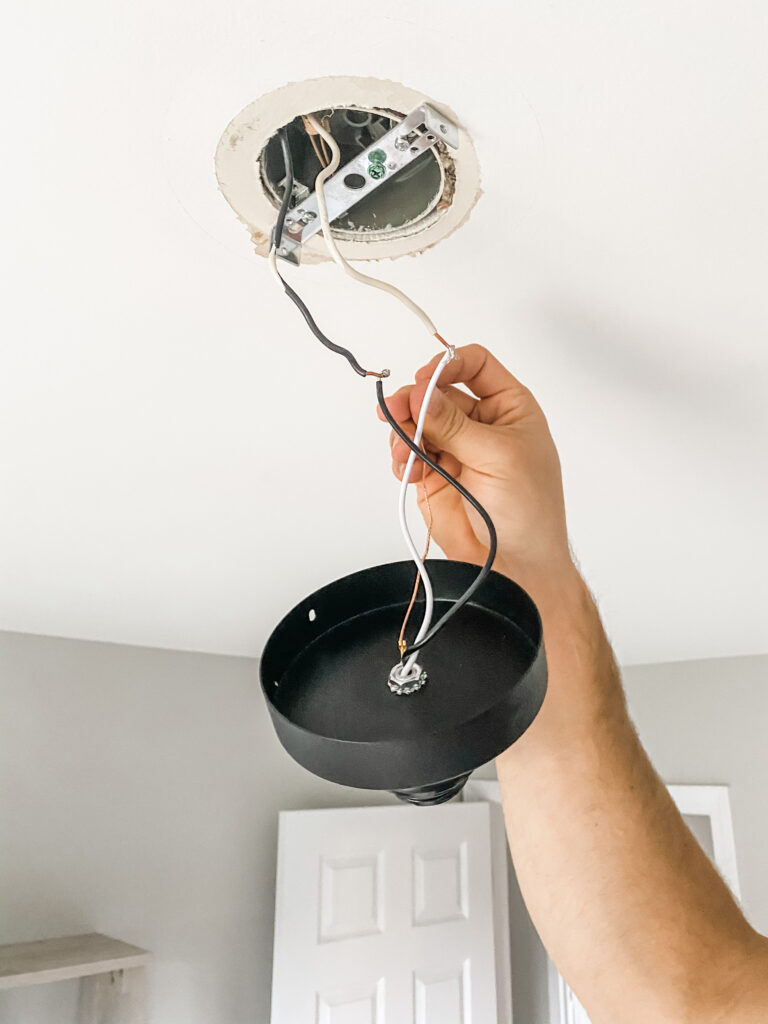
Most of the time all you will need to remove the old fixture is a screw driver. Unscrew the old fixture, disconnect the black, white and copper wire and remove the mounting plate from the ceiling. In most cases, your new fixture will come with all the hardware that is required. Once removed, all you should be left with is the black, white and copper wire.

Your new fixture will come with a mounting plate that can be screwed into the ceiling. Make sure you screw it in tight enough that it’s flush with the ceiling. This will make sure your new fixture is snug up against the ceiling.
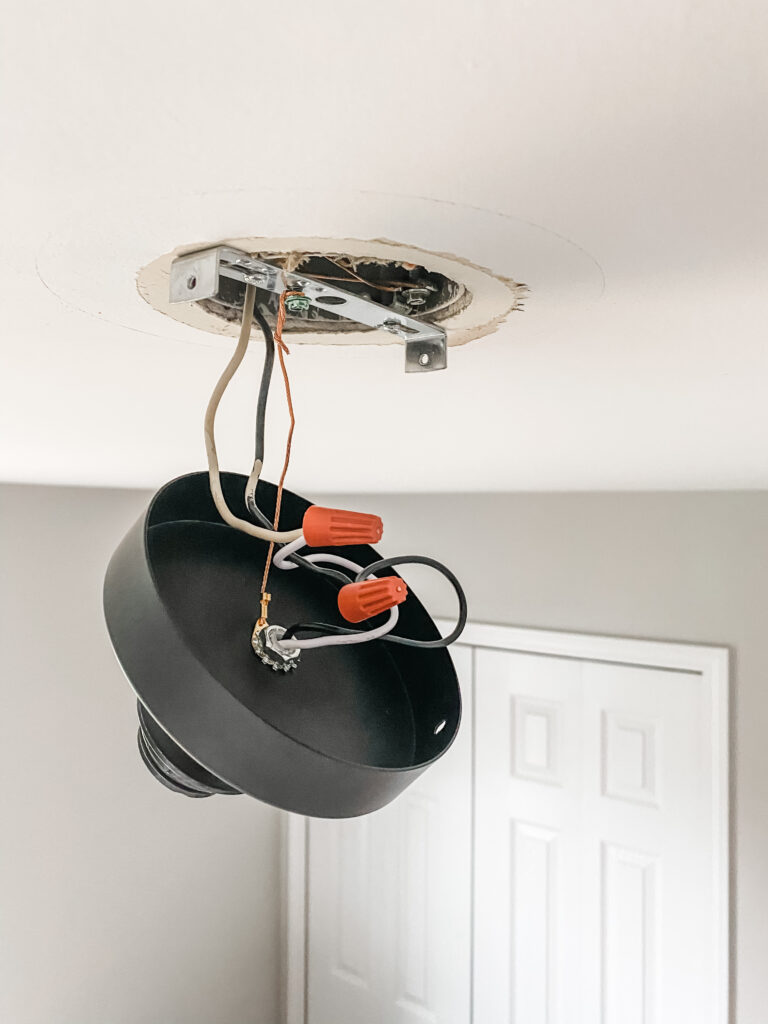
Loosen the green screw (this is for the grounding wire).
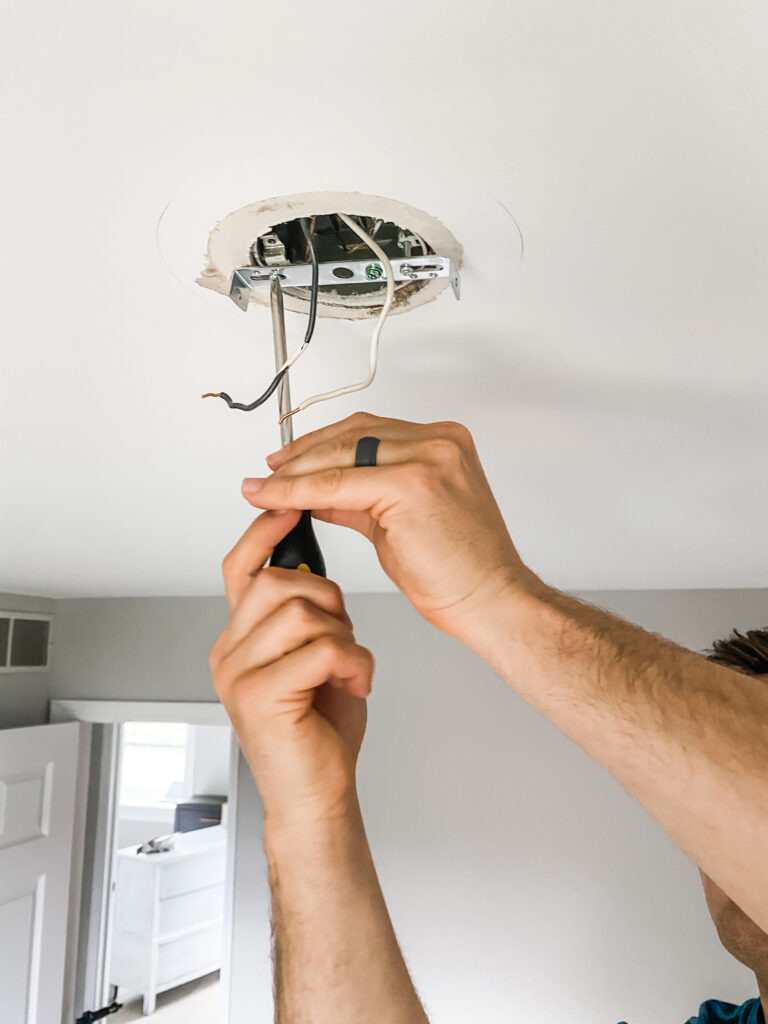
Wrap the wires around each other to connect them. Make sure you attach the black to black and the white to white. You may need to use wire strippers to expose more of the wire to give yourself more wire to work with for better connection. Use the screw caps to make sure the connection is tight. Just put the wrapped wires into the screw cap and twist to tighten. You can check the connection by tugging gently to make sure that it is secure.
Wrap the copper wire around the green screw to ground the wire and screw to tighten and secure the connection.
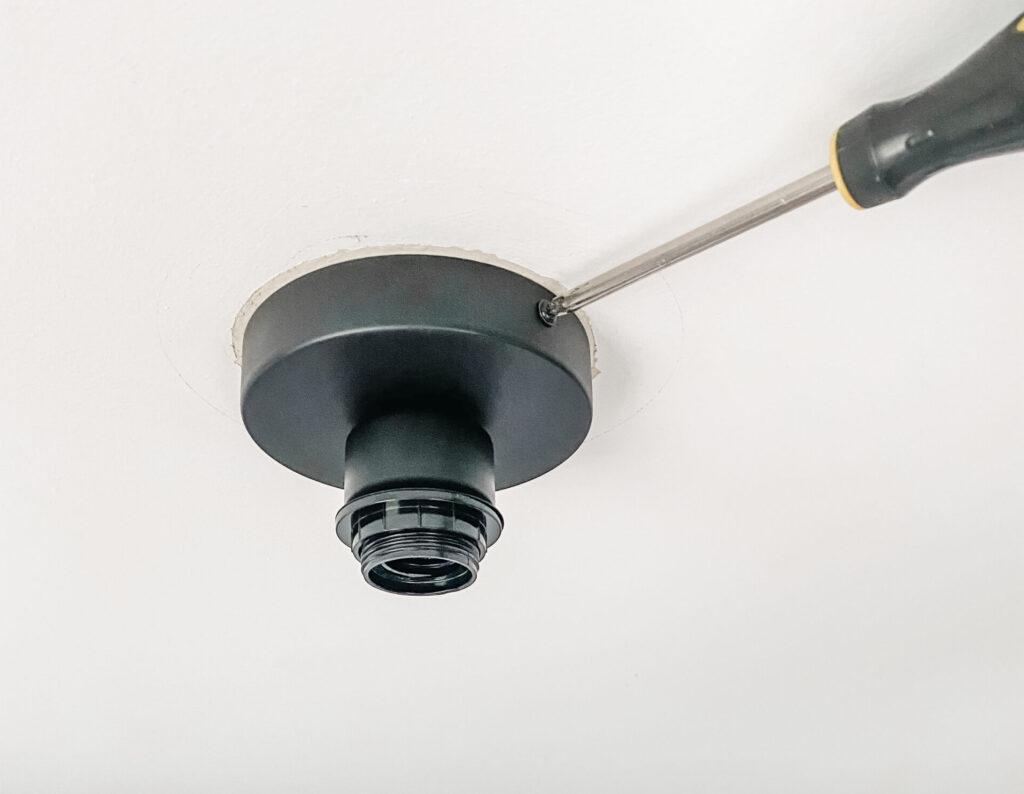
Push the connected wires up into the ceiling hole and attach your fixture. All you will need is a screw driver. Install your light bulb and flip the switch inflatable games!
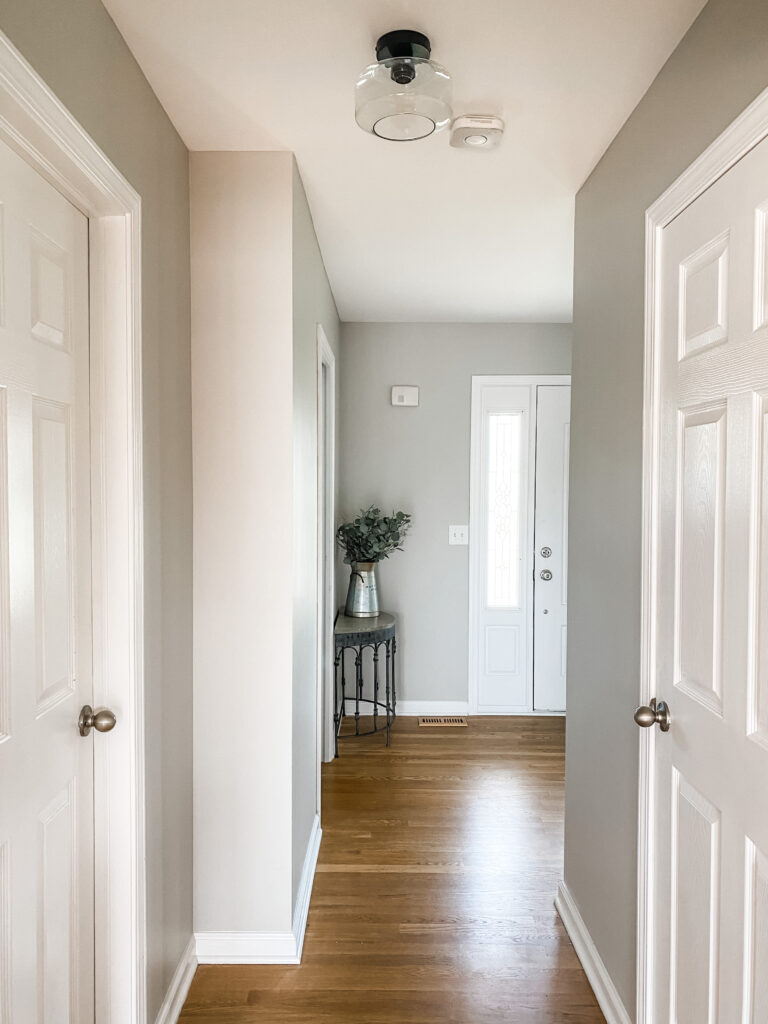
Your new fixture might be smaller than the one you had their previously so you will have to use some ceiling touch up paint to fix it. Note this when selecting a fixture if you aren’t wanting to retouch the ceiling.
Ta-da! New light fixture! I promise if we can do this, you can do this!