Beginner Friendly Projects, DIY + Projects, Home, Organization, Projects on A Budget, View All, Weekend Projects, Workshop


I was quoted $350 for wedding bar signs for my sister in laws wedding and thought… hell no, we can DIY that for WAY CHEAPER. I put all 6 of these signs together in about an hour for under $100!

I ordered most of my supplies from Amazon, except the wallpaper which is from my exclusive collection Wall Blush. My sister-in-law and I designed this elegant floral print specifically for her wedding and I’m so obsessed with how it turned out! We’re using the pink for these signs, but it is also available in beige, green, and blue. To save extra money, I created the signature drink signs in Canva using pictures of her dog, Romeo, then had them printed at FedEx. There’s tons of similar customizable pet-themed cocktail signs available on Etsy too!
To start, I used a panel of the Chelsea Luxe Traditional wallpaper and laid it on a flat surface. Then I sprayed ultra strong, quick-drying adhesive on the back of the wallpaper and firmly pressed the easels face down onto the wallpaper. Once the adhesive dried, I used scissors to cut a square in the walpaper around the easels, then folded the excess around the edges and secured it to the back of the easels.
I used a paper cutter to cut the signature cocktail and bar signs into equal sizes, then used double sided tape to place them onto the easels. To add an extra touch of elegance, I found wax seal stickers on Amazon and placed them on top of the prints. They are the perfect finishing touch to a really simple and budget-friendly DIY for your wedding!

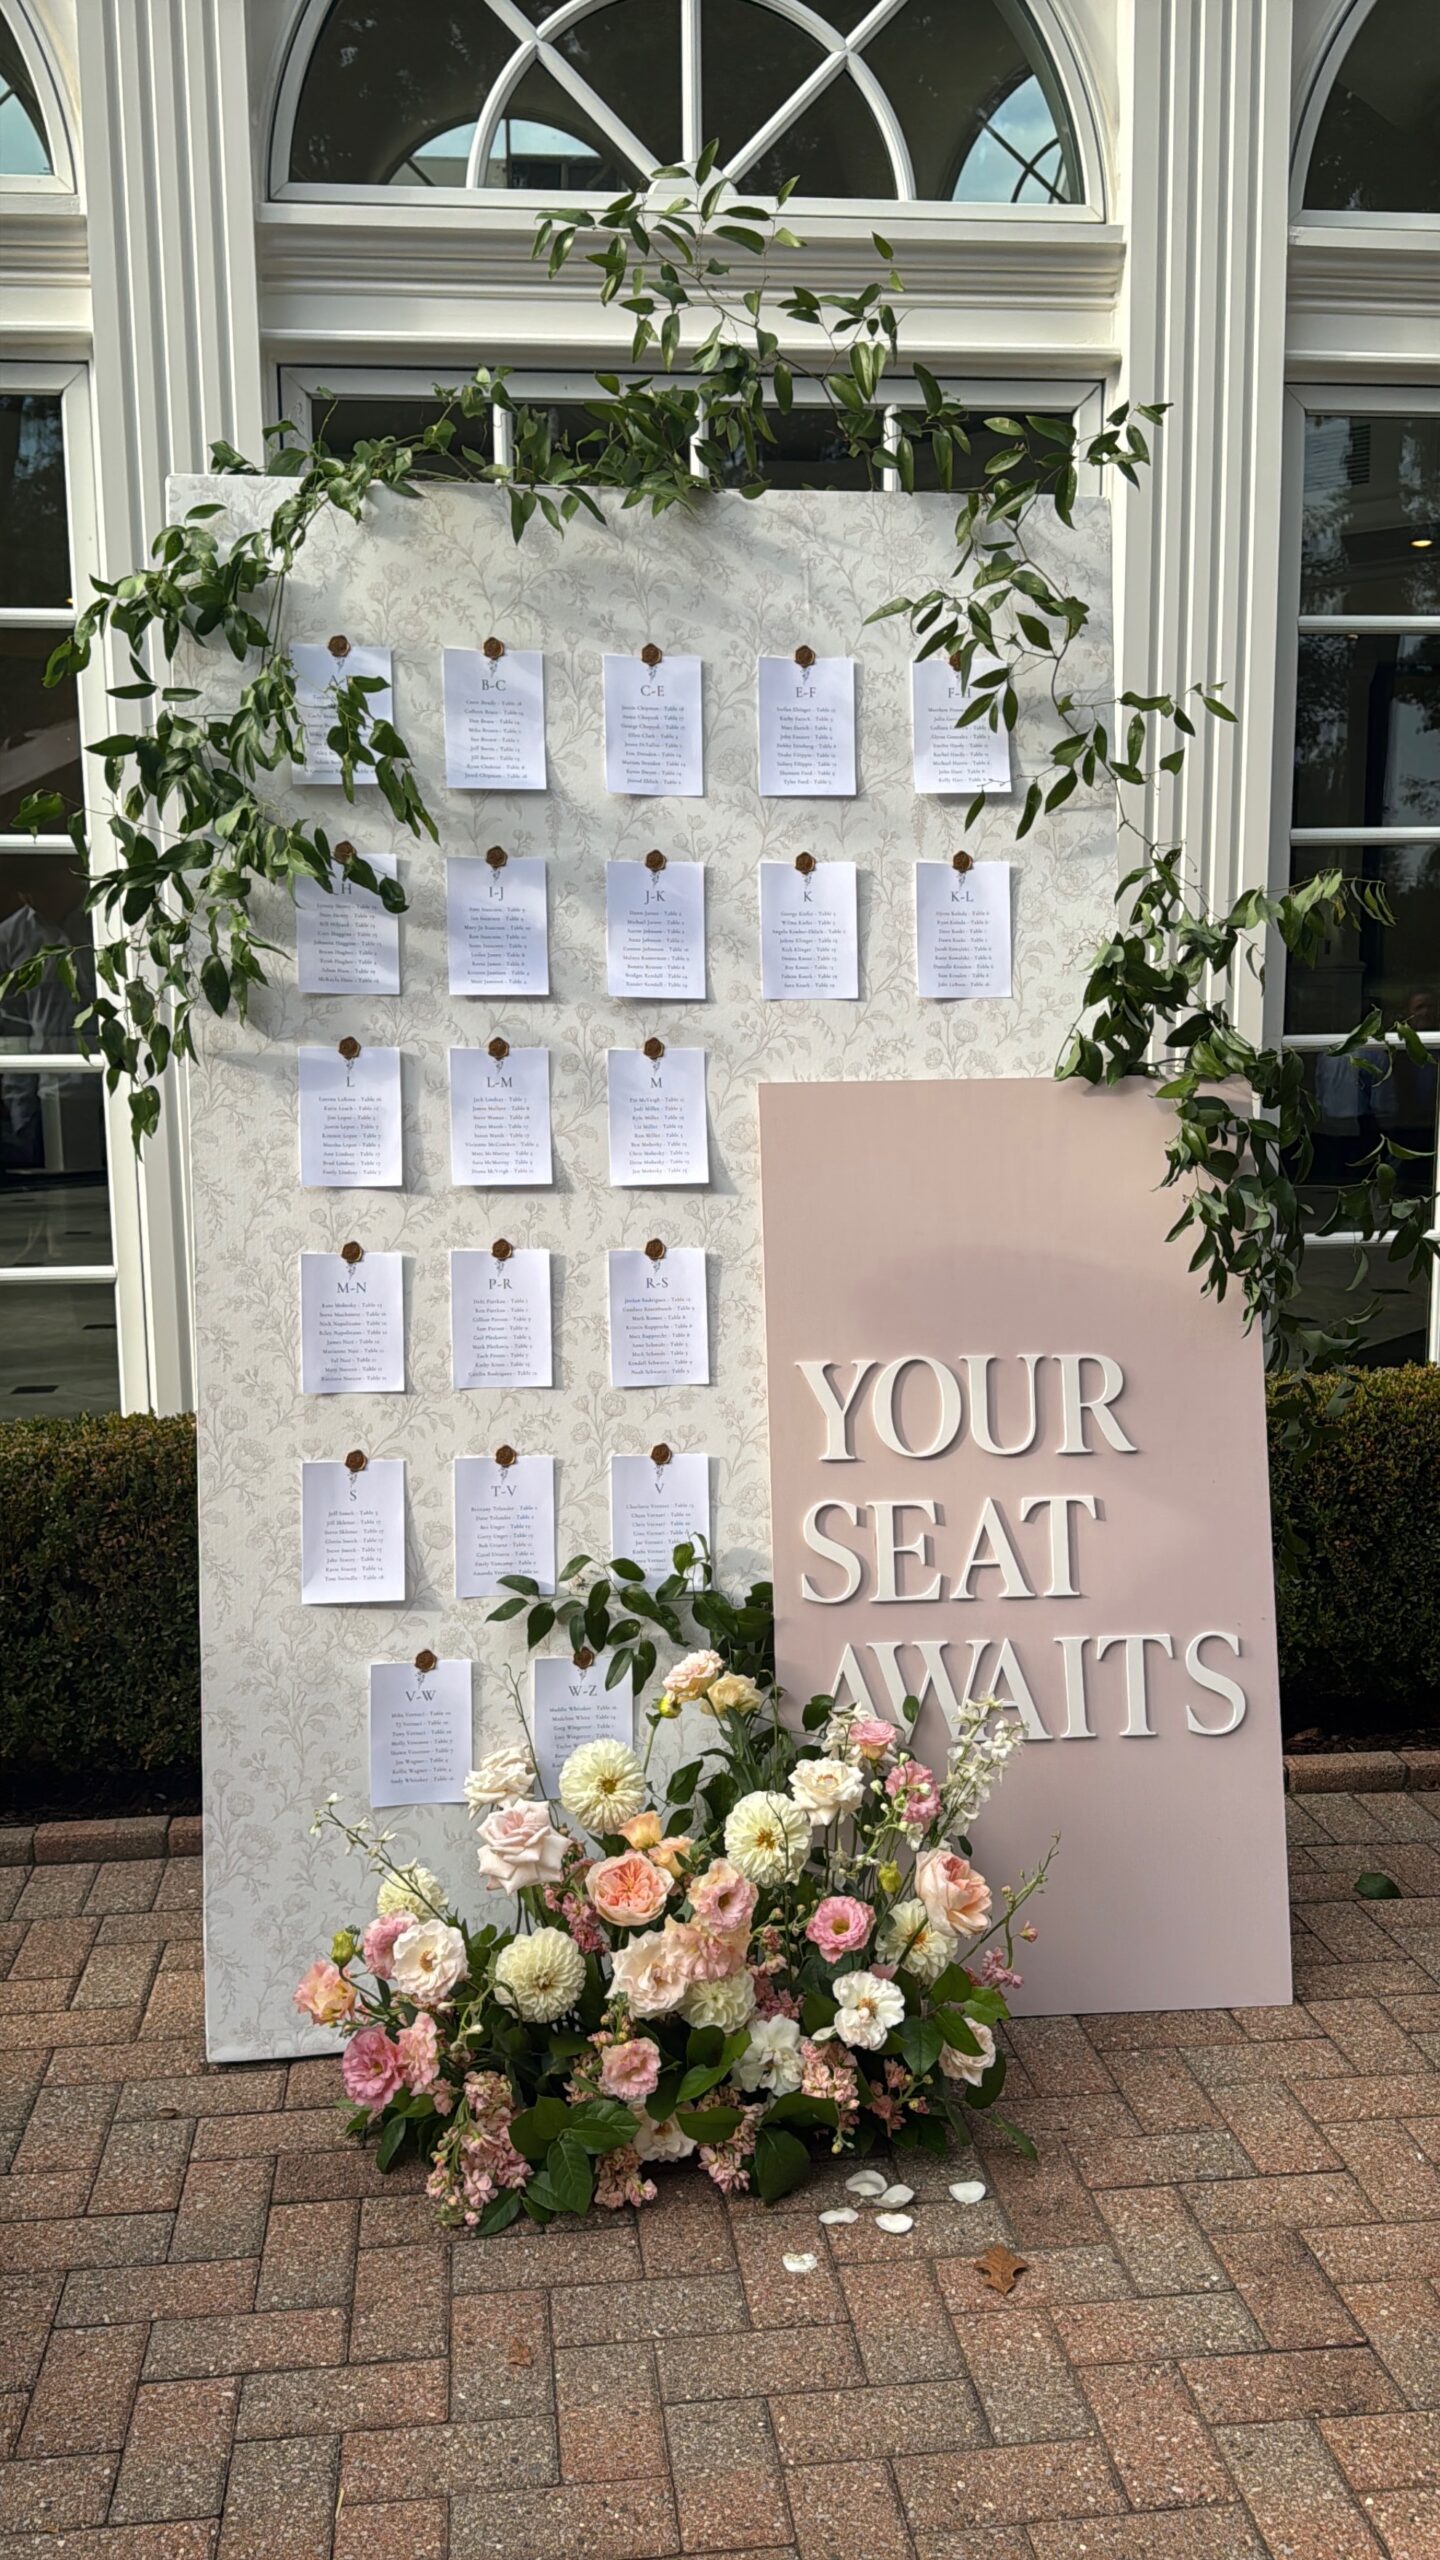
Using this picture as my inspiration, I started by using 4×8 foam insulation board from Home Depot for the wallpapered part of the sign and a sheet of 1/2 inch birch plywood for the “Your Seat Awaits”. I used my jigsaw to cut both to the size I wanted then used a detail sander to smooth the edges of the plywood.

My sister-in-law Chelsea and I created a custom floral wallpaper specifically for her wedding. It’s called The Chelsea and is part of my exclusive collection with Wall Blush. I used the traditional application paper for this project, so I started by brushing wallpaper glue onto the insulation board. Then I laid each wallpaper panel, making sure the pattern lined up and used the squeegee to remove any air bubbles. I folded the paper around the corners, similarly to how you would when wrapping a present. Then I used my squeegee to make crisp line along the edges.

I ordered wooden 3D letters from Amazon to write out the “Your Seat Awaits”. I used True White spray paint by Magnolia to paint the letters. Then I used the Blush Pink by Rustoleum paint for the birch plywood. Once the paint was dried on both, I used spray adhesive to attach the letters to the board.

First, I built a triangle on the ground using 2×4 boards and screws. Then I attached two vertical 2×4 boards together using hinges for the stand. The triangle keeps the “leg” in place so it doesn’t fall down, and the vertical board gives the sign a solid surface to lean on. I used velcro command strips to attach the boards to the sign so that it could be easily disassembled for transport.

The table cards were the finishing touch. I had them printed on Etsy for a very affordable price and used wax seal stickers from Amazon to hang them on the foam board. I absolutely love how this sign turned out, and more importantly I think Chelsea will love it too!