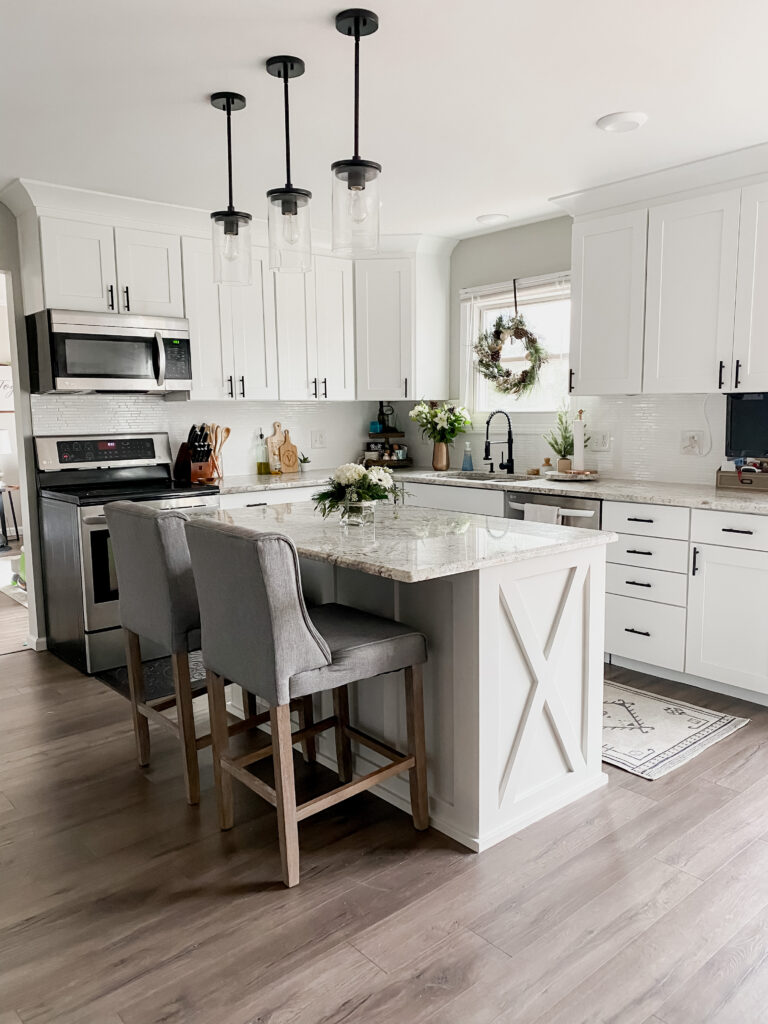


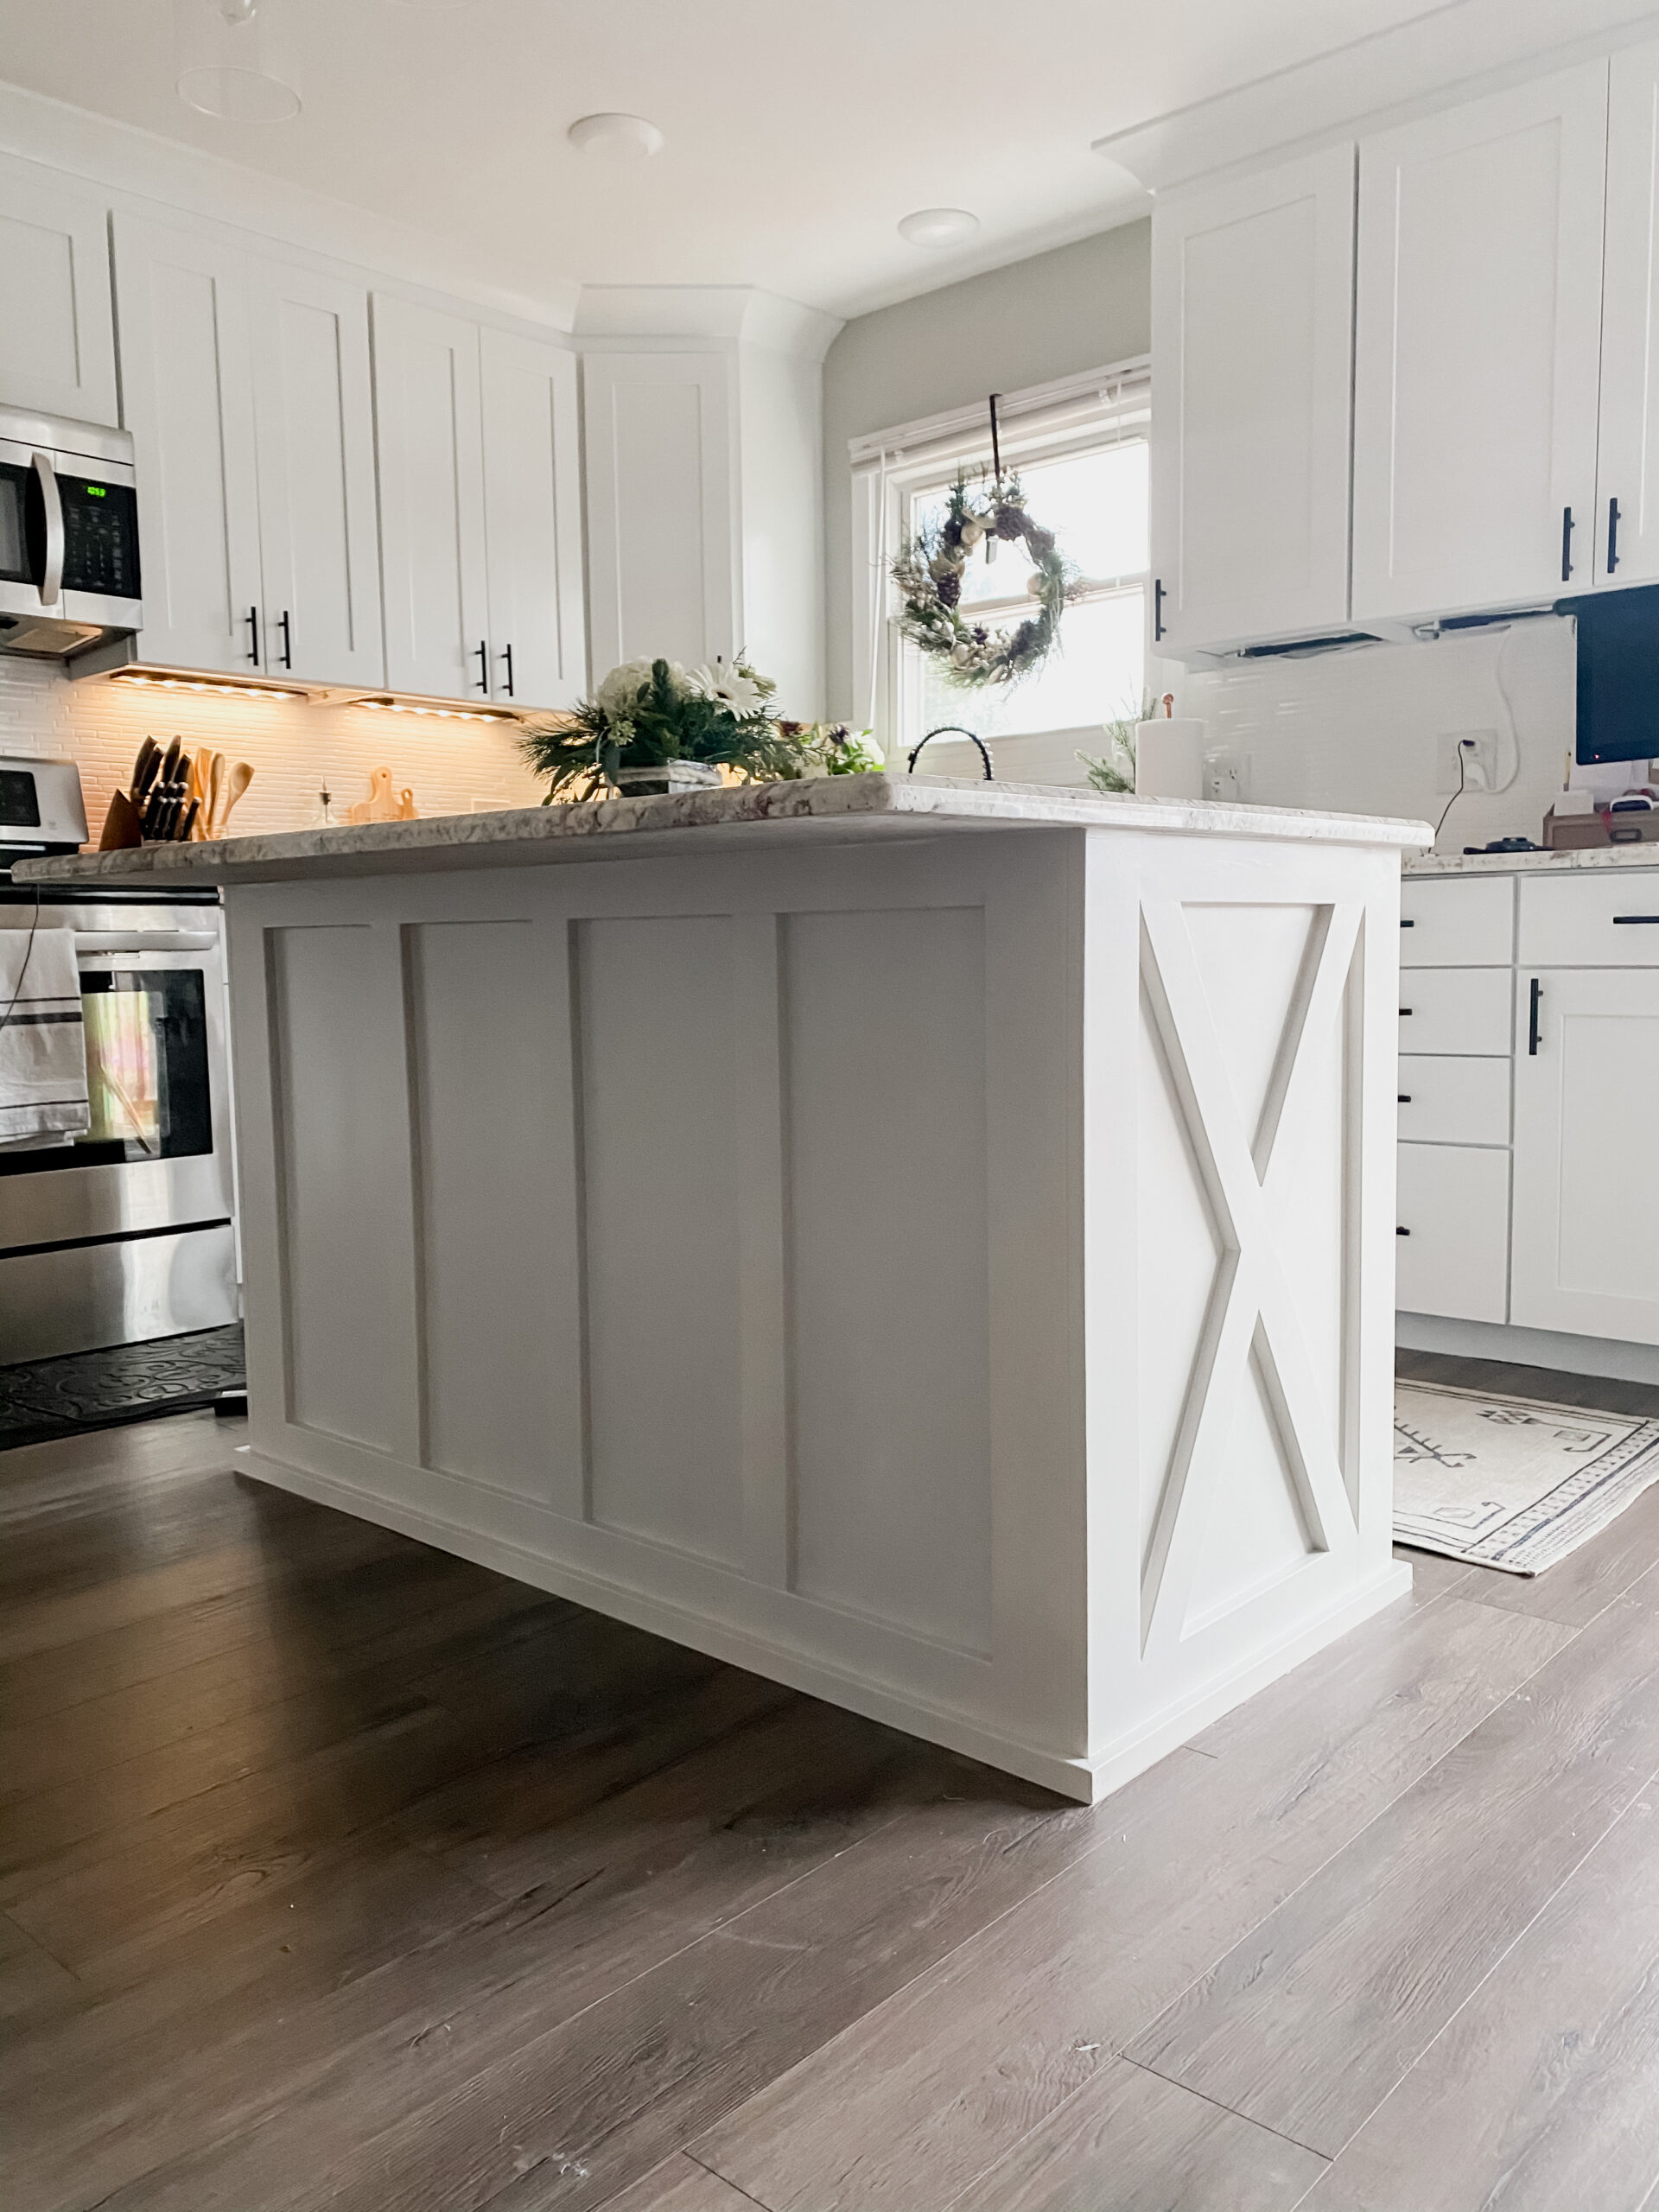
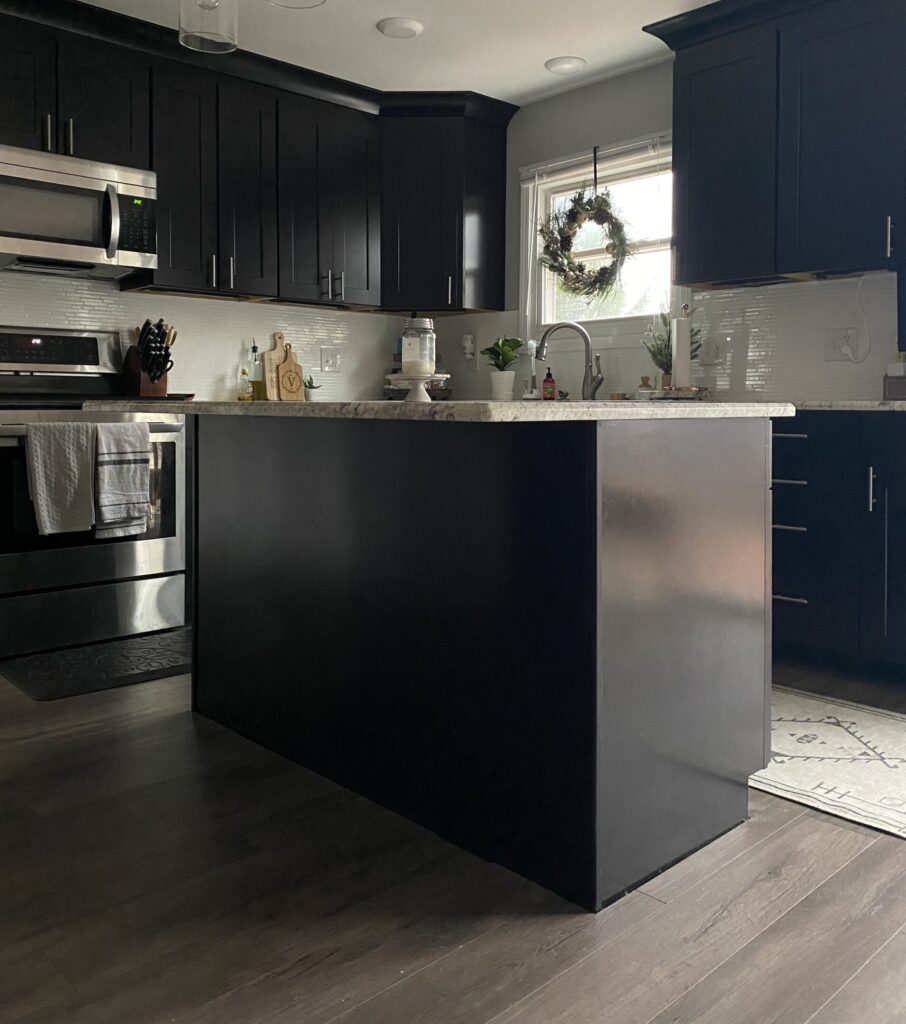
We decided to have our cabinets painted and before the painters spray I wanted to add some wood detailing to our island to make it look custom. This project was much easier than expected and took our island to a whole new level! Follow the tutorial below and also check out my story highlights on instagram for more details!
![]()
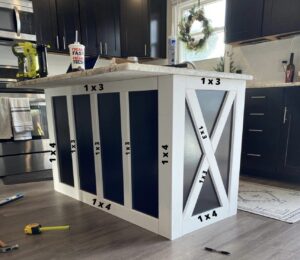
Start by framing out the edges. Use your nail gun and put the nails in at different angles so that it will grip. I measured and made cuts as I went to make sure they were exact. I used 1 x 4 pieces on the corners, edges and bottom and used 1 x 3 for the top edge and for the batten on the front of the island. I knew I wanted 4 panels on the front so I started by putting the first board in the center of the island front.
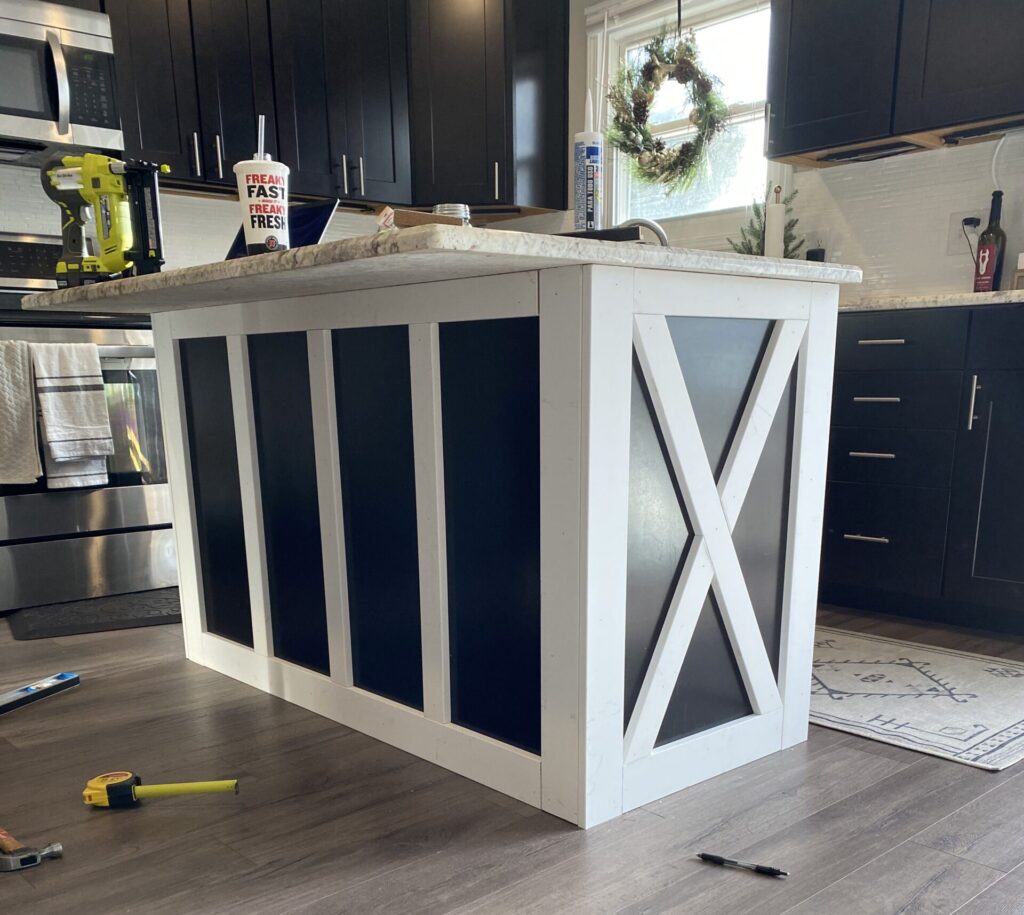
I put my first board in the center of the island and then measured the center between each one to get them perfectly spaced. You can do as many panels as you would like for your taste. To add the X, I used an angle finder and used my miter saw to cut the boards. I used 1 x 3 for the X.
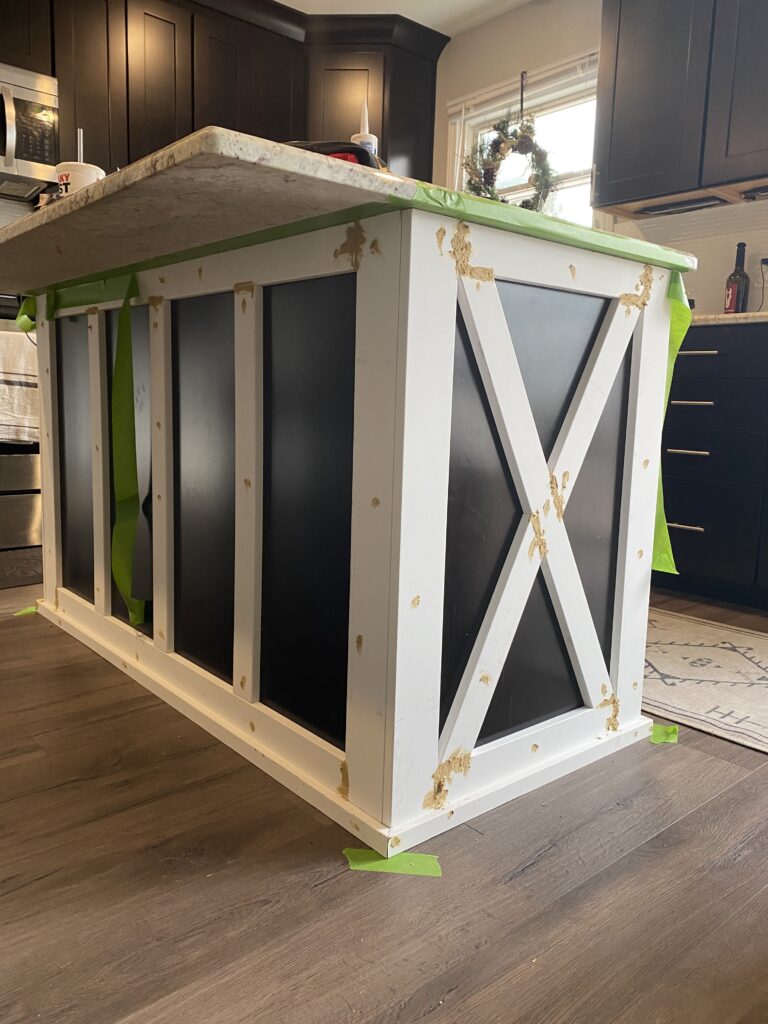
I felt like the island needed a base piece of trim in order to look complete. I just cut one of my 1 x 3 in boards into a 1 x 1 board and mitered the edges to get a bottom piece of trim. You could always use trim molding. Do this part last so it covers the first edge pieces. You want it to stick out farther. Use your wood filler to fill any gaps and nail holes. Then use your sander to file it down smooth.
Paint your island your desired color and bam!! Custom island for $36
![]()