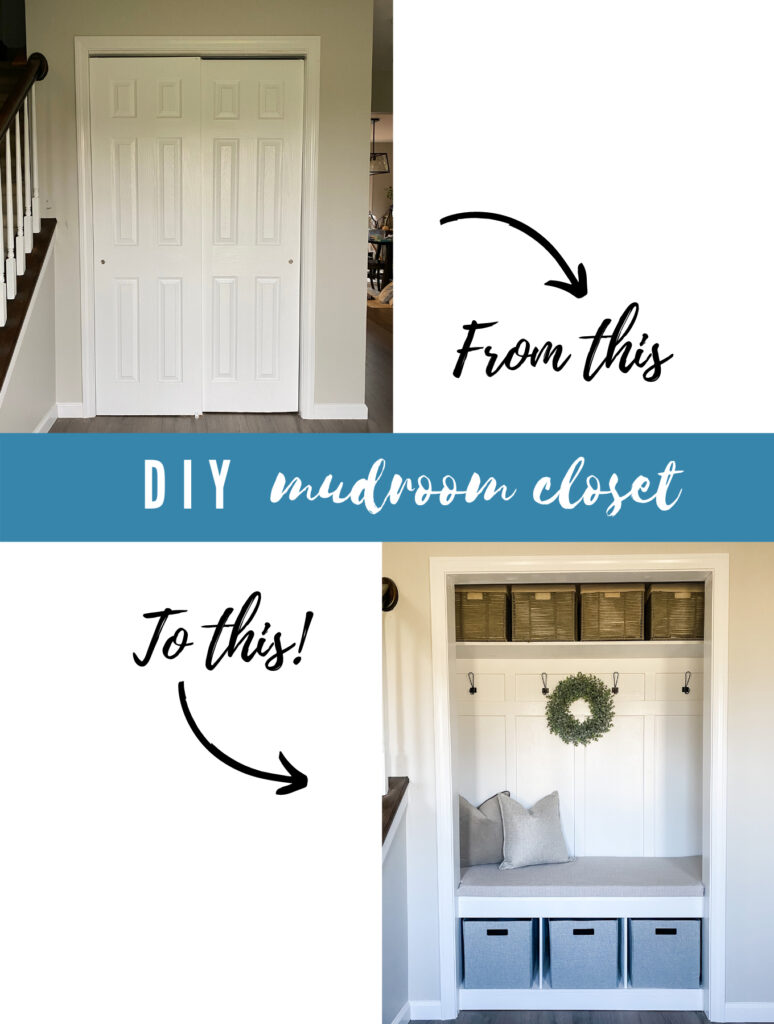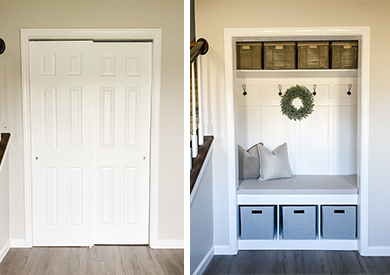


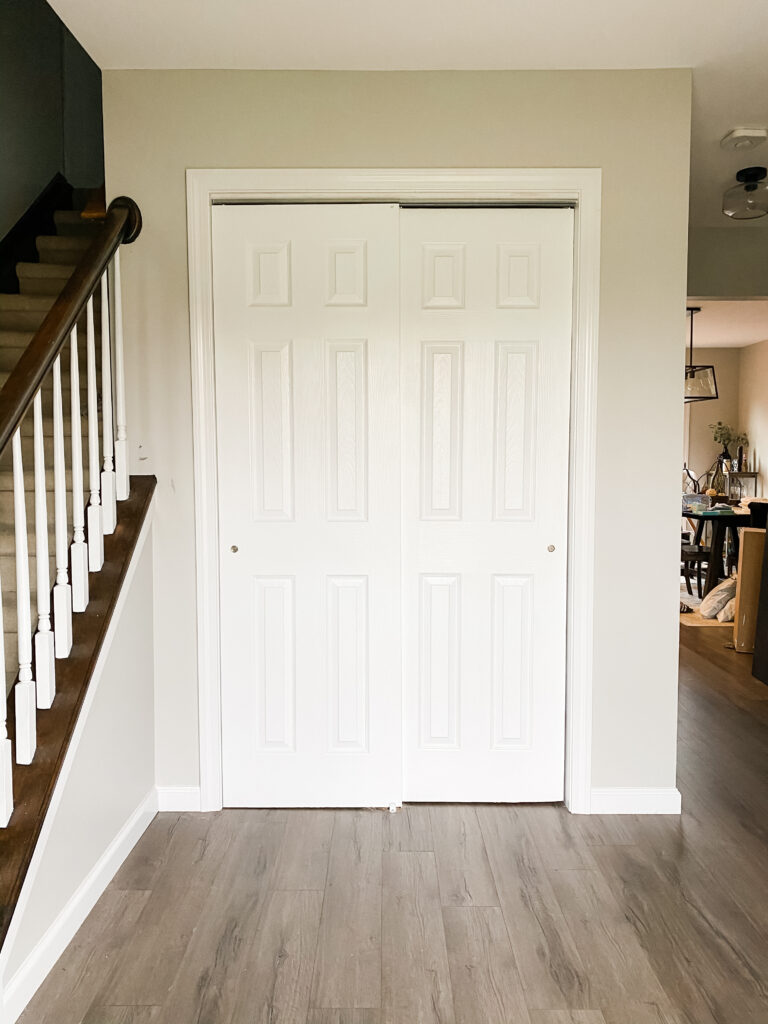
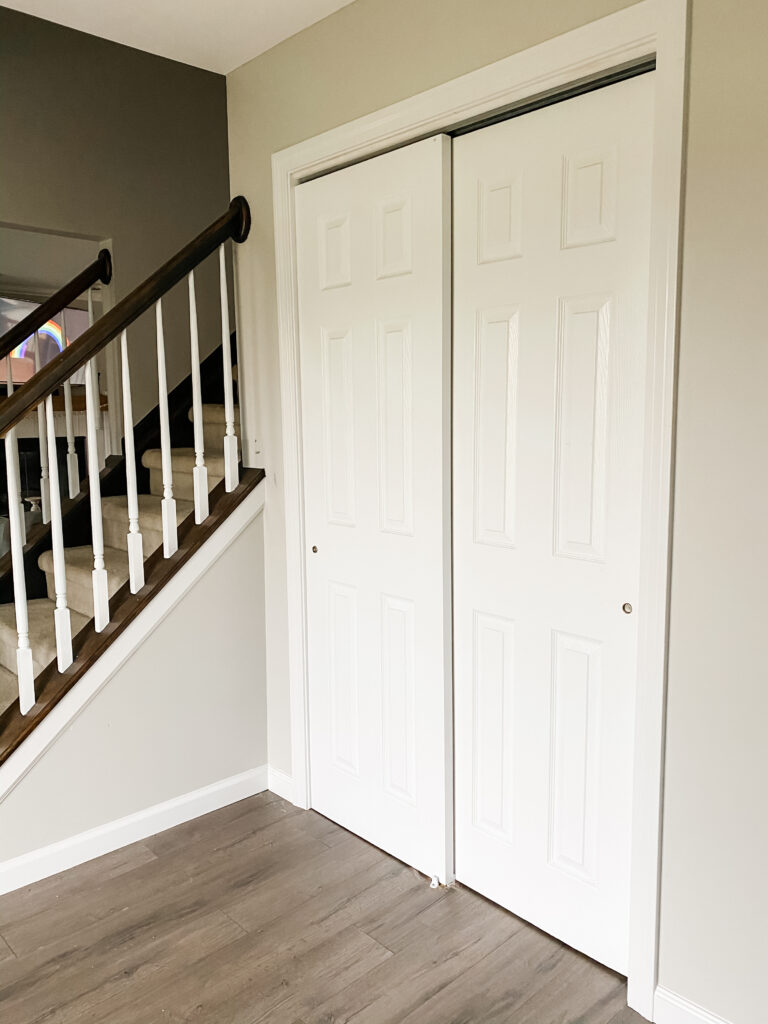
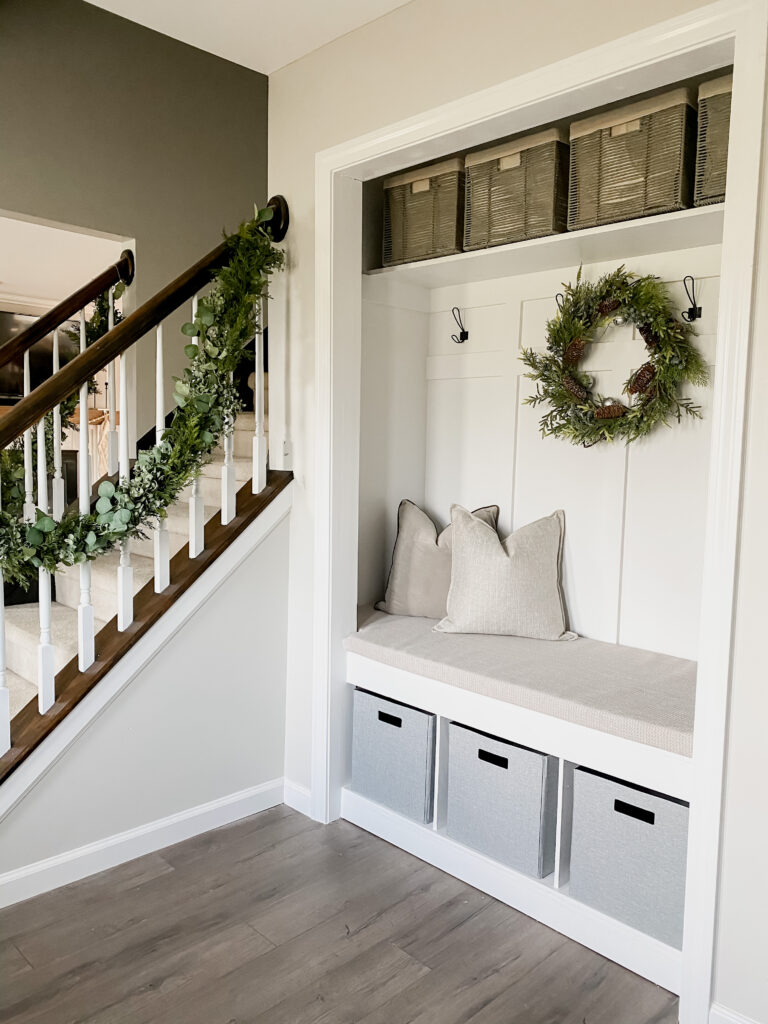
Right when you walk into our house we have this coat closet. Yes, it is good for storage but it doesn’t do much for the aesthetic. I had been wanting to put in a DIY mudroom closet somewhere that we could sit to put our shoes on, hang coats, etc… but I had never taken on a DIY project this big.
I say it often, sometimes I feel like a “fake DIYer” lol …let me explain. I am crafty, love transforming thing but I’ve never tried to build anything. Quite frankly… power tools scare me a bit. But I finally got the courage to just go for it and I am SO PROUD of what I built. If you are reading thing and considering a mudroom closet makeover… I promise you can do it if you follow these steps! The whole process took me about 4 days.

This project requires a ton of planning. I drew out a diagram on a scrap piece of paper and took a bunch of measurements. This step is important. Measure twice (or 3 times!) and cut once.
Once I had my measurements written out, I made a list of all my materials that I would need to get from the store. Once you are at the store, you can calculate how much wood you need of each item from your measurements diagram.
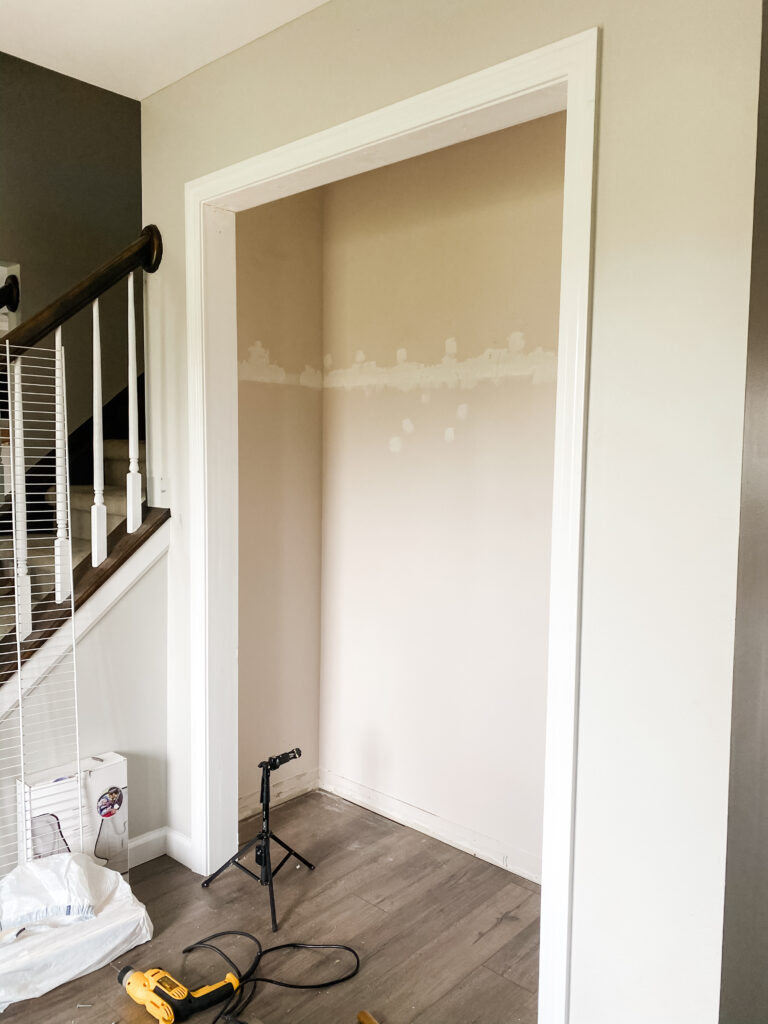
Before you can begin building anything you need to demo your current closet. Take the doors off, remove any shelving and remove the baseboards so that you have a fresh area to start with. If you have never removed baseboards before… I promise it is so easy! Click here to see it. You just take a utility knife and cut along the baseboard. This makes sure that your caulk/paint is separated from the board before you pull it off the wall. Use a trim puller or a chisel and hammer behind the baseboard. Pull slightly and you’ll be able to pop them right off.
After you demo and get everything out of the closet you will want to take some spackling paste and patch any holes that were left in the walls. After it is dry, you will take your sander and sand it until the surface is smooth and blends with the wall. Thankfully our closet had sliding doors so the trim was in good shape. If your closet had doors, you might need to remove some of the doorframe and replace with pine boards so its smooth.
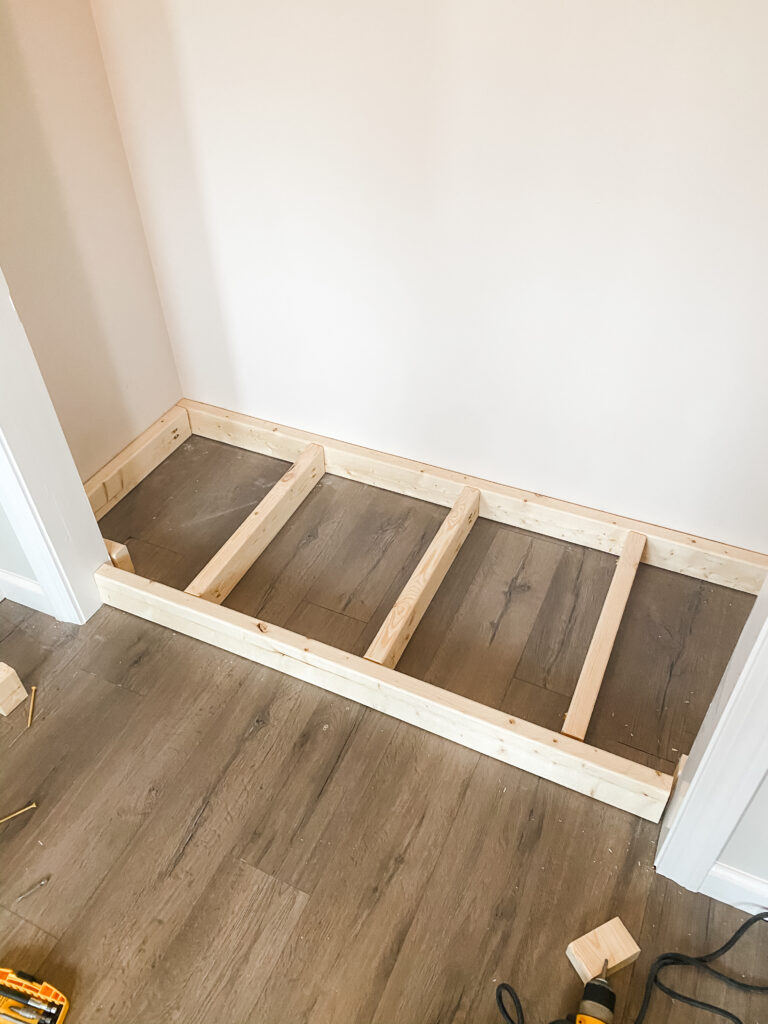
Cut your 2x4s using your miter saw so that you get something that looks like this. I started by measuring the back wall length and then measuring the others as I made the cuts so that I didn’t make any mistakes. Do not assume that your walls are the same lengths on each side! Mine were different by almost an inch, so make sure you measure both.
Use your Kregjig to create pocket holes in your 2x4s. I watched this video to figure out how to use it. It’s a lot easier than it looks. I was super intimidated at first. This is so that you can attach your boards together from the inside instead of having to screw from the outside of the wood. Once you create all of your pocket holes, screw them together with the decking screws.
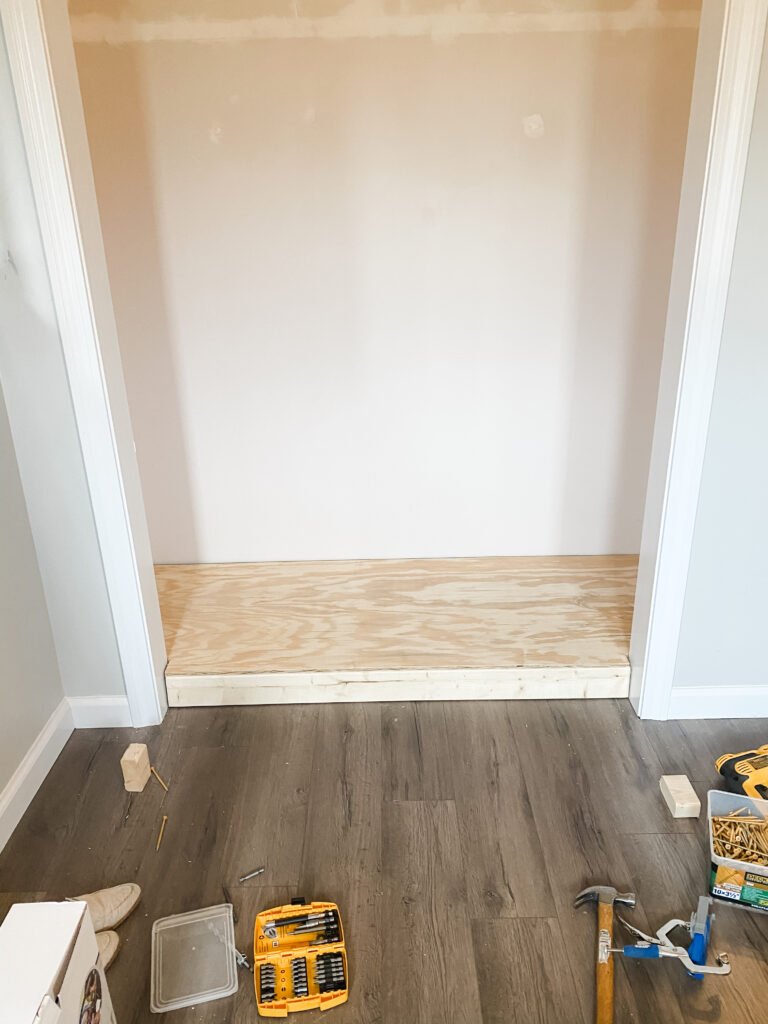
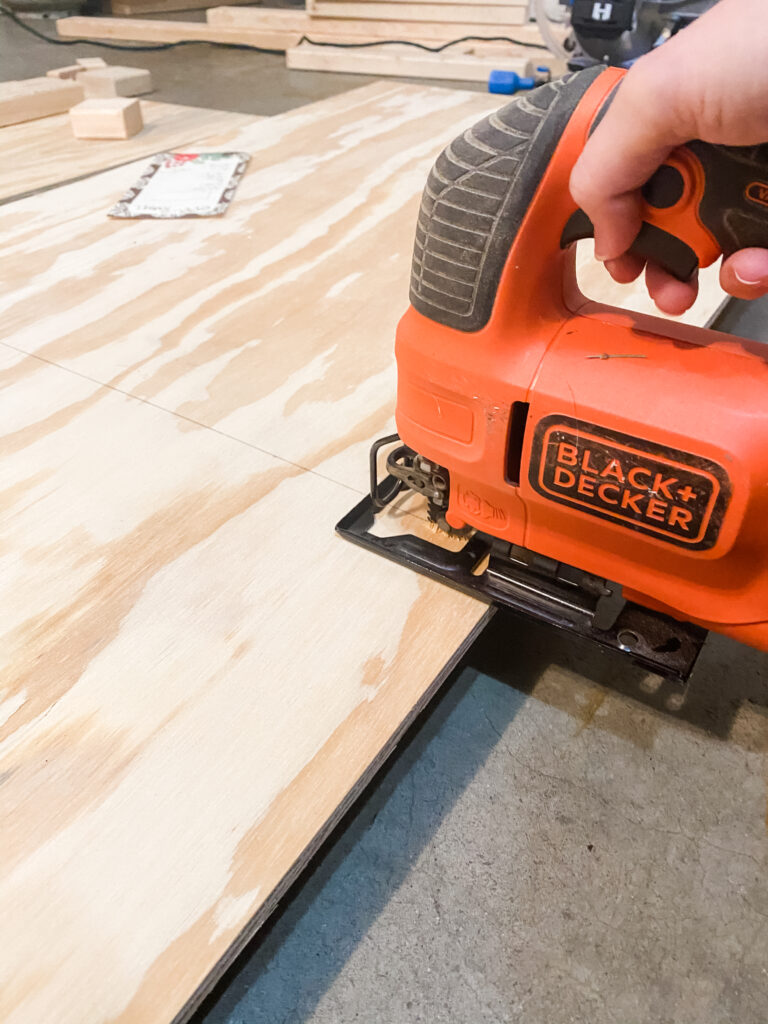
Using the plywood that you bought, use a jigsaw to cut out the indents needed. You will want your bench to sit about halfway in the entryway of the closet so that it has that “built-in” look. Be sure to sand the top of the board so it doesn’t feel rough.
I highly recommend painting as you go. This will make it easier than trying to get in all the areas after the whole thing is built. Before I installed the bench, I painted all of the walls and the bottom base.
To build the base, you will create the same 2×4 platform that you created for the bottom. Make sure that your cross beams are in the place where you will want the dividers. You will use these to attach your dividers. Most bins are standard 13″ x 13″ so you can decide how many can fit in your space and go from there. Make sure you screw your pocket holes in before you start assembling.
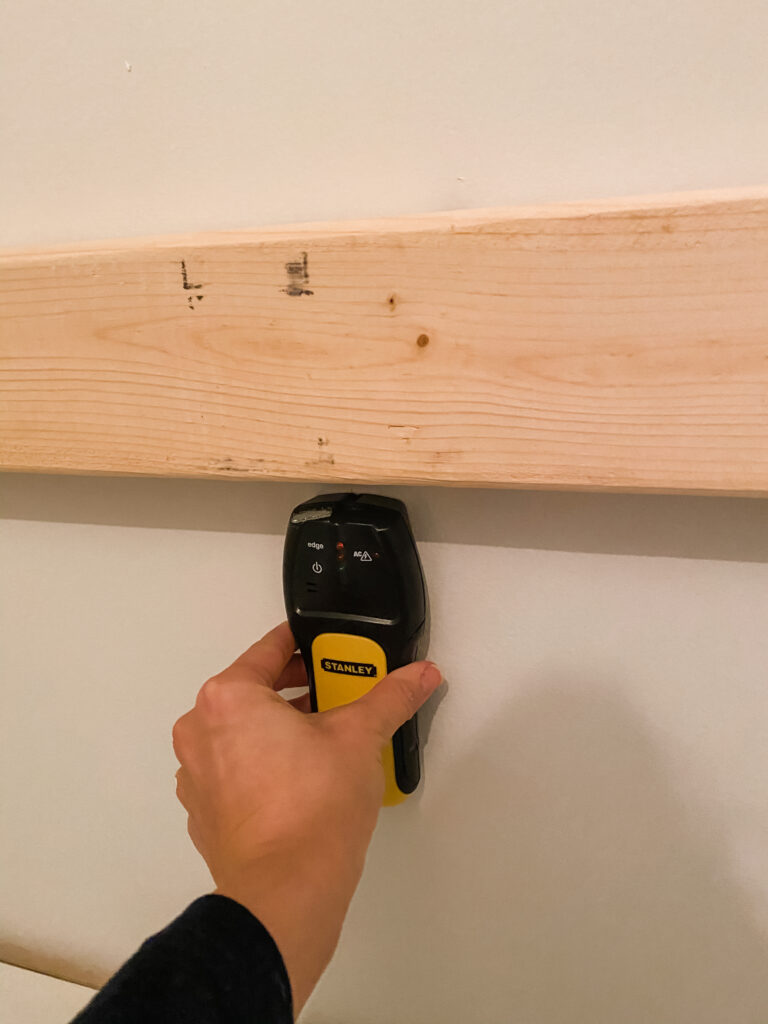
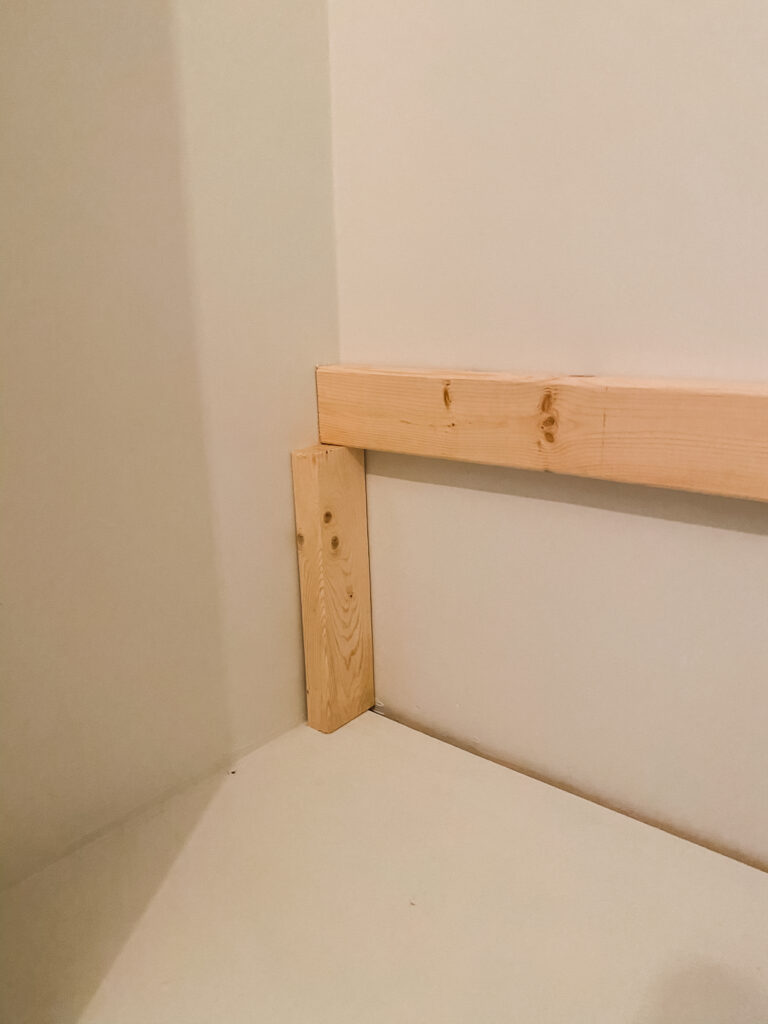
You will want to locate the studs. This is how your bench will support the weight. After determining the height I wanted for my bench, I created 4 support beams using left over wood for each corner. It is probably not needed, but it can’t hurt and it will provide extra support.
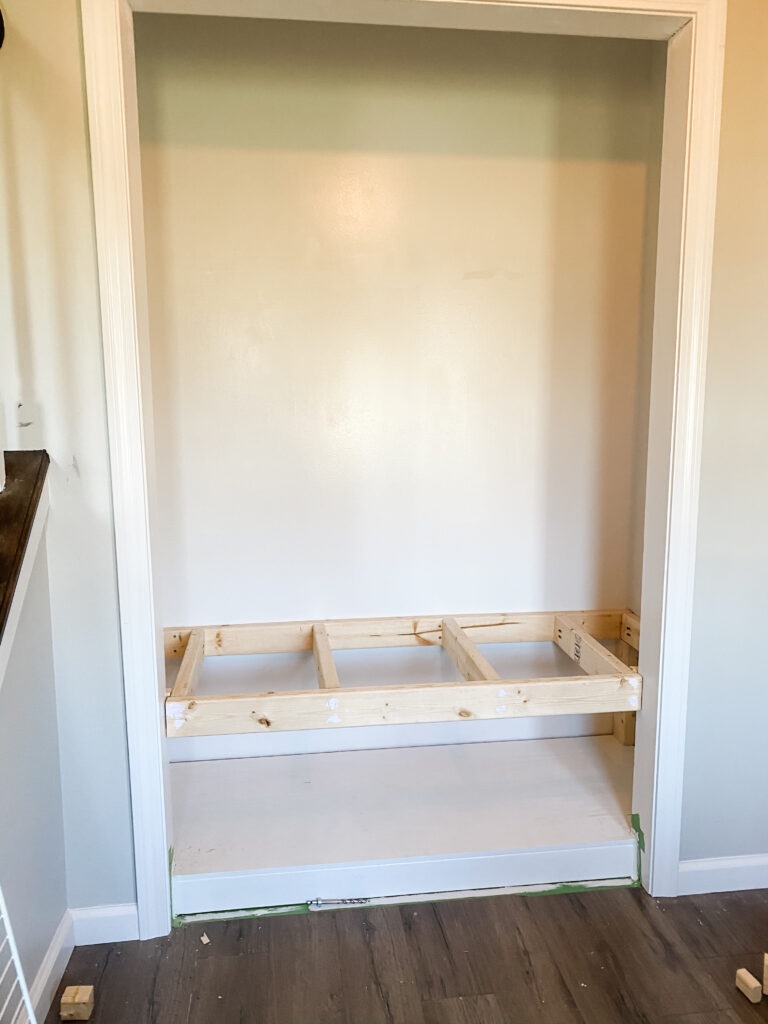
Put a corner support beam in each corner and rest your long board on them. Screw them into the studs using 2 screws per stud for extra support.
Continue building the base board by board until you get something like this:
I ended up screwing through the front of this board because it was easier so I just used wood filler to fill in the holes made by the screws. I sanded flat once it dried.
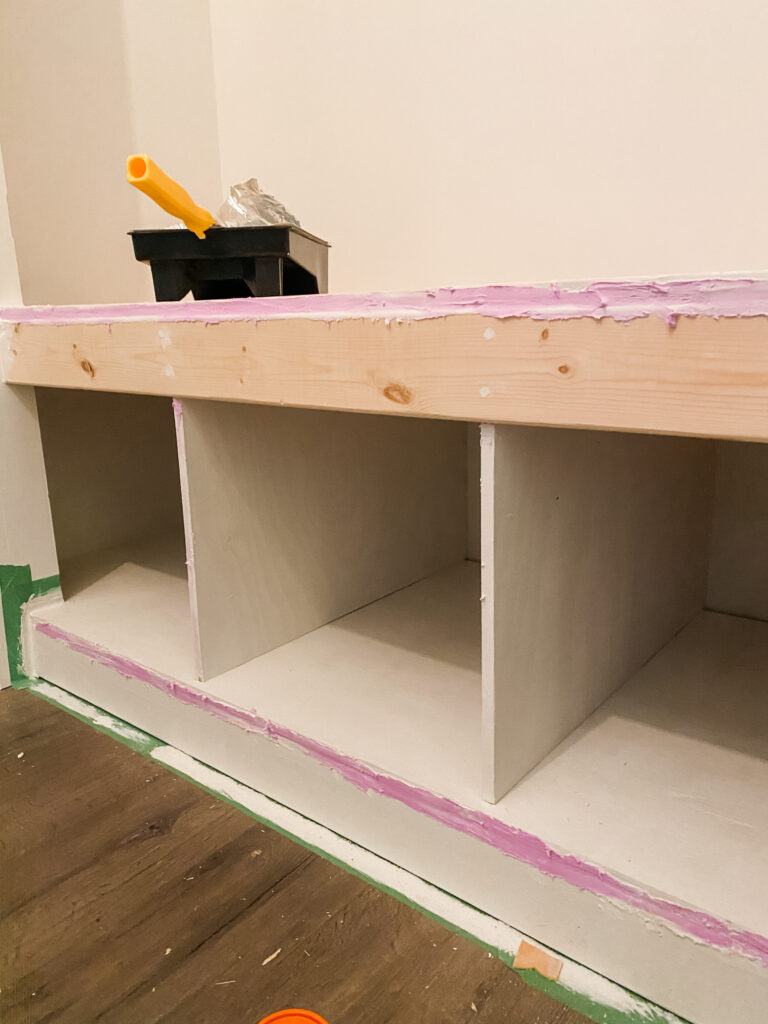
This part looks more intimidating than it is. Once your bench is attached, measure the height between the bottom platform and the bench. Cut your dividers from leftover plywood and cut them just slightly taller than you need. Use a hammer and wedge them in between the base and the bench 2×4 cross beams. This way you do not have to nail anything or secure them. They are wedged in. After this step was complete, I used my wood filler to fill any holes and the seam on the front between the plywood and the 2x4s.
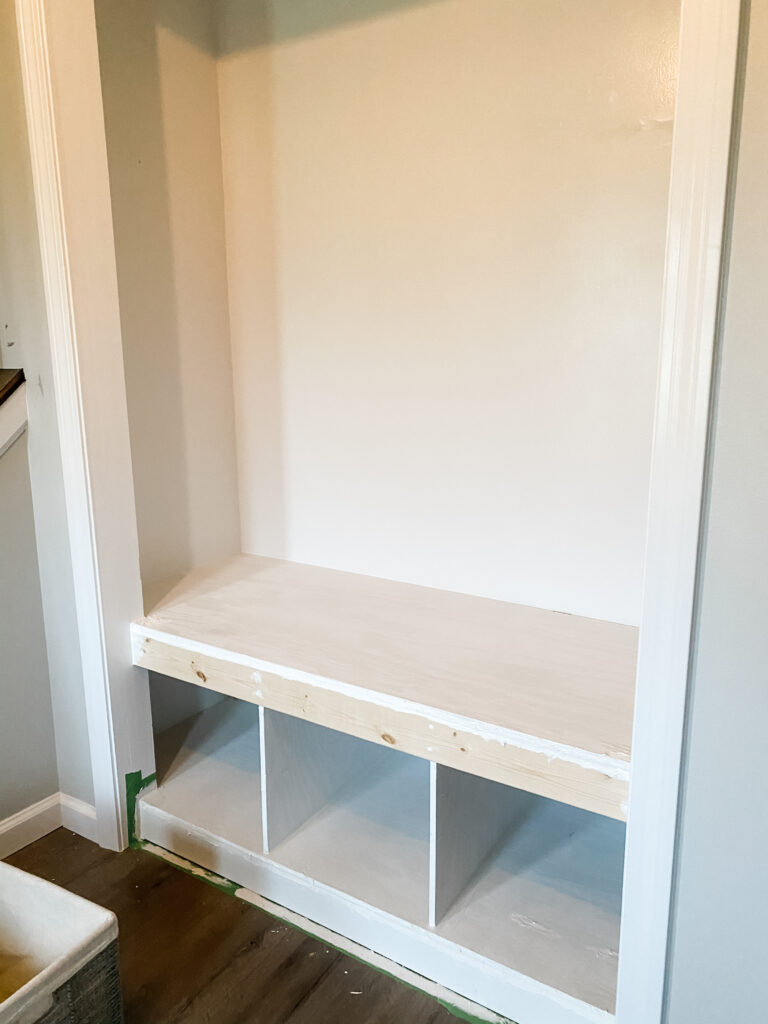
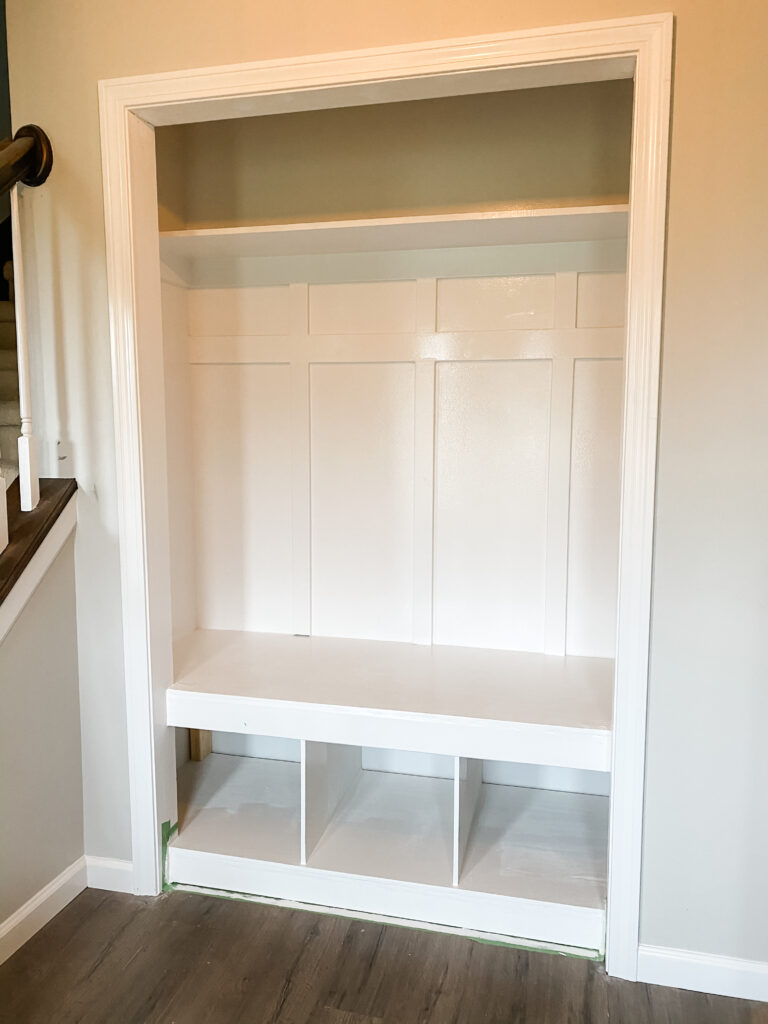
Just like you did for the bottom base, cut your plywood bench top to fit and screw it in on the sides so it doesn’t move. Paint a coat on the bench.
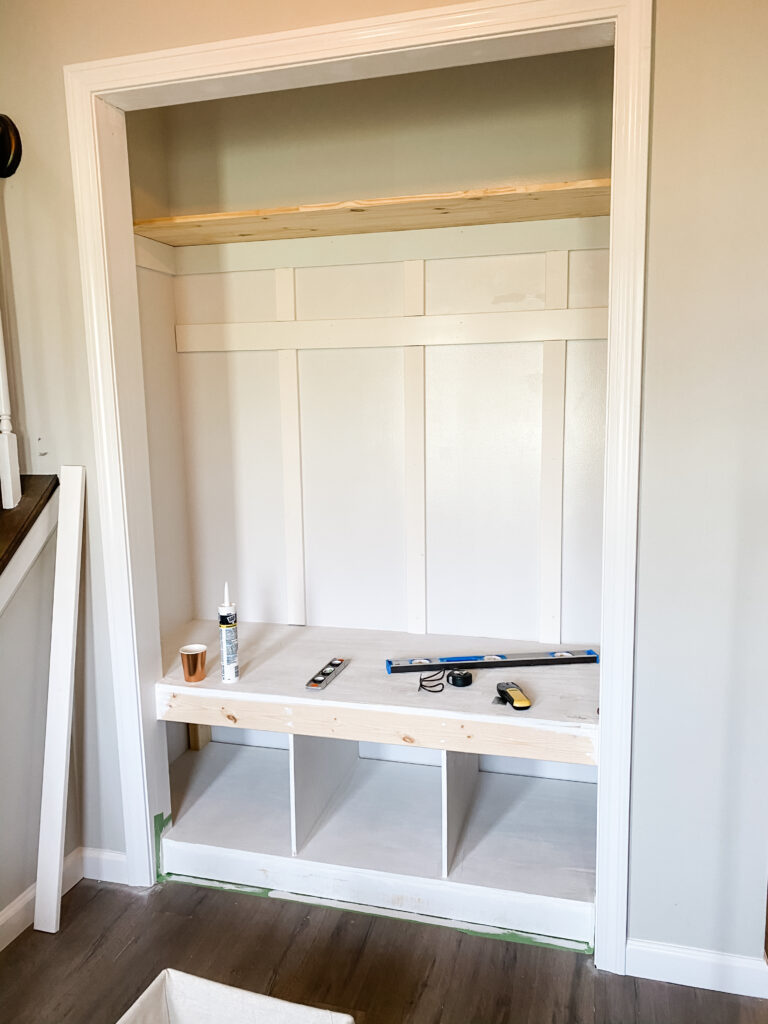
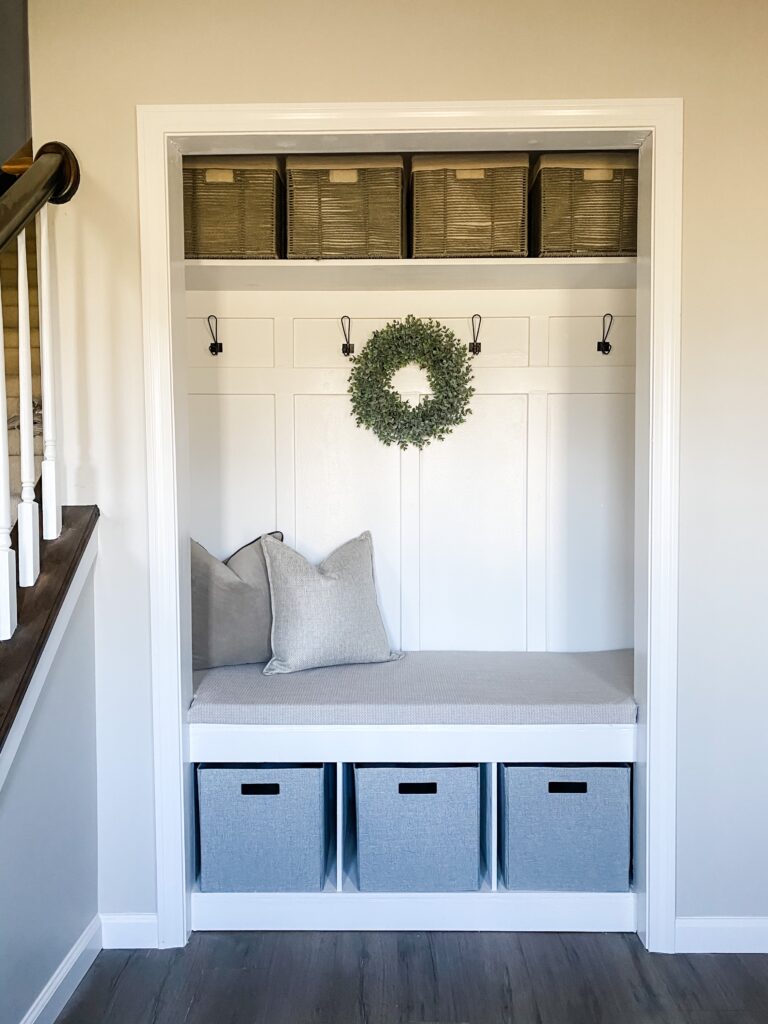
Using your primed PDF boards, cut your two horizontal boards (3.5″). Make sure it is level and use your nail gun to attach them. The top layer of board and batten is what your top shelf will rest on. You will want to make sure you get your shelf in place before attaching the last side piece of board and batten or you won’t be able to get your shelf up there. Be sure to test the height with your basket before you start so you make sure it will fit up there. Measure the vertical space for the 2.5″ boards and wedge them in. You will use a nail gun to secure them. Once all of this is done, paint the top shelf.
To get the professional look, you will want to caulk all of your seams and fill in any holes/gaps in the wood. If you have never caulked before, its easy. Follow this tutorial. After you have caulked,wood filled and sanded everything, paint another coat on everything with your white paint.
If you are making a cushion, simply take the foam you purchased and cut it to size. Attached it to a thin board and use a staple gun to wrap the fabric.
If you try this tutorial in your own space, I would LOVE to see it! Tag my instagram @comestayawhile!