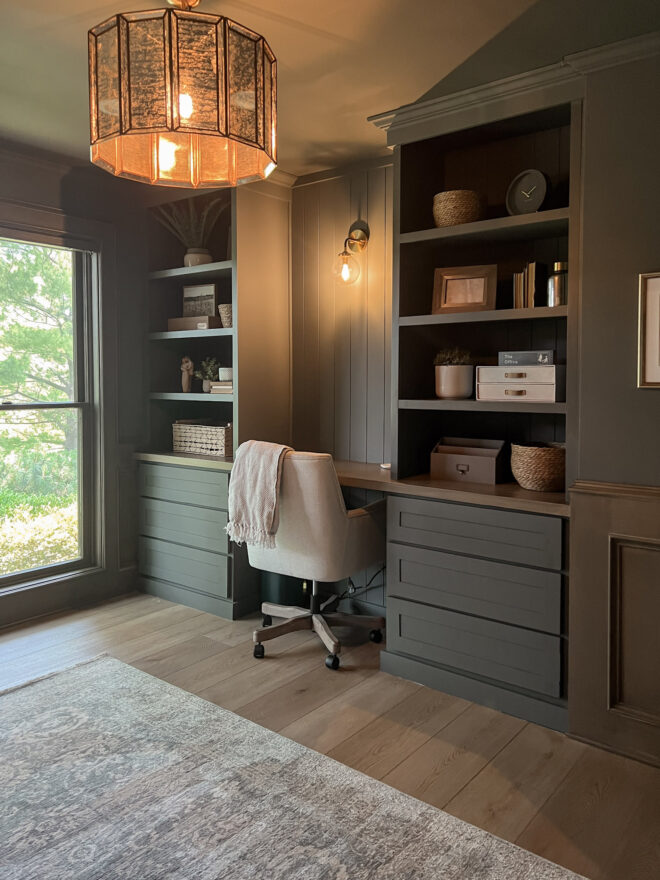


This is my first time building drawer boxes, and they weren’t easy but I’m happy to say I did it!! I’m working on a full office remodel and the largest part of the project is a full wall of custom built-in cabinets with a desk! Drawer boxes can be tough because it requires the cabinet box to be perfectly square and level as well as the drawer boxes so that when you add the drawer slides they don’t get stuck. I had a hell of a time getting them installed and had to make some adjustments. But once you do them, you learn so much so next time I know I’ll do so much better. Practice makes progress!
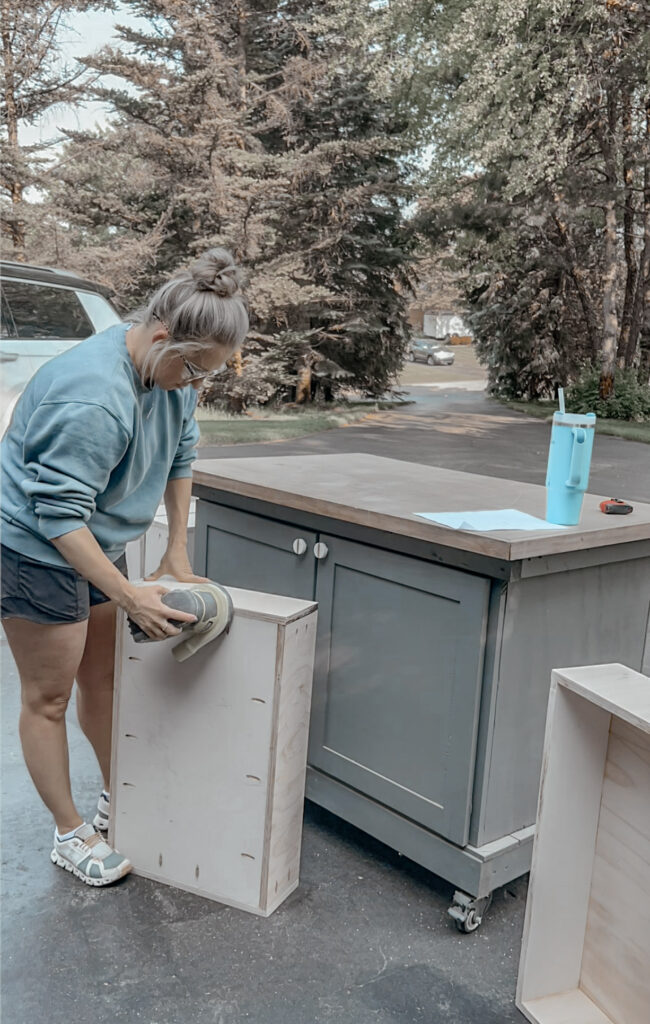
I am building six total boxes for this project, so I started by measuring the dimensions of each drawer. Because I hand built the cabinet, it isn’t perfect, so each drawer is just slightly different dimensions. Once I have all my dimensions I input them into the plywood optimizer to see how many pieces of plywood I need to purchase for this part of the project


I recently got this circular saw rip cut guide, and it is a MUST for cutting plywood. I can’t believe I worked for so long without it! I marked all my cuts on the plywood first based on the layout from the optimizer and then started cutting down to size!


As I cut the pieces to size I stacked them together in separate piles so when I went to assemble I knew which pieces went together. The end result was 6 piles with 5 boards each!
I can’t believe I’m building my first ever drawer boxes! I am using wood glue and pocket holes to assemble, but the whole time I was terrified the measurements weren’t going to be right and the drawers would be the wrong size. After assembling, I use these to check and make sure the drawer is square. I wanted to make sure the drawer looked as clean as possible so I put the pocket holes on the bottom piece and the front and back boards. The front will be covered with a drawer face and the bottom won’t ever be seen. This way when you open the drawer you see clean smooth sides!
Pro Tip: Assemble the edges first and then attach the bottom for the easiest way to keep the drawer square.


I’ll go ahead and give you the secret: you need to build your drawer boxes 1/4″ smaller than your openings to allow room for slides (check the slide requirements, it may be different depending on what you purchase) and wiggle room. When I measured for my drawers I accounted for the width of the drawer slides but I didn’t give any extra room and when I tested my drawers for assembly they were all too tight/large for the opening in some spots because the cabinet box wasn’t perfectly square. Drawer slides require almost perfection for measurements so make sure you go slow and focus during building. I was able to make small tweaks to them and get it to work but I should have made them all slightly smaller from the beginning.


Before installing the drawer slides you want to sand down all the drawer boxes perfectly smooth. I then used this Kreg jig to start installing the slides. It seems simple in theory but it was WORK. Everything has to be exactly perfect for the drawer to shut correctly. I kept trying and I finally got one drawer to work perfectly so I took used that one as a model and finished the rest. I ended up using quite a few shims to get the soft close working perfectly. I would loosely install the drawer slide, insert the shims, test the drawer, and when it closed perfectly I cut the shim and tightened the screws to hold everything in place.

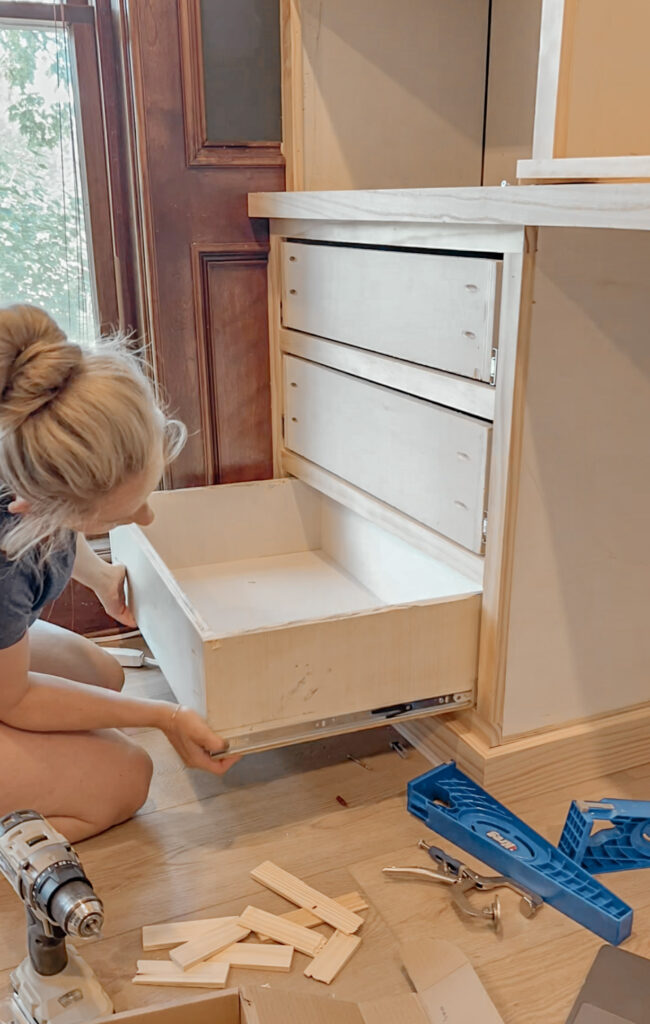
Looking back on the project, it would have been smart to build and install just one drawer and get it perfect, then do the rest, but luckily for you I am able to share my mistakes for you to learn from!
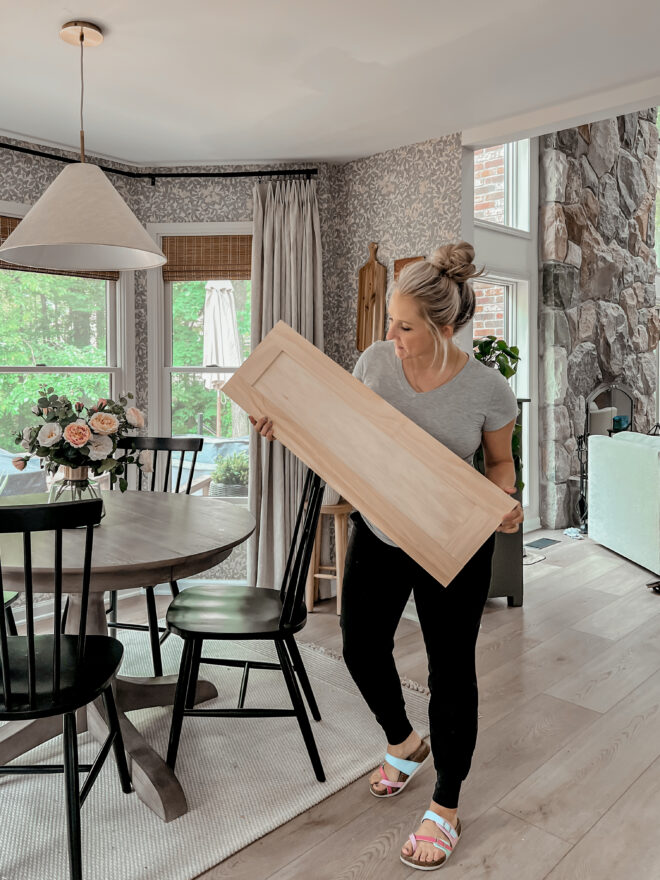
I decided on shaker style drawer faces and I have a full tutorial here for you! The finished drawers were perfect and it feels so good to have learned a new skill!